


Wintry Floral Centerpiece DIY
 I blogged about our Thanksgiving table last week, and today I’m sharing more details about the table, and a simple DIY for recreating this centerpiece. My mom and I wanted to create an extra special table for our family dinner, so we planned out the details together. For Thanksgiving, we gathered at my sister’s home in New Jersey, since she’s moving this month and it was the last time for us all to be together in their home (they are buying a home up the street, but we wanted to celebrate one last time in their gorgeous rental)!
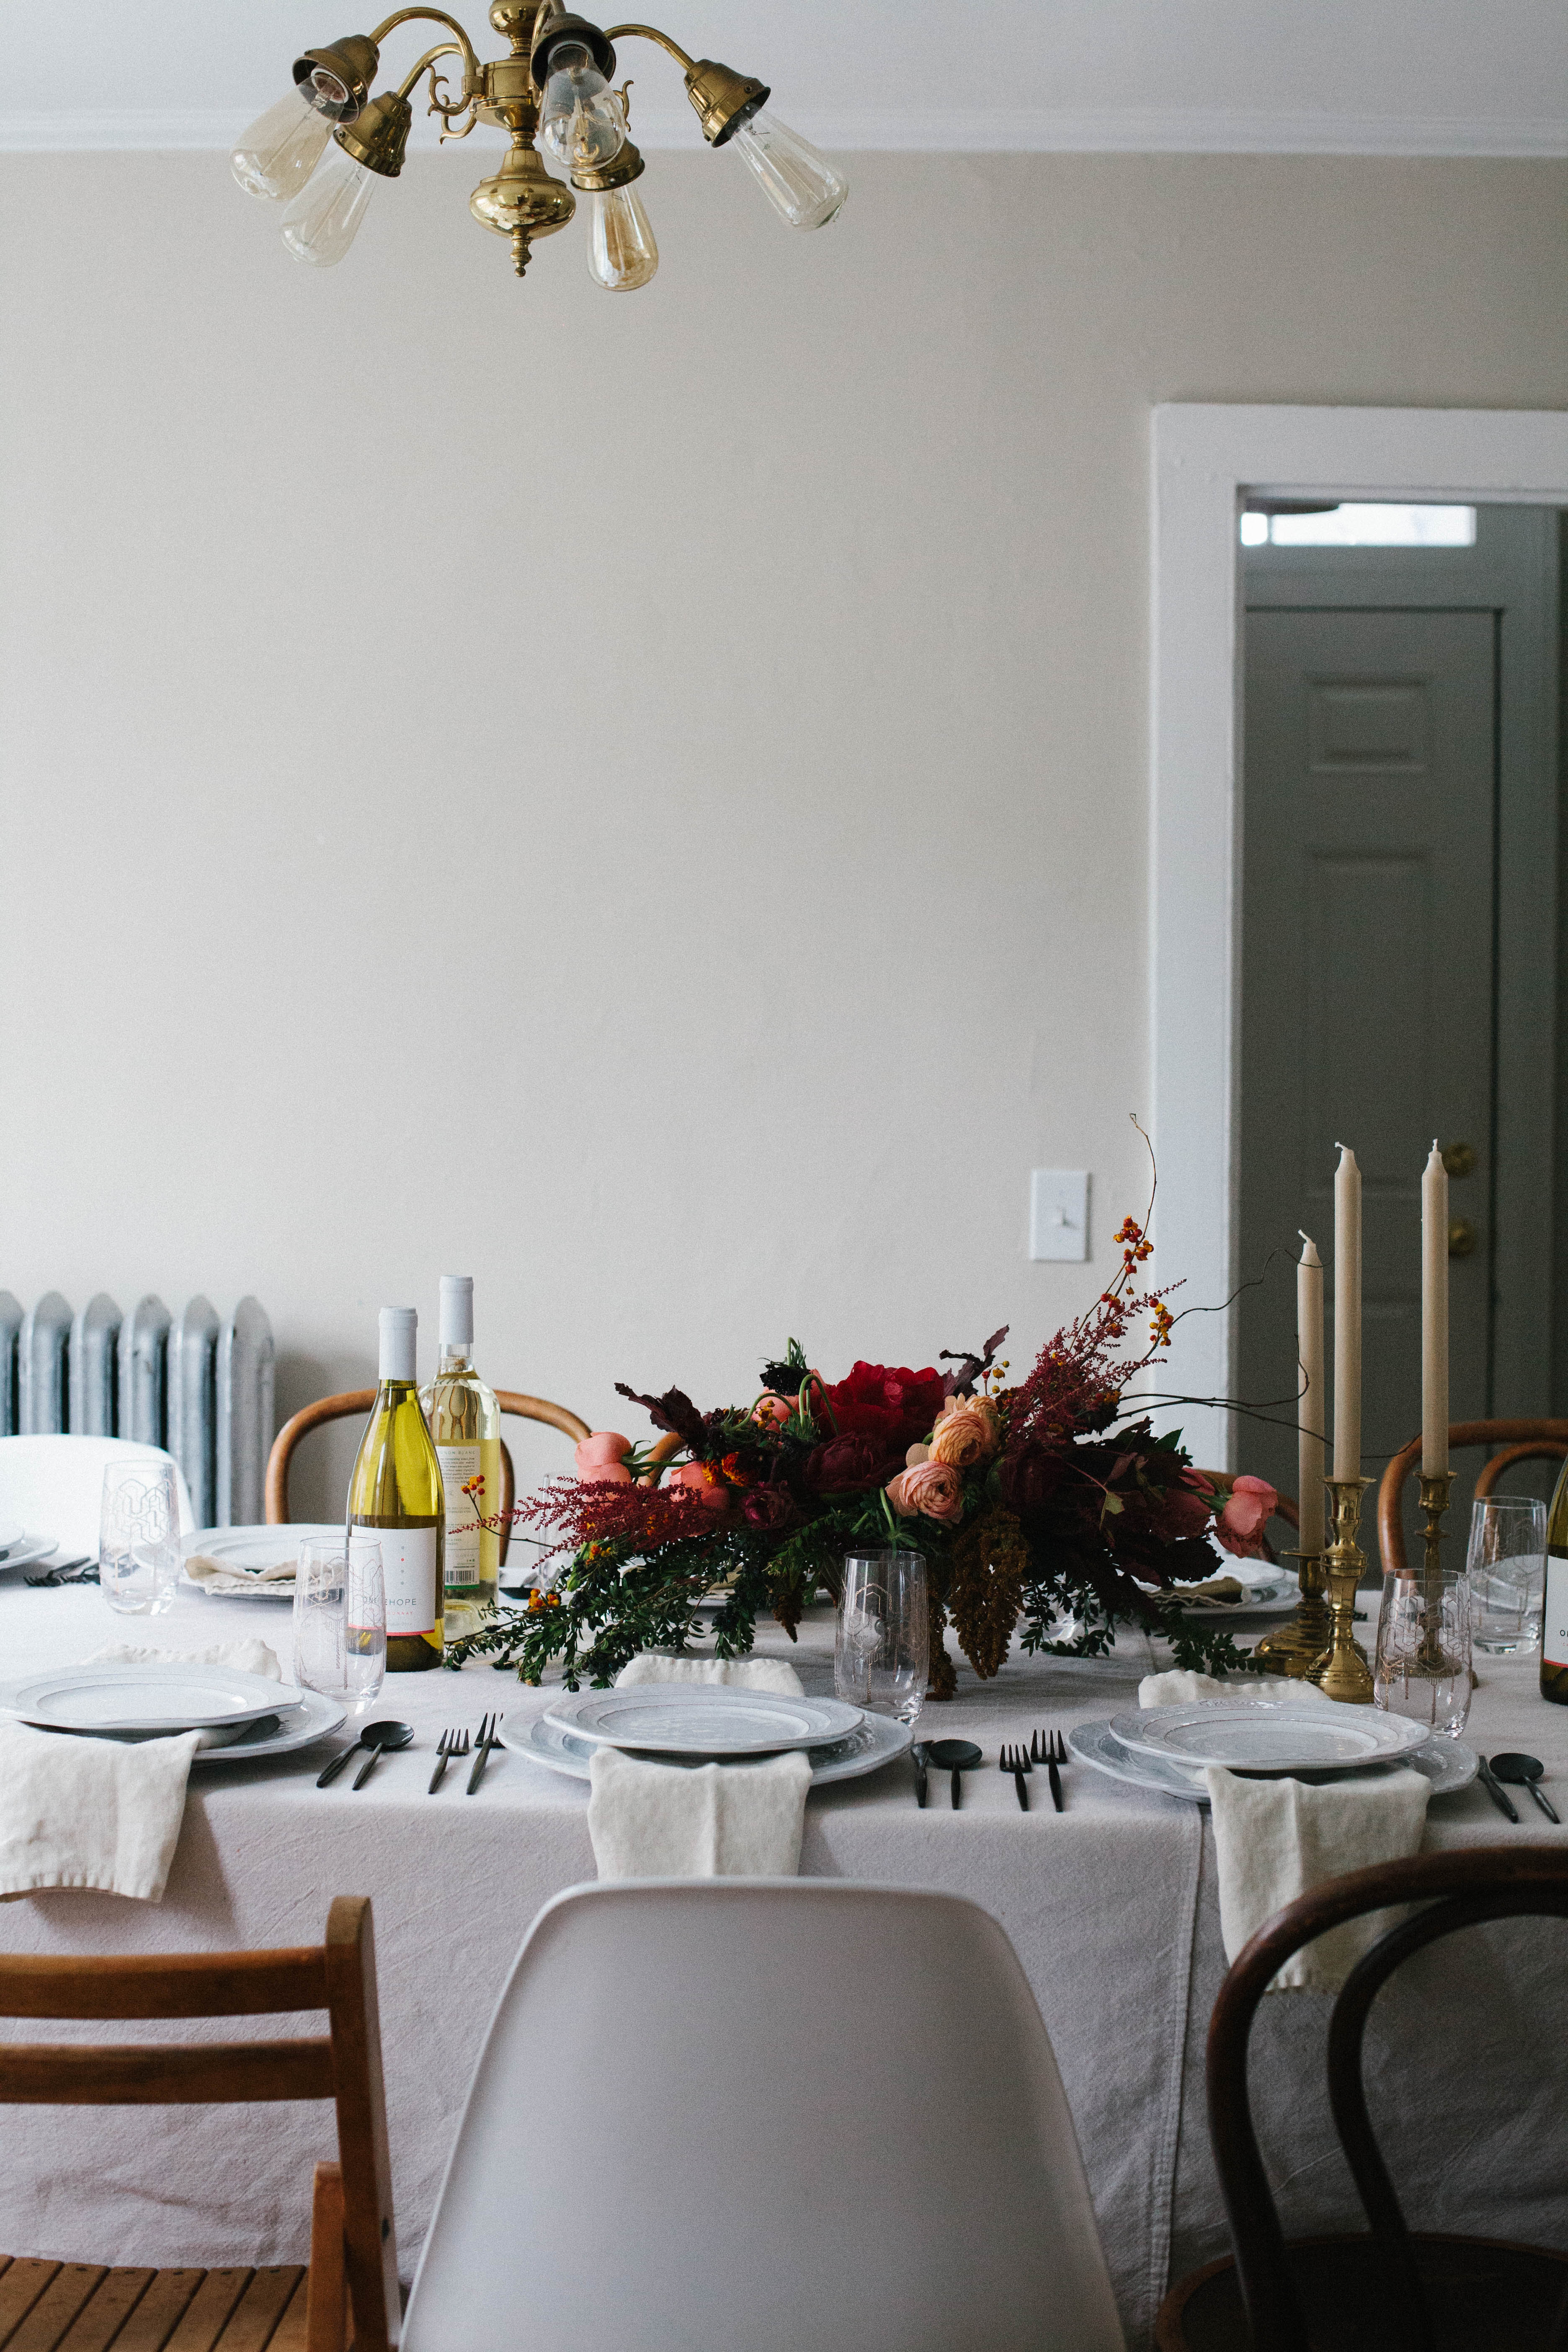
We brought (from Virginia) our new Anthropologie Glenna dishes, Enchante glassware, and Neona flatware, along with my favorite linen napkins from Olmay Home. We used two canvas dropcloths for the table linens. I would have preferred to keep my sister’s table exposed, but since we had to use a card table at one end to fit all 17 of us, we had to cover the tables! An assortment of modern molded white chairs, wooden folding chairs, and bentwood chairs provided a perfectly eclectic look.
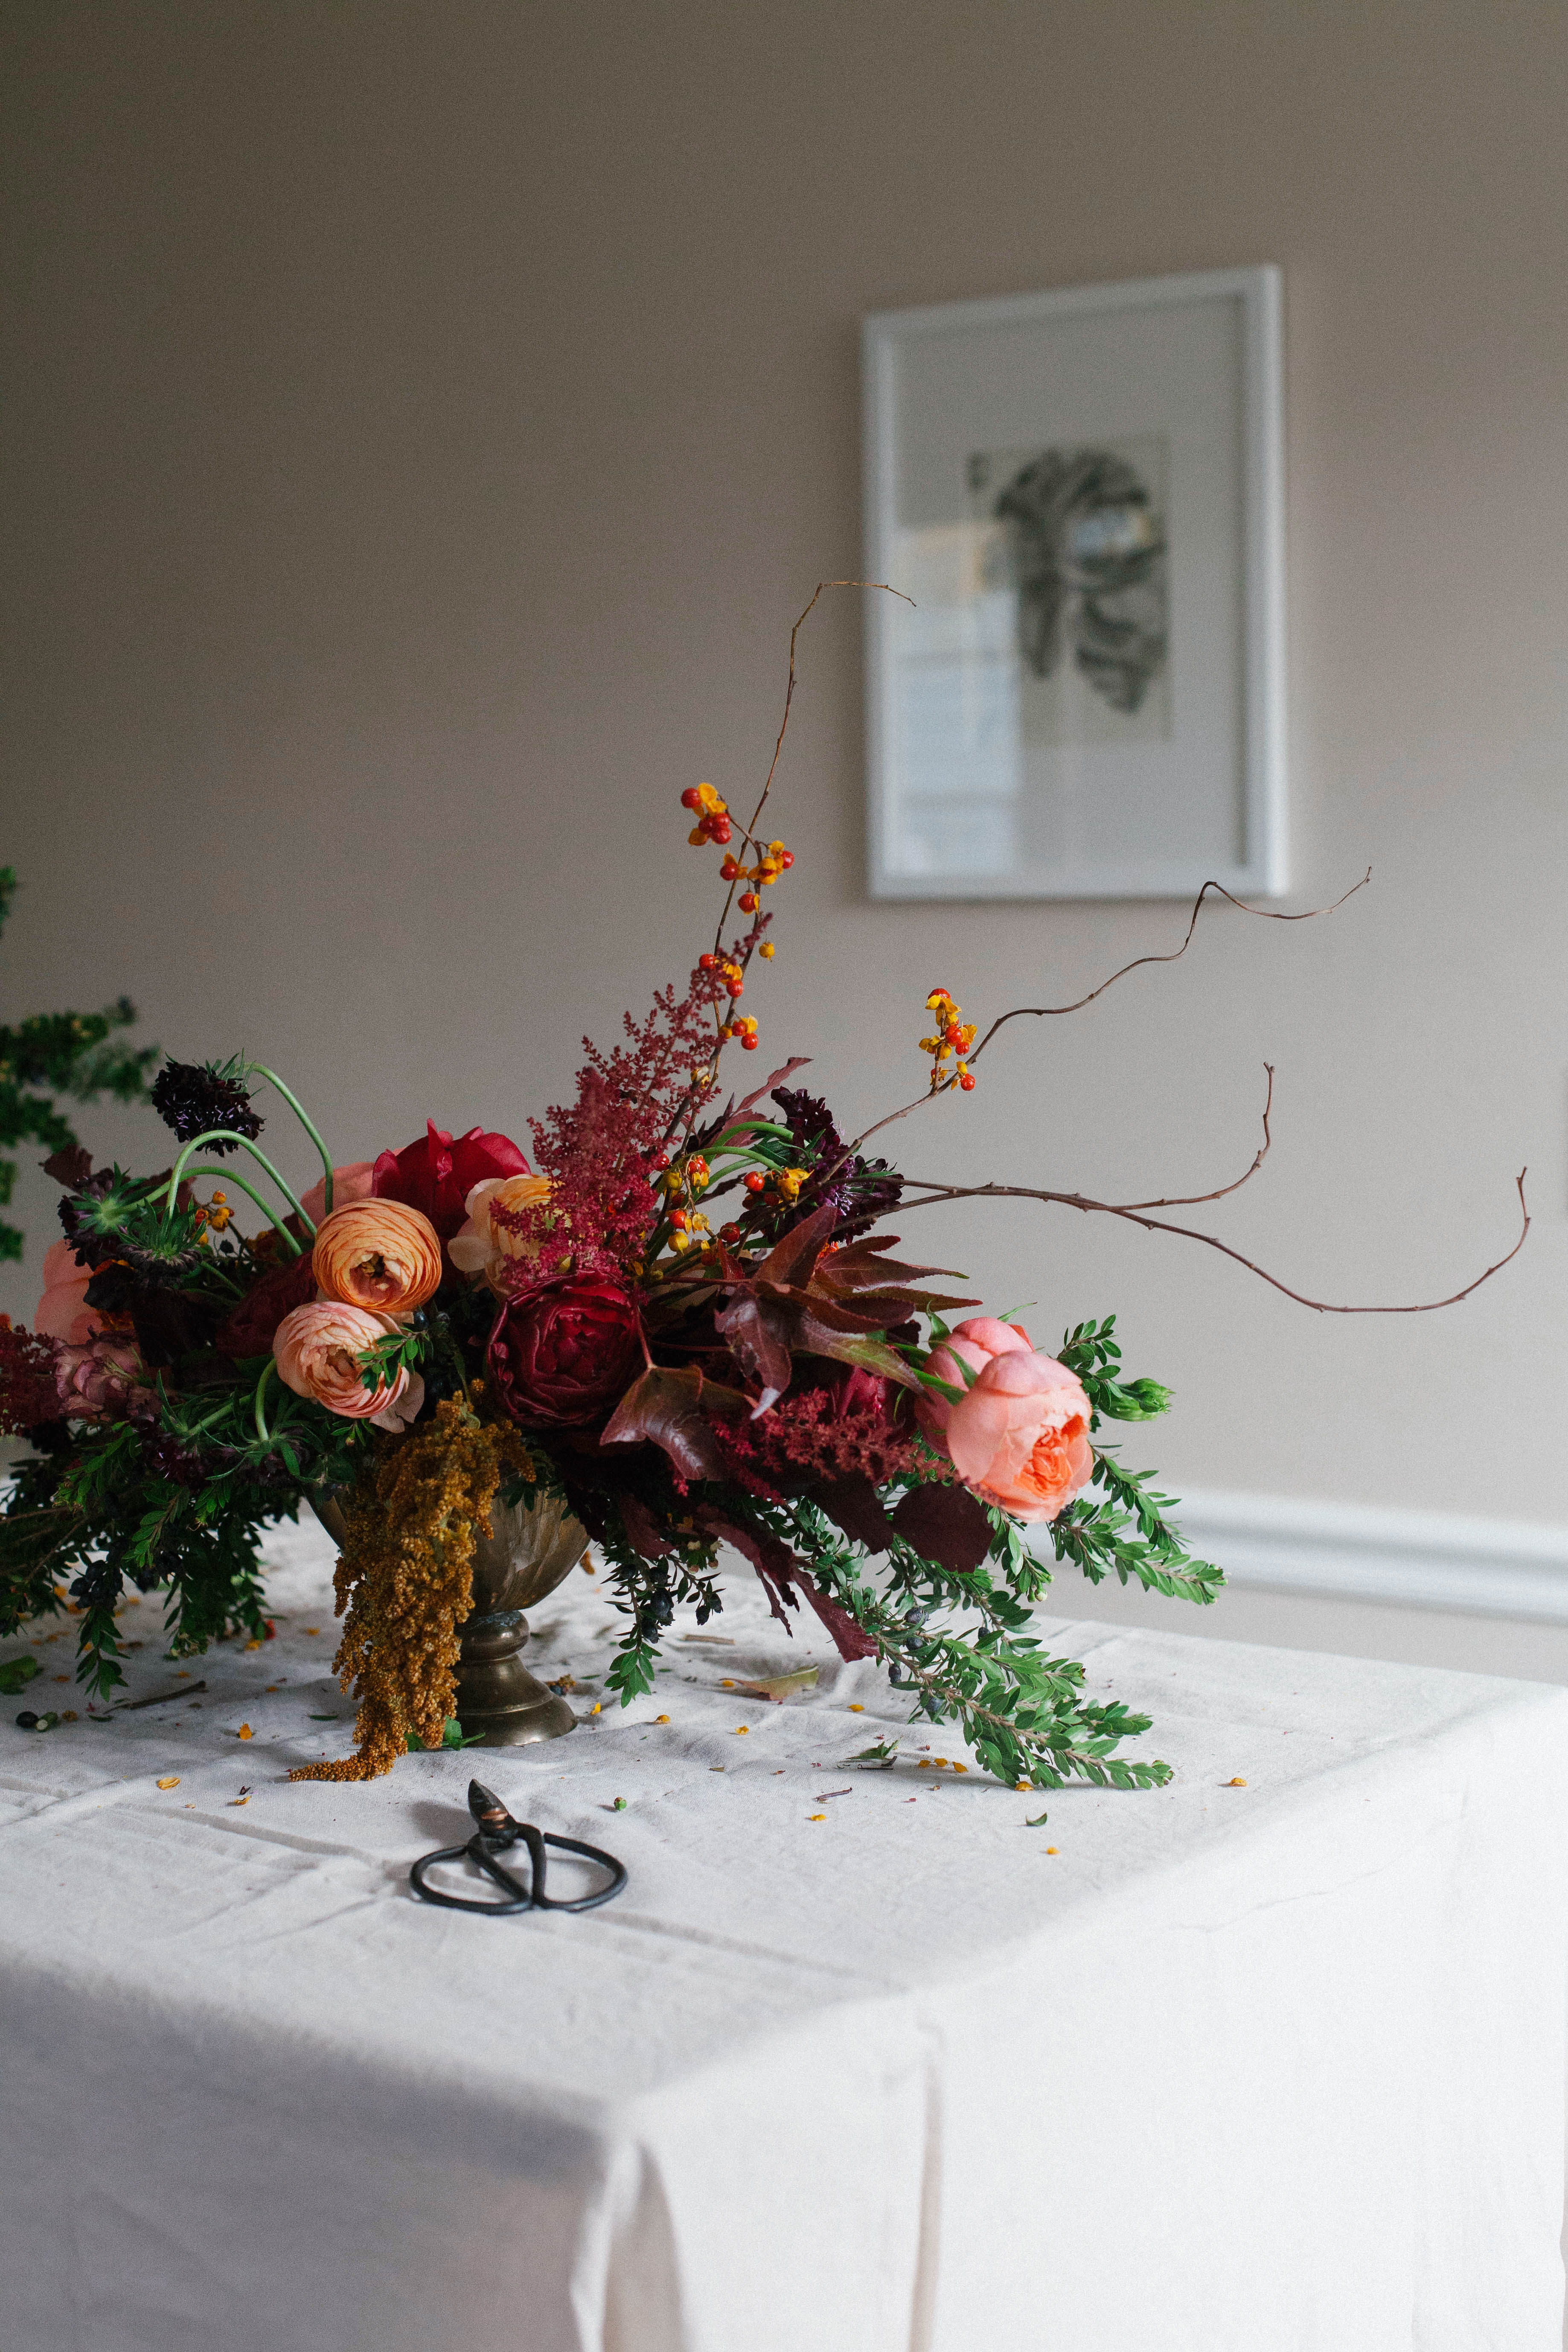
We kept the table completely neutral; we wanted the floral centerpiece and the food itself to take centerstage. For this centerpiece, I ordered all the foliage and blooms from Florabundance. I adore working with Debbie, and highly recommend ordering with her if you’re in the market! 🙂 She sent the best selection of goodies for us to play with in our arrangement. We wanted to keep colors rich and wintry, and use a variety of flowers and textures. We certainly aren’t flower experts, but have outlined a few steps below to help you recreate your own wintry centerpiece.
Supplies
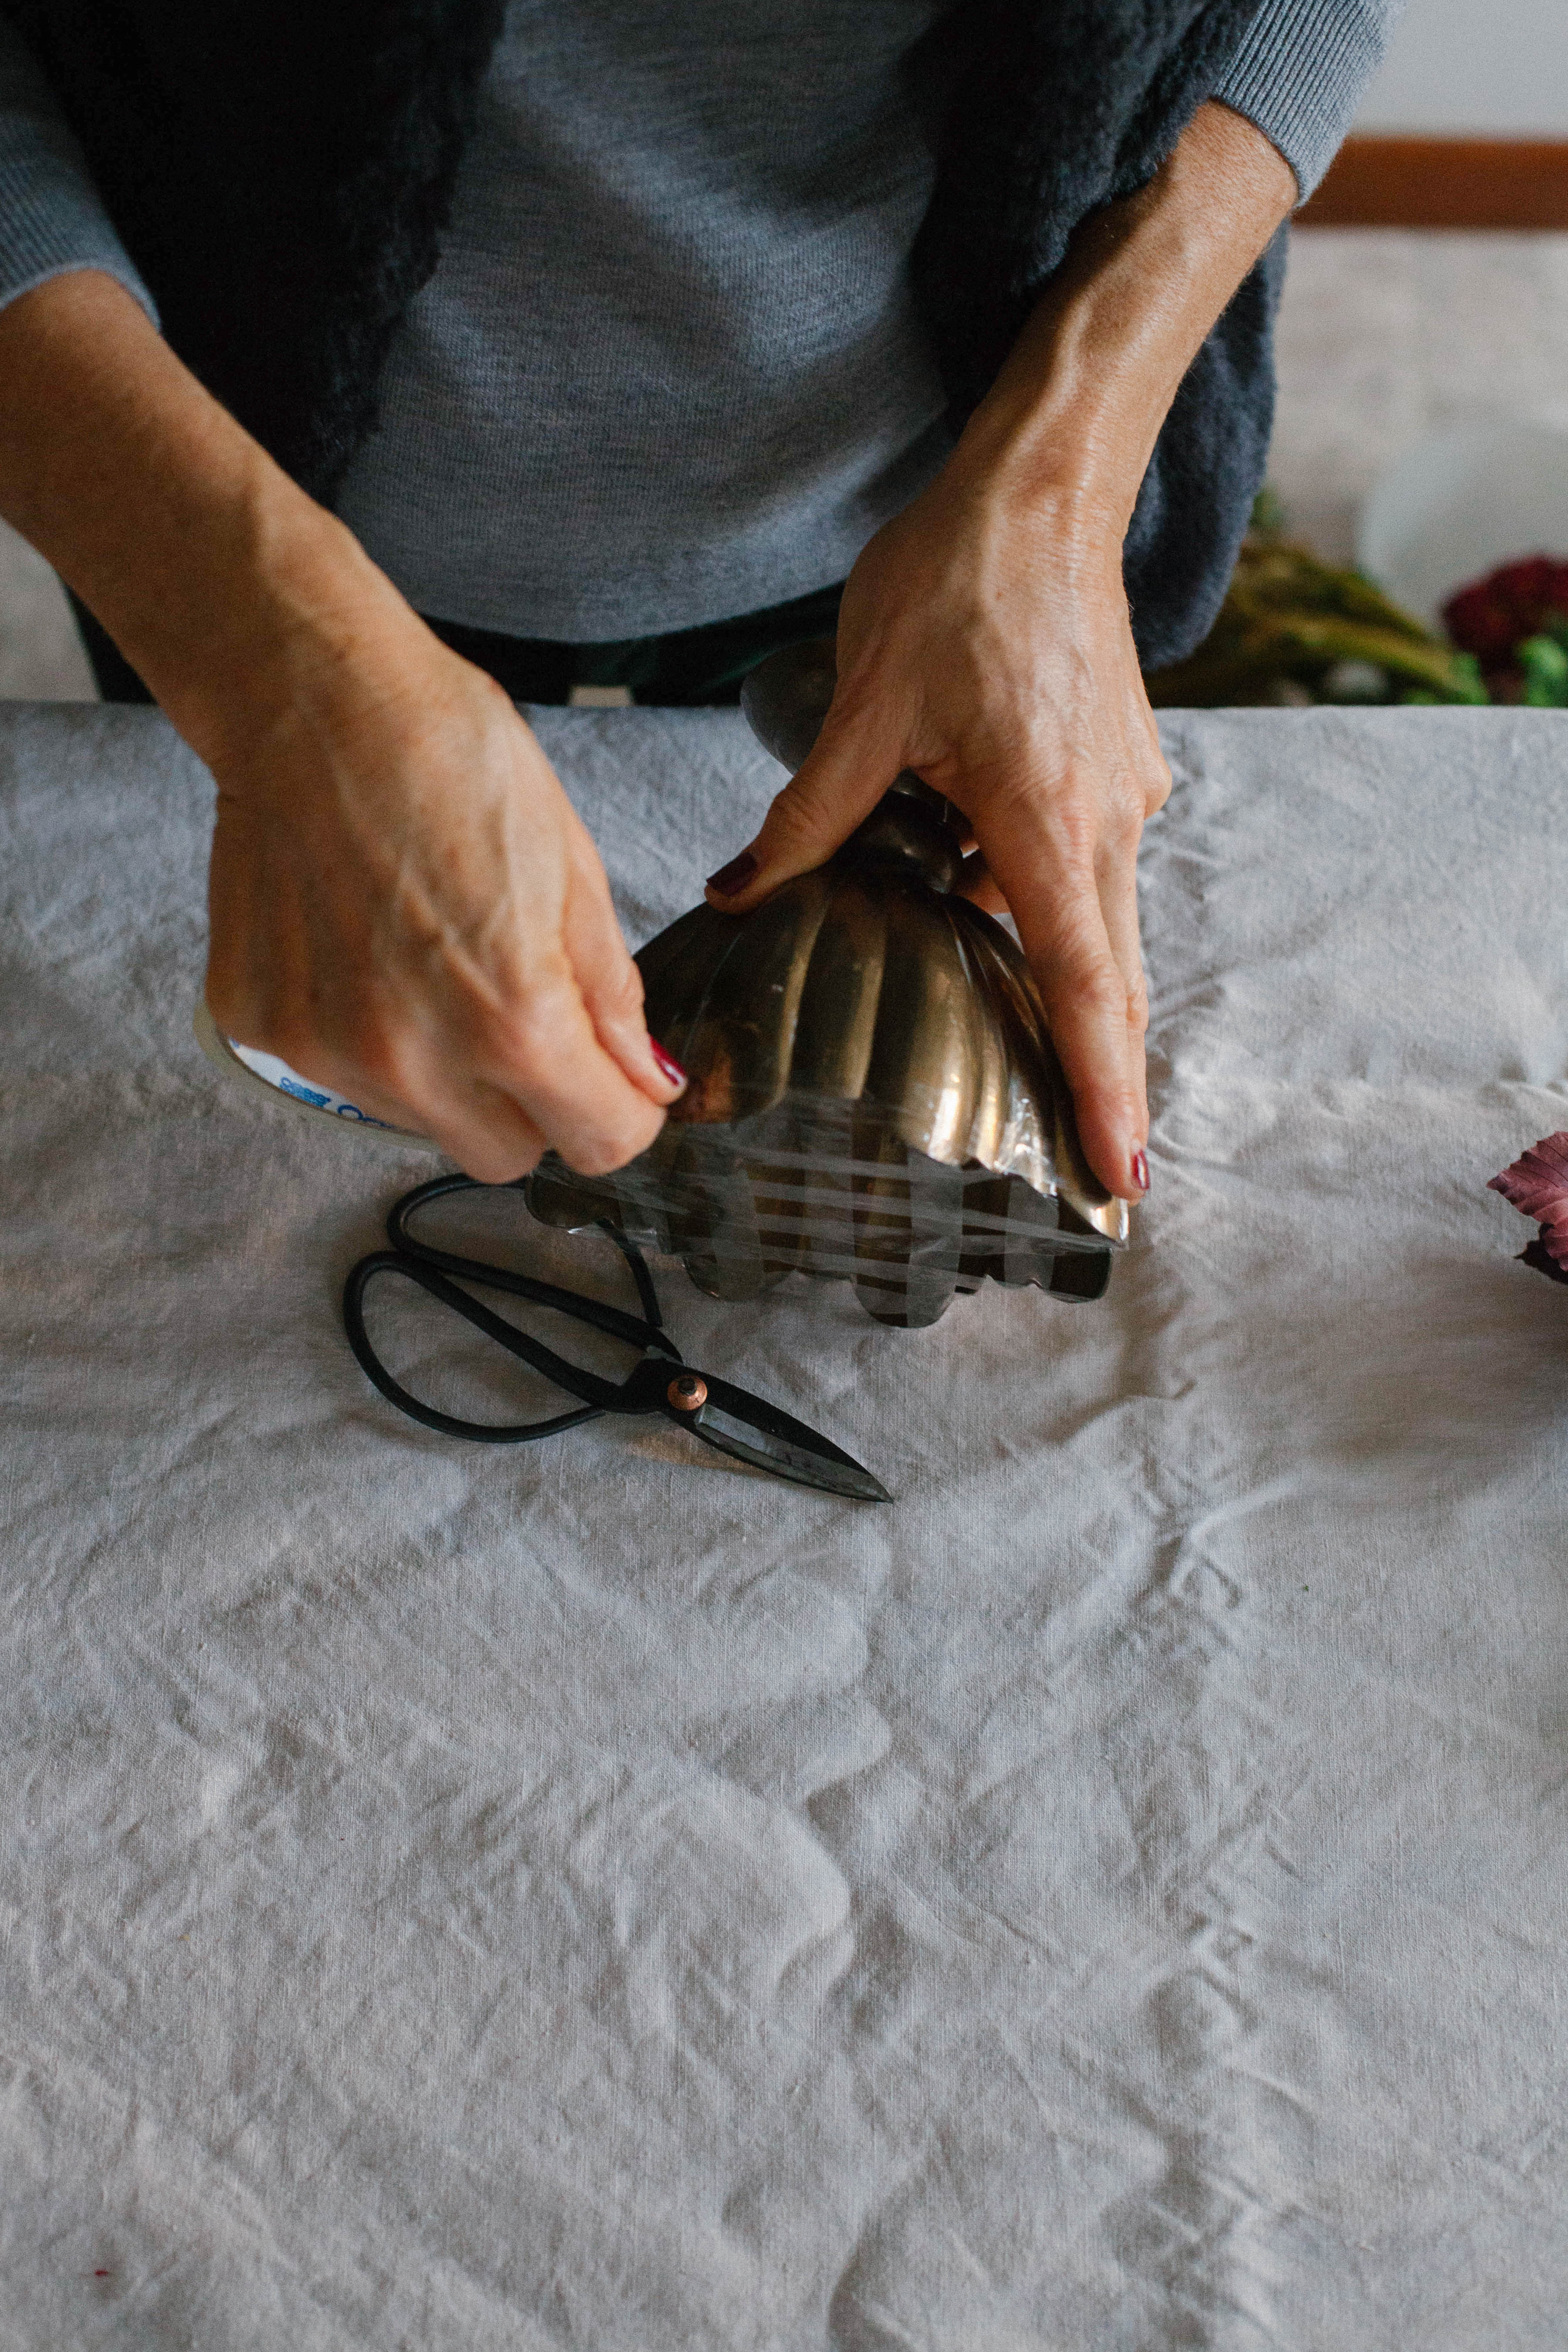
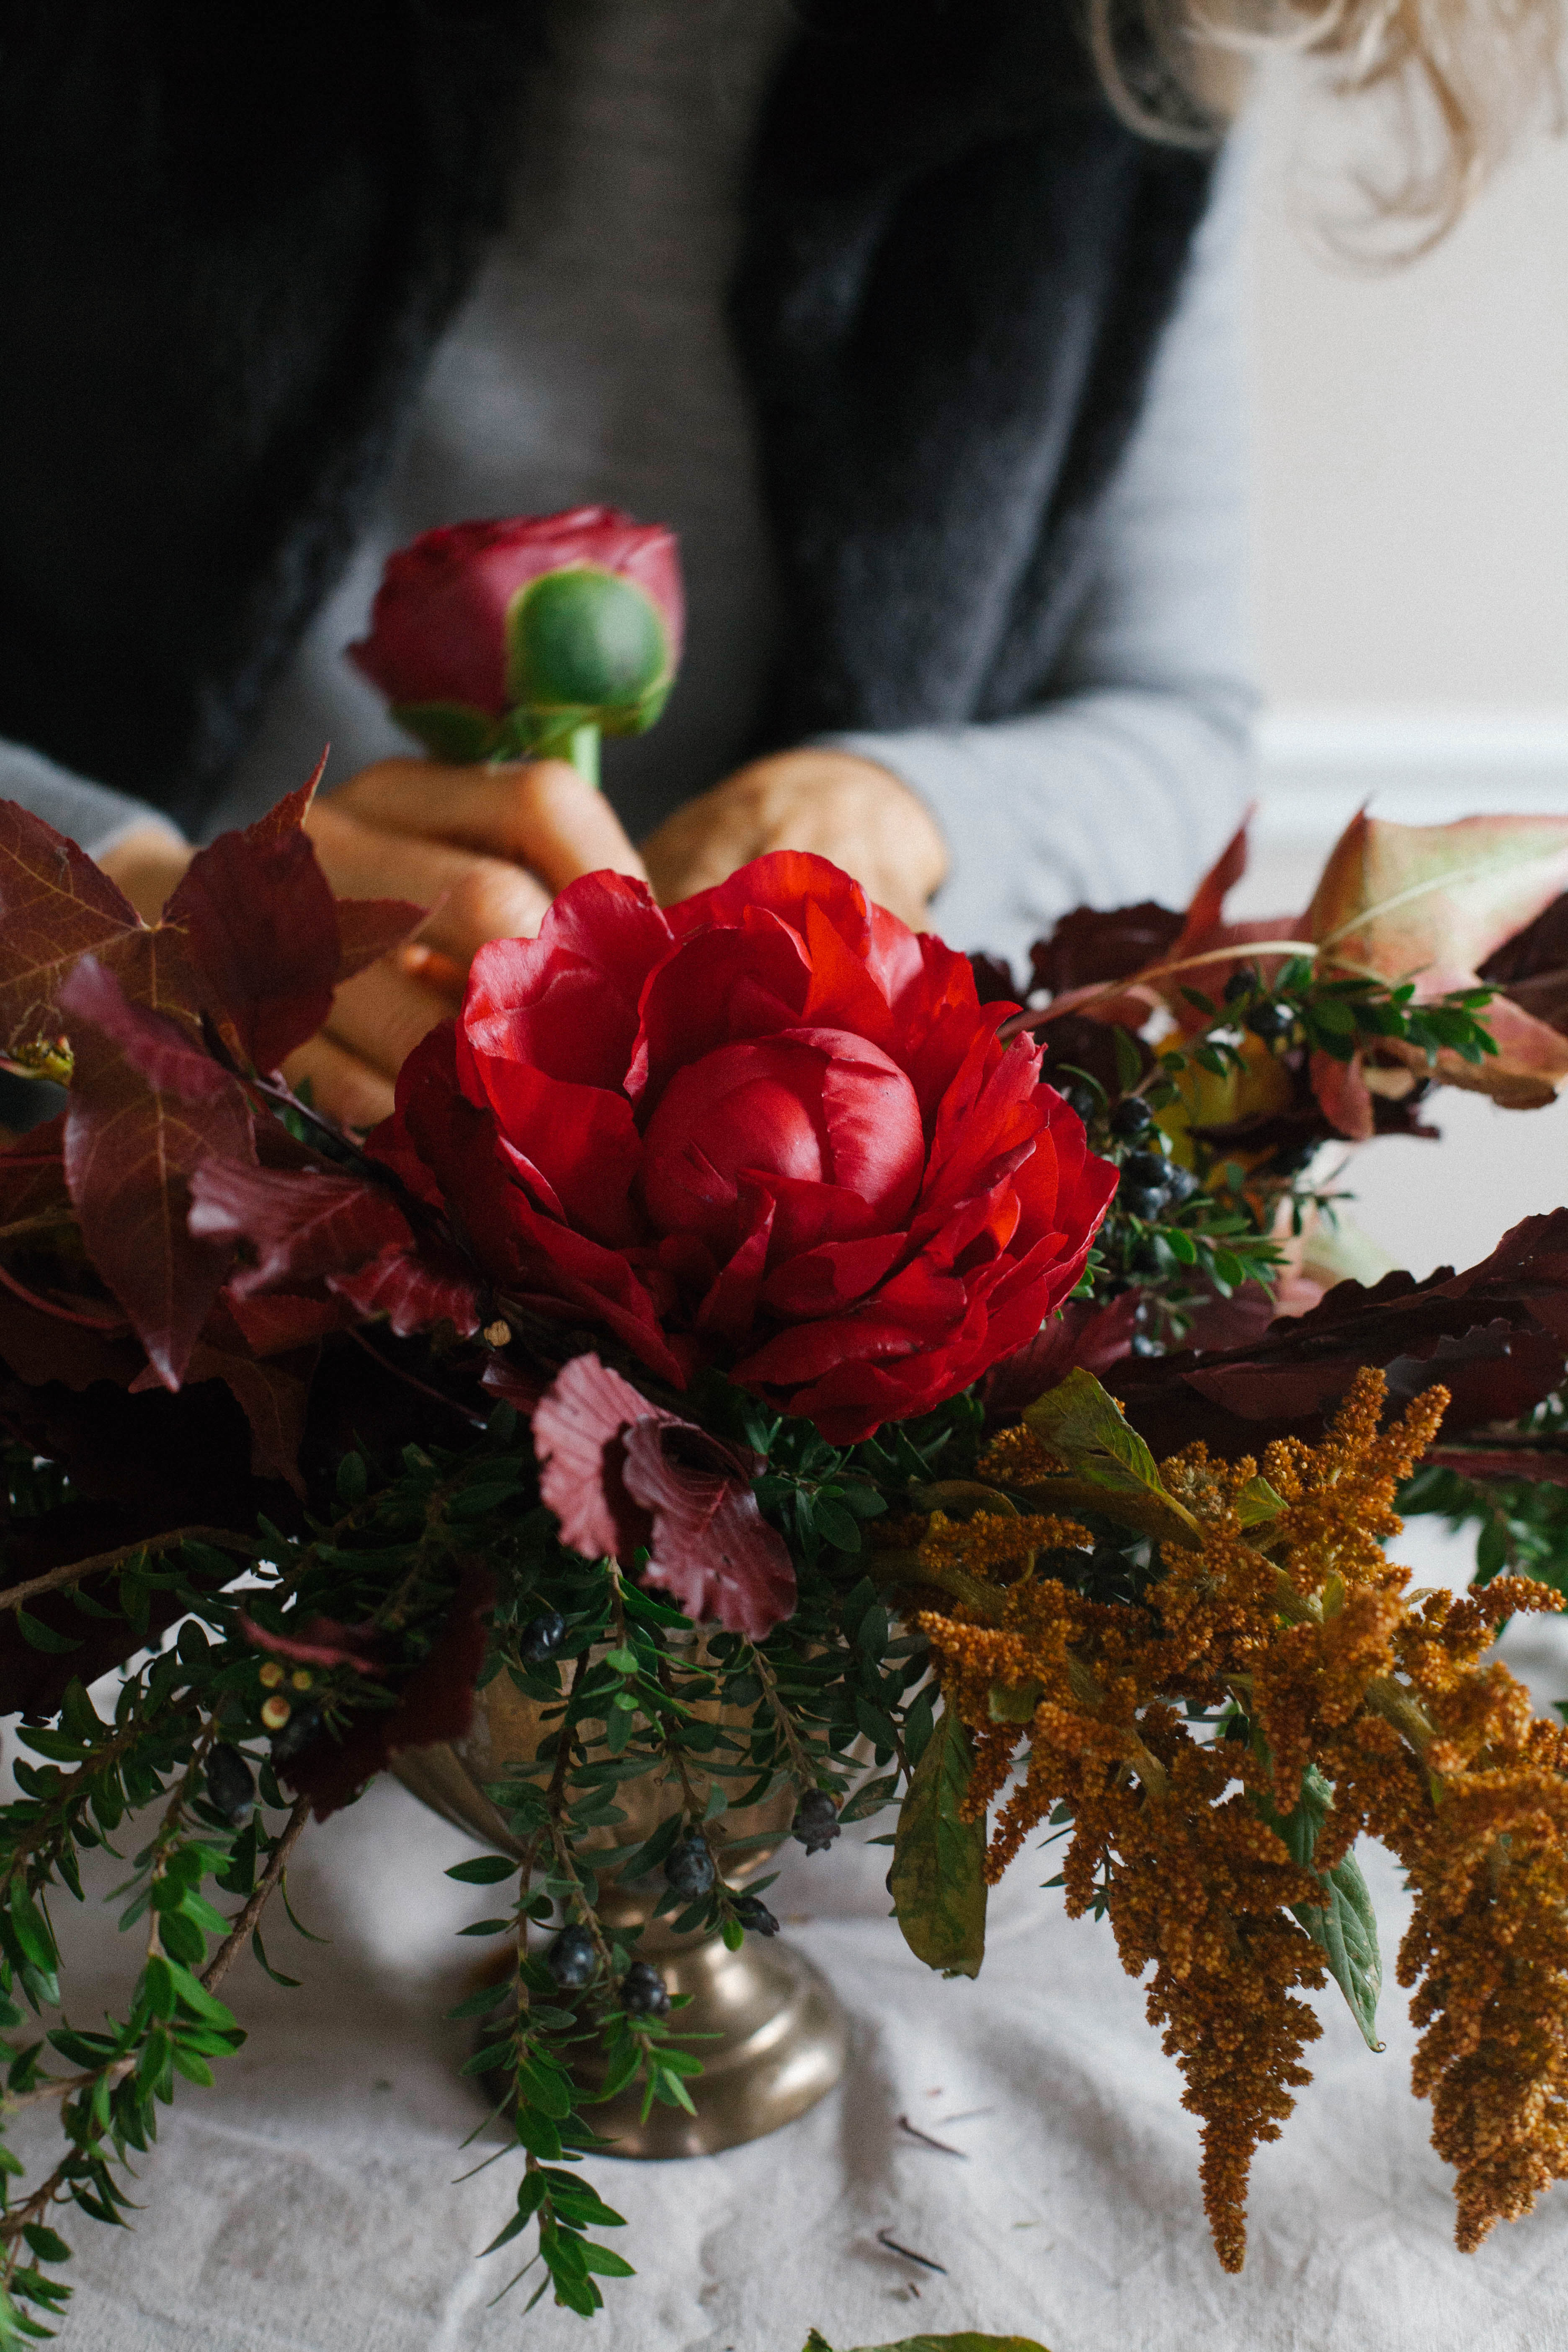
– vessel (we used a vintage brass compote, with a fairly deep bowl…approximately 4″ high and 3″ wide)
– shears
– clear water proof floral tape
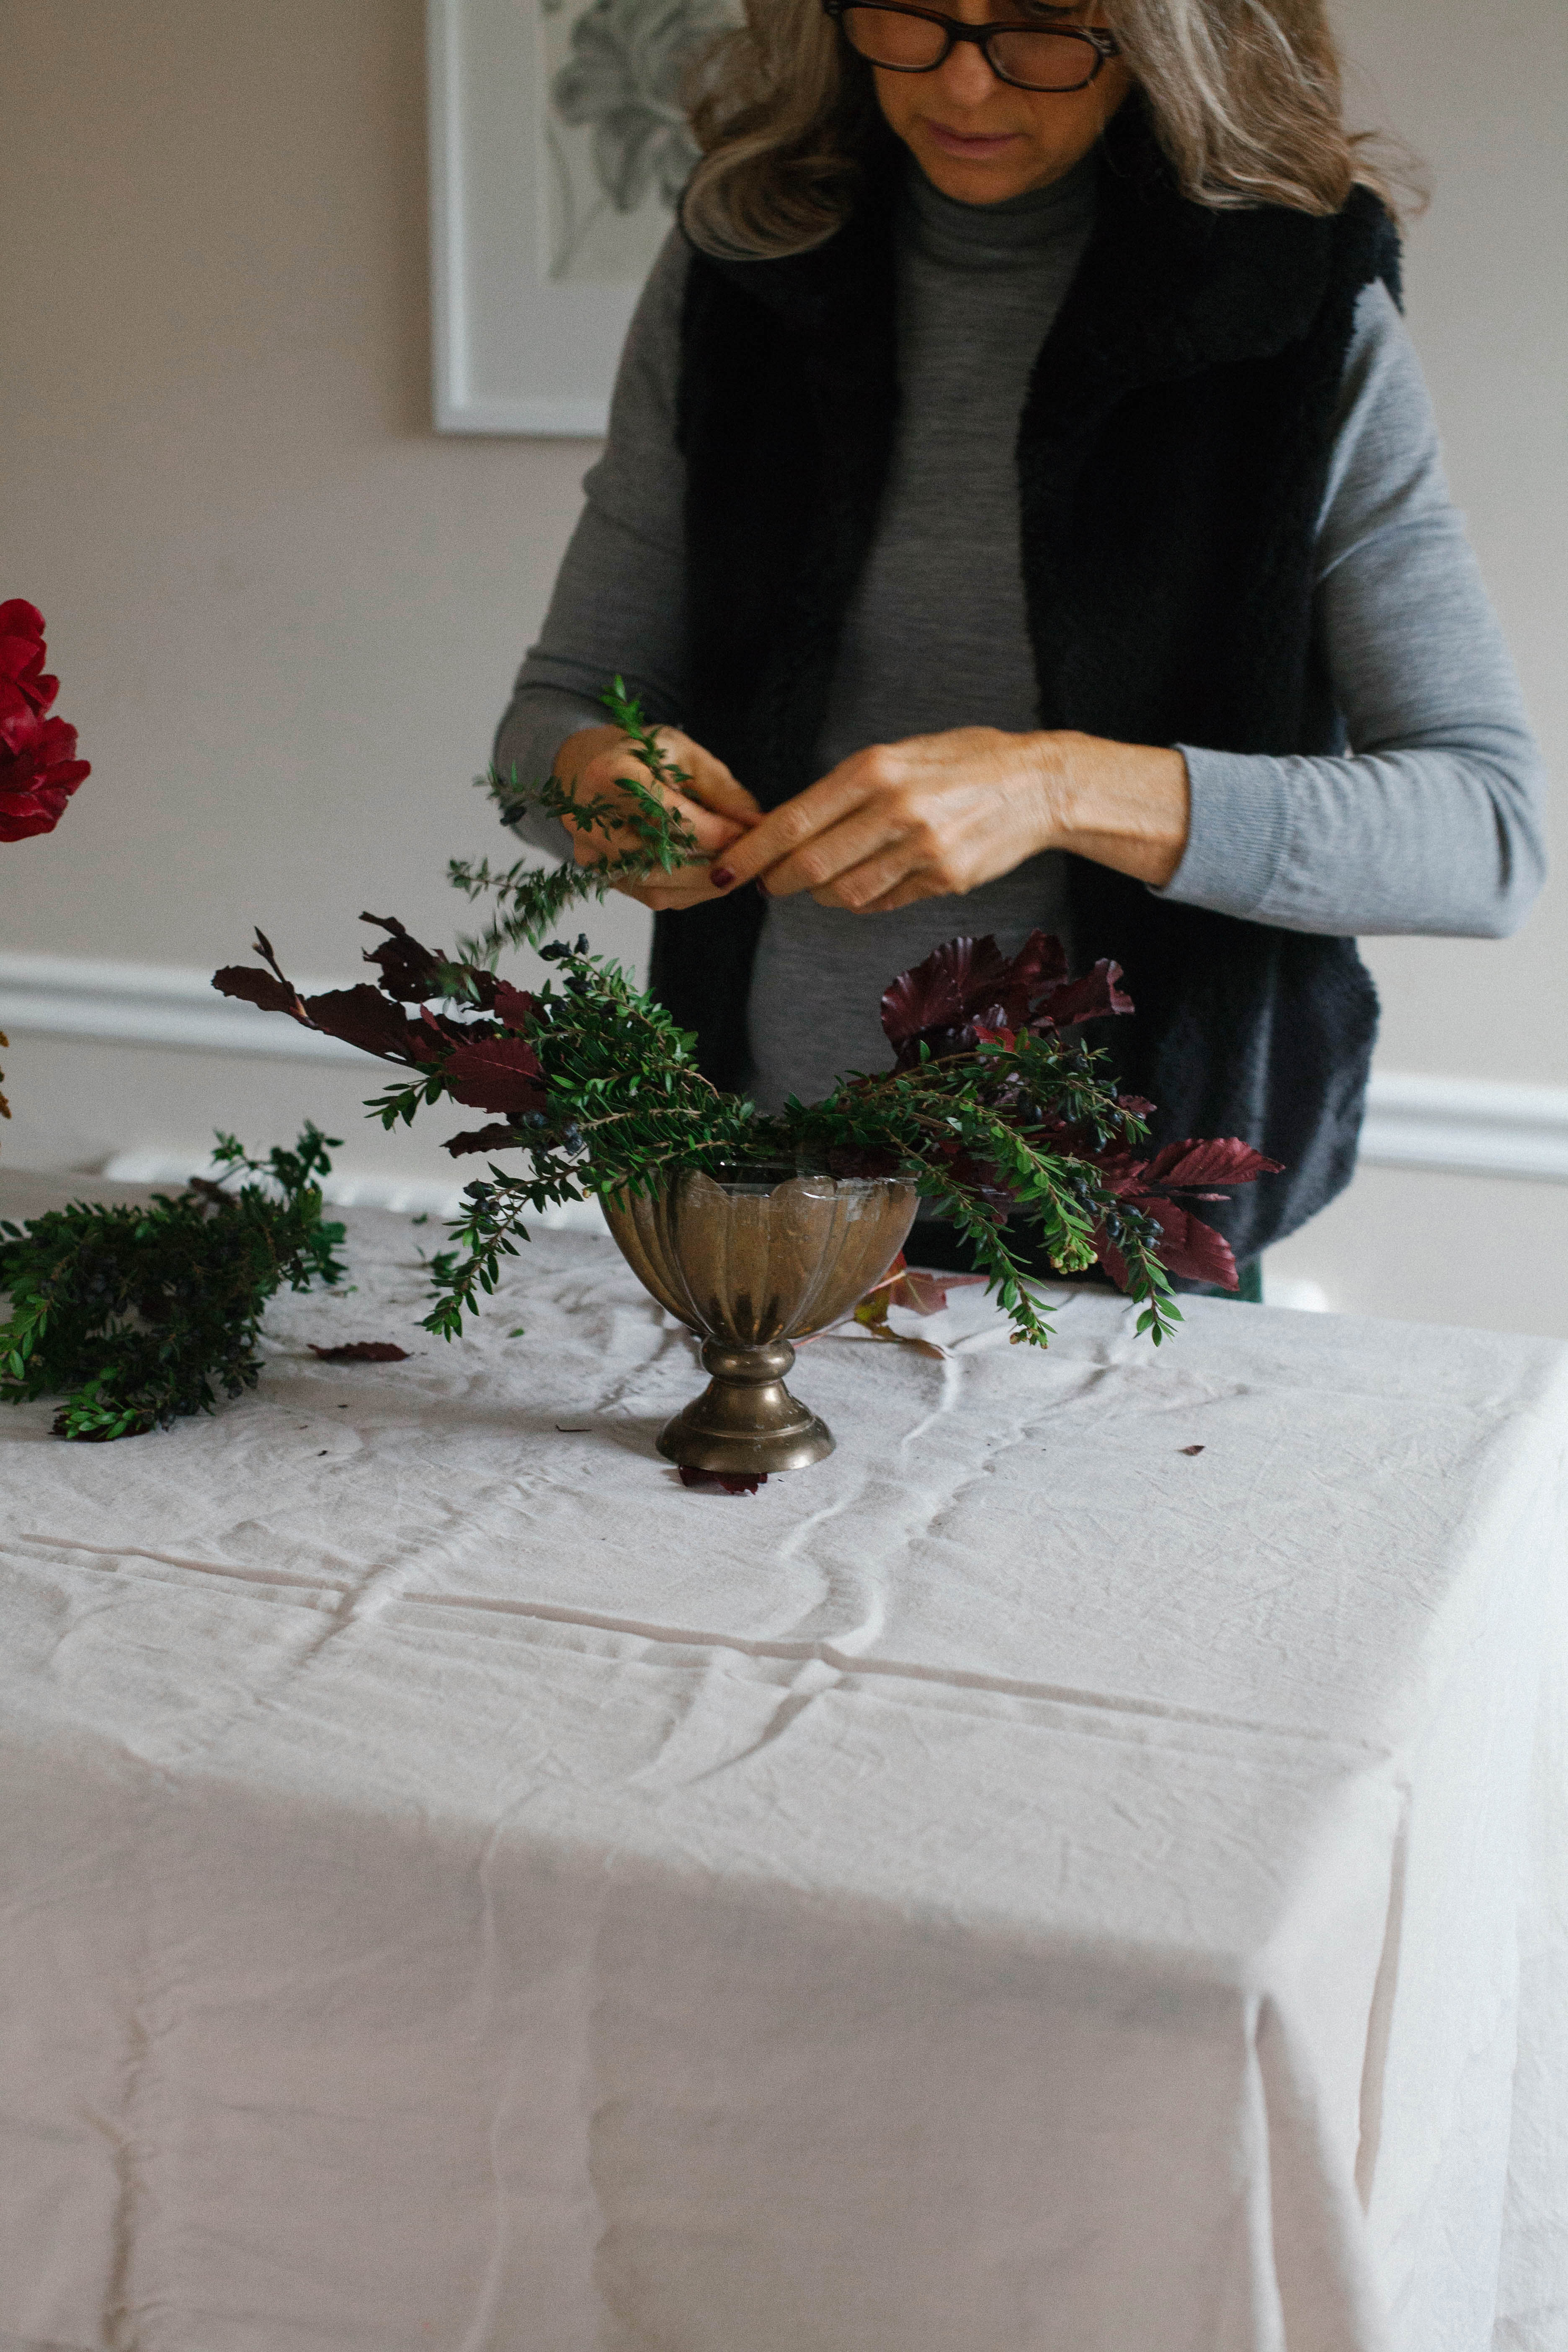
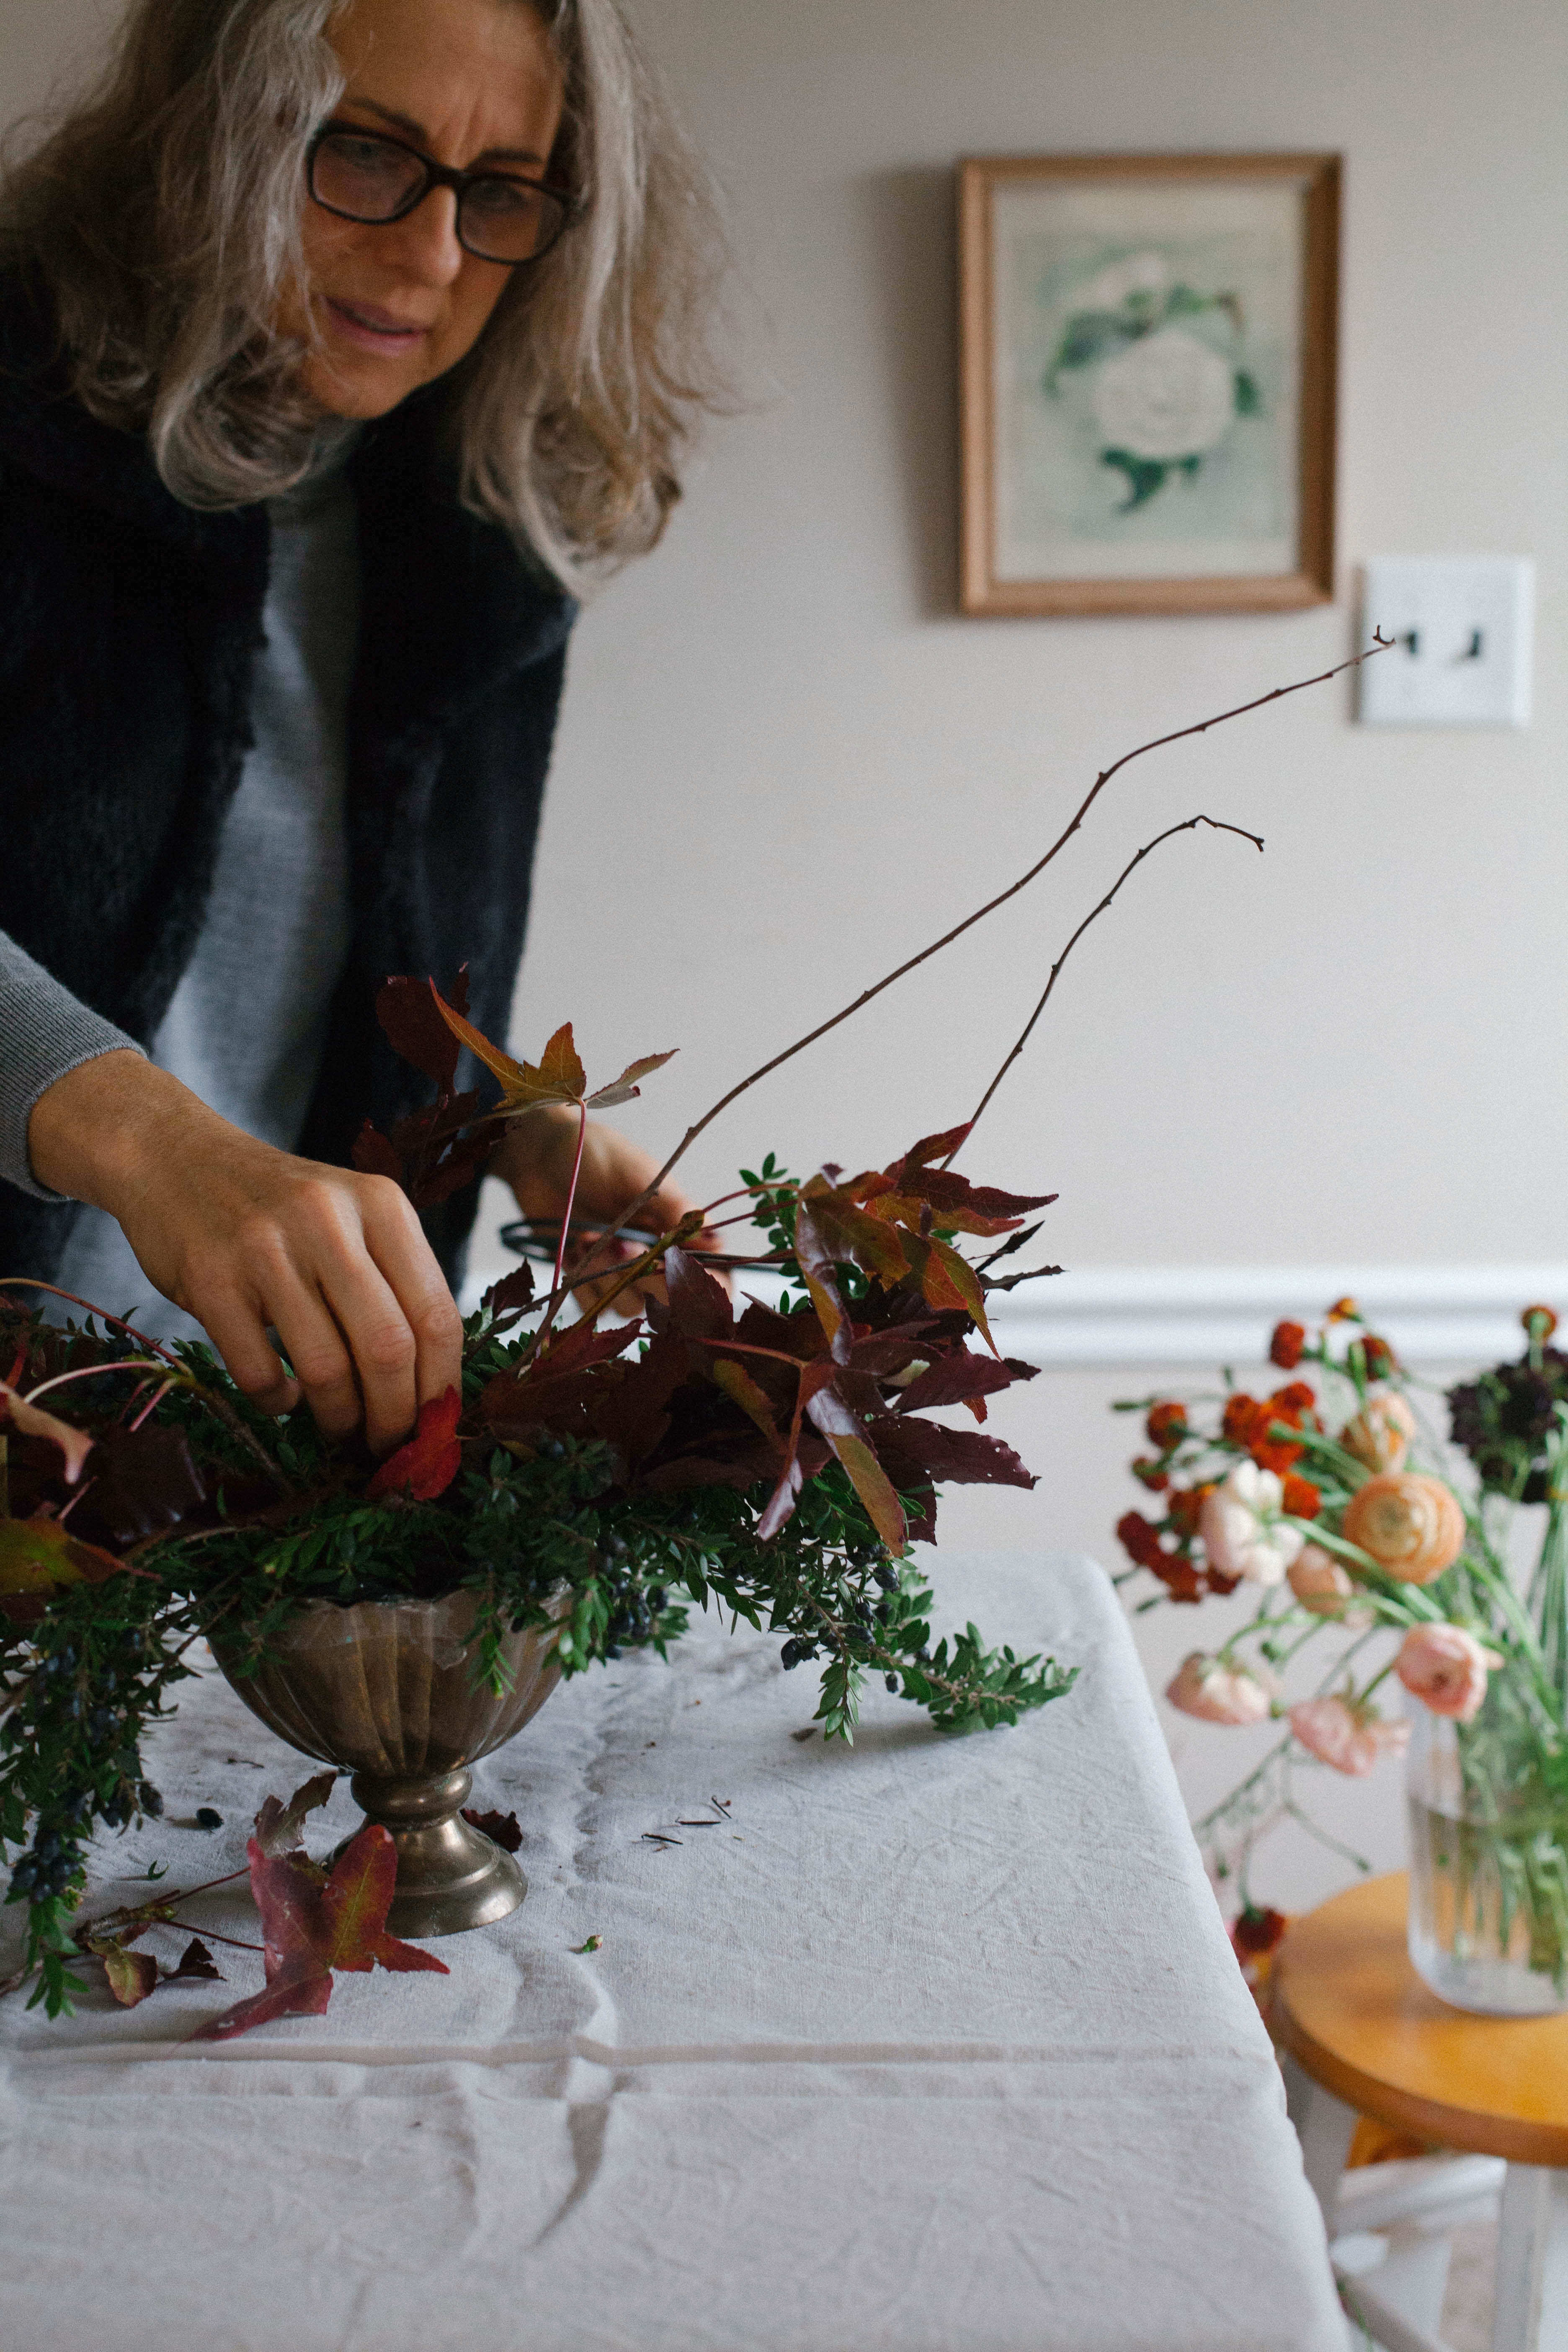
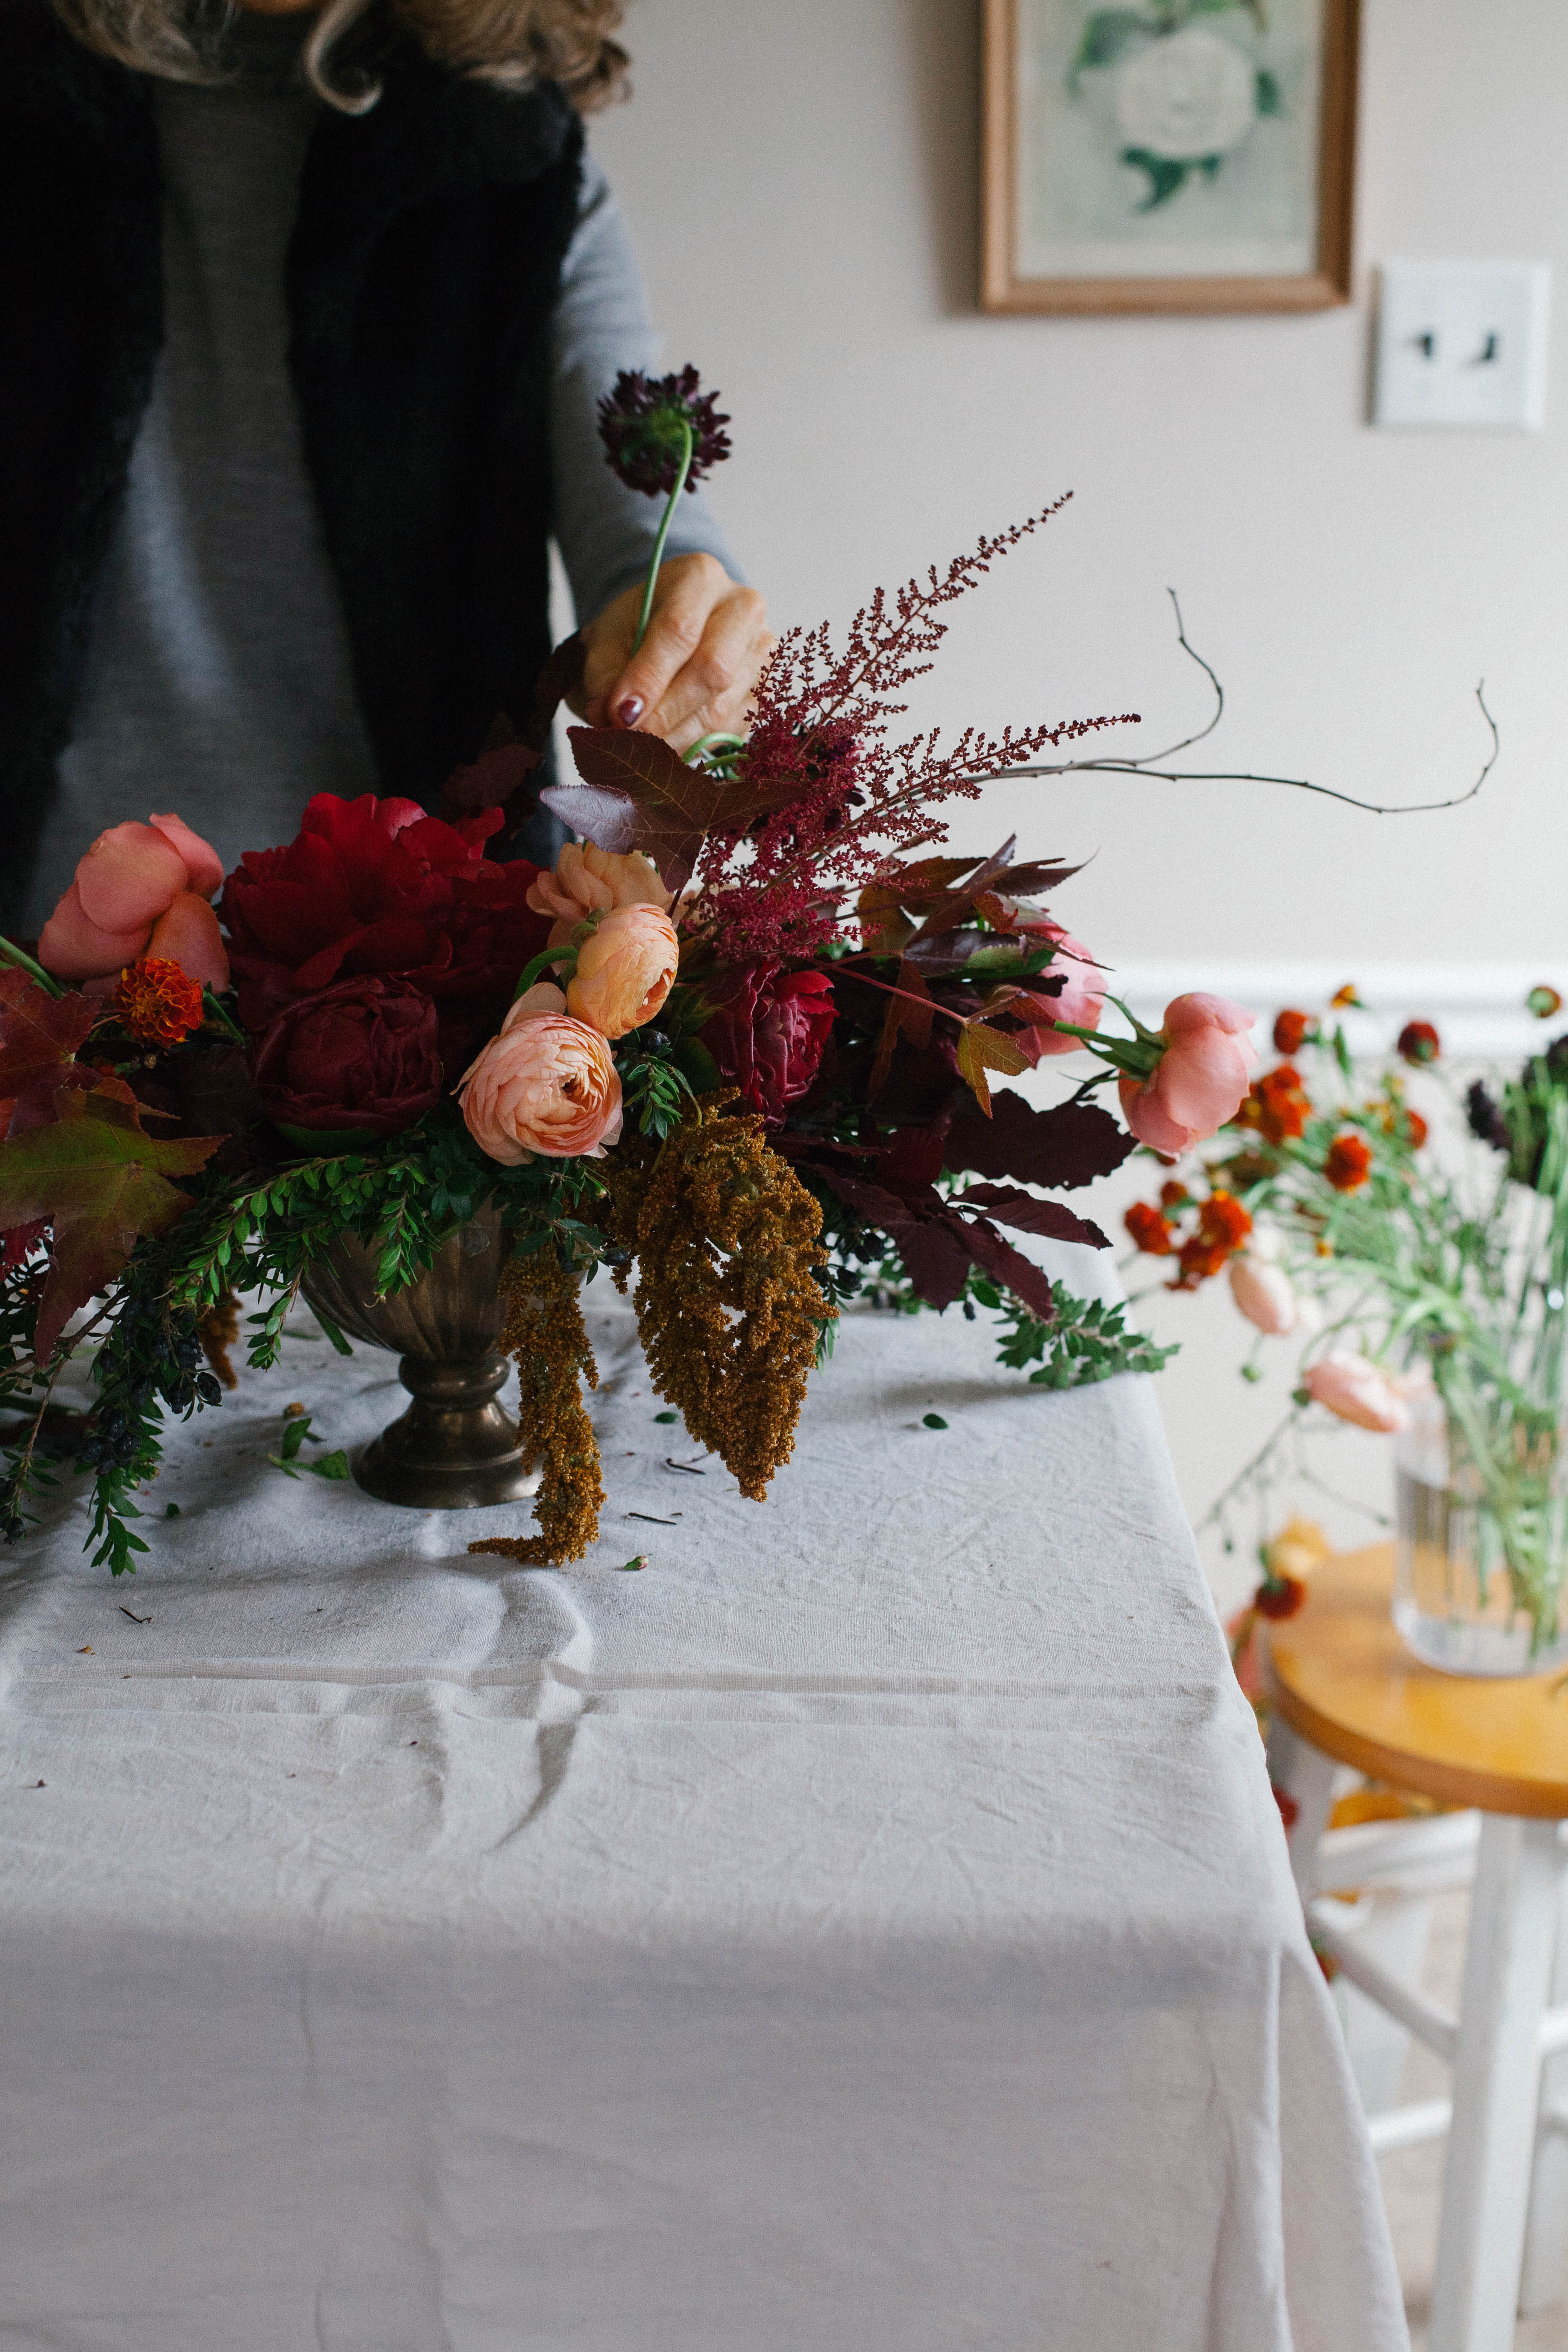
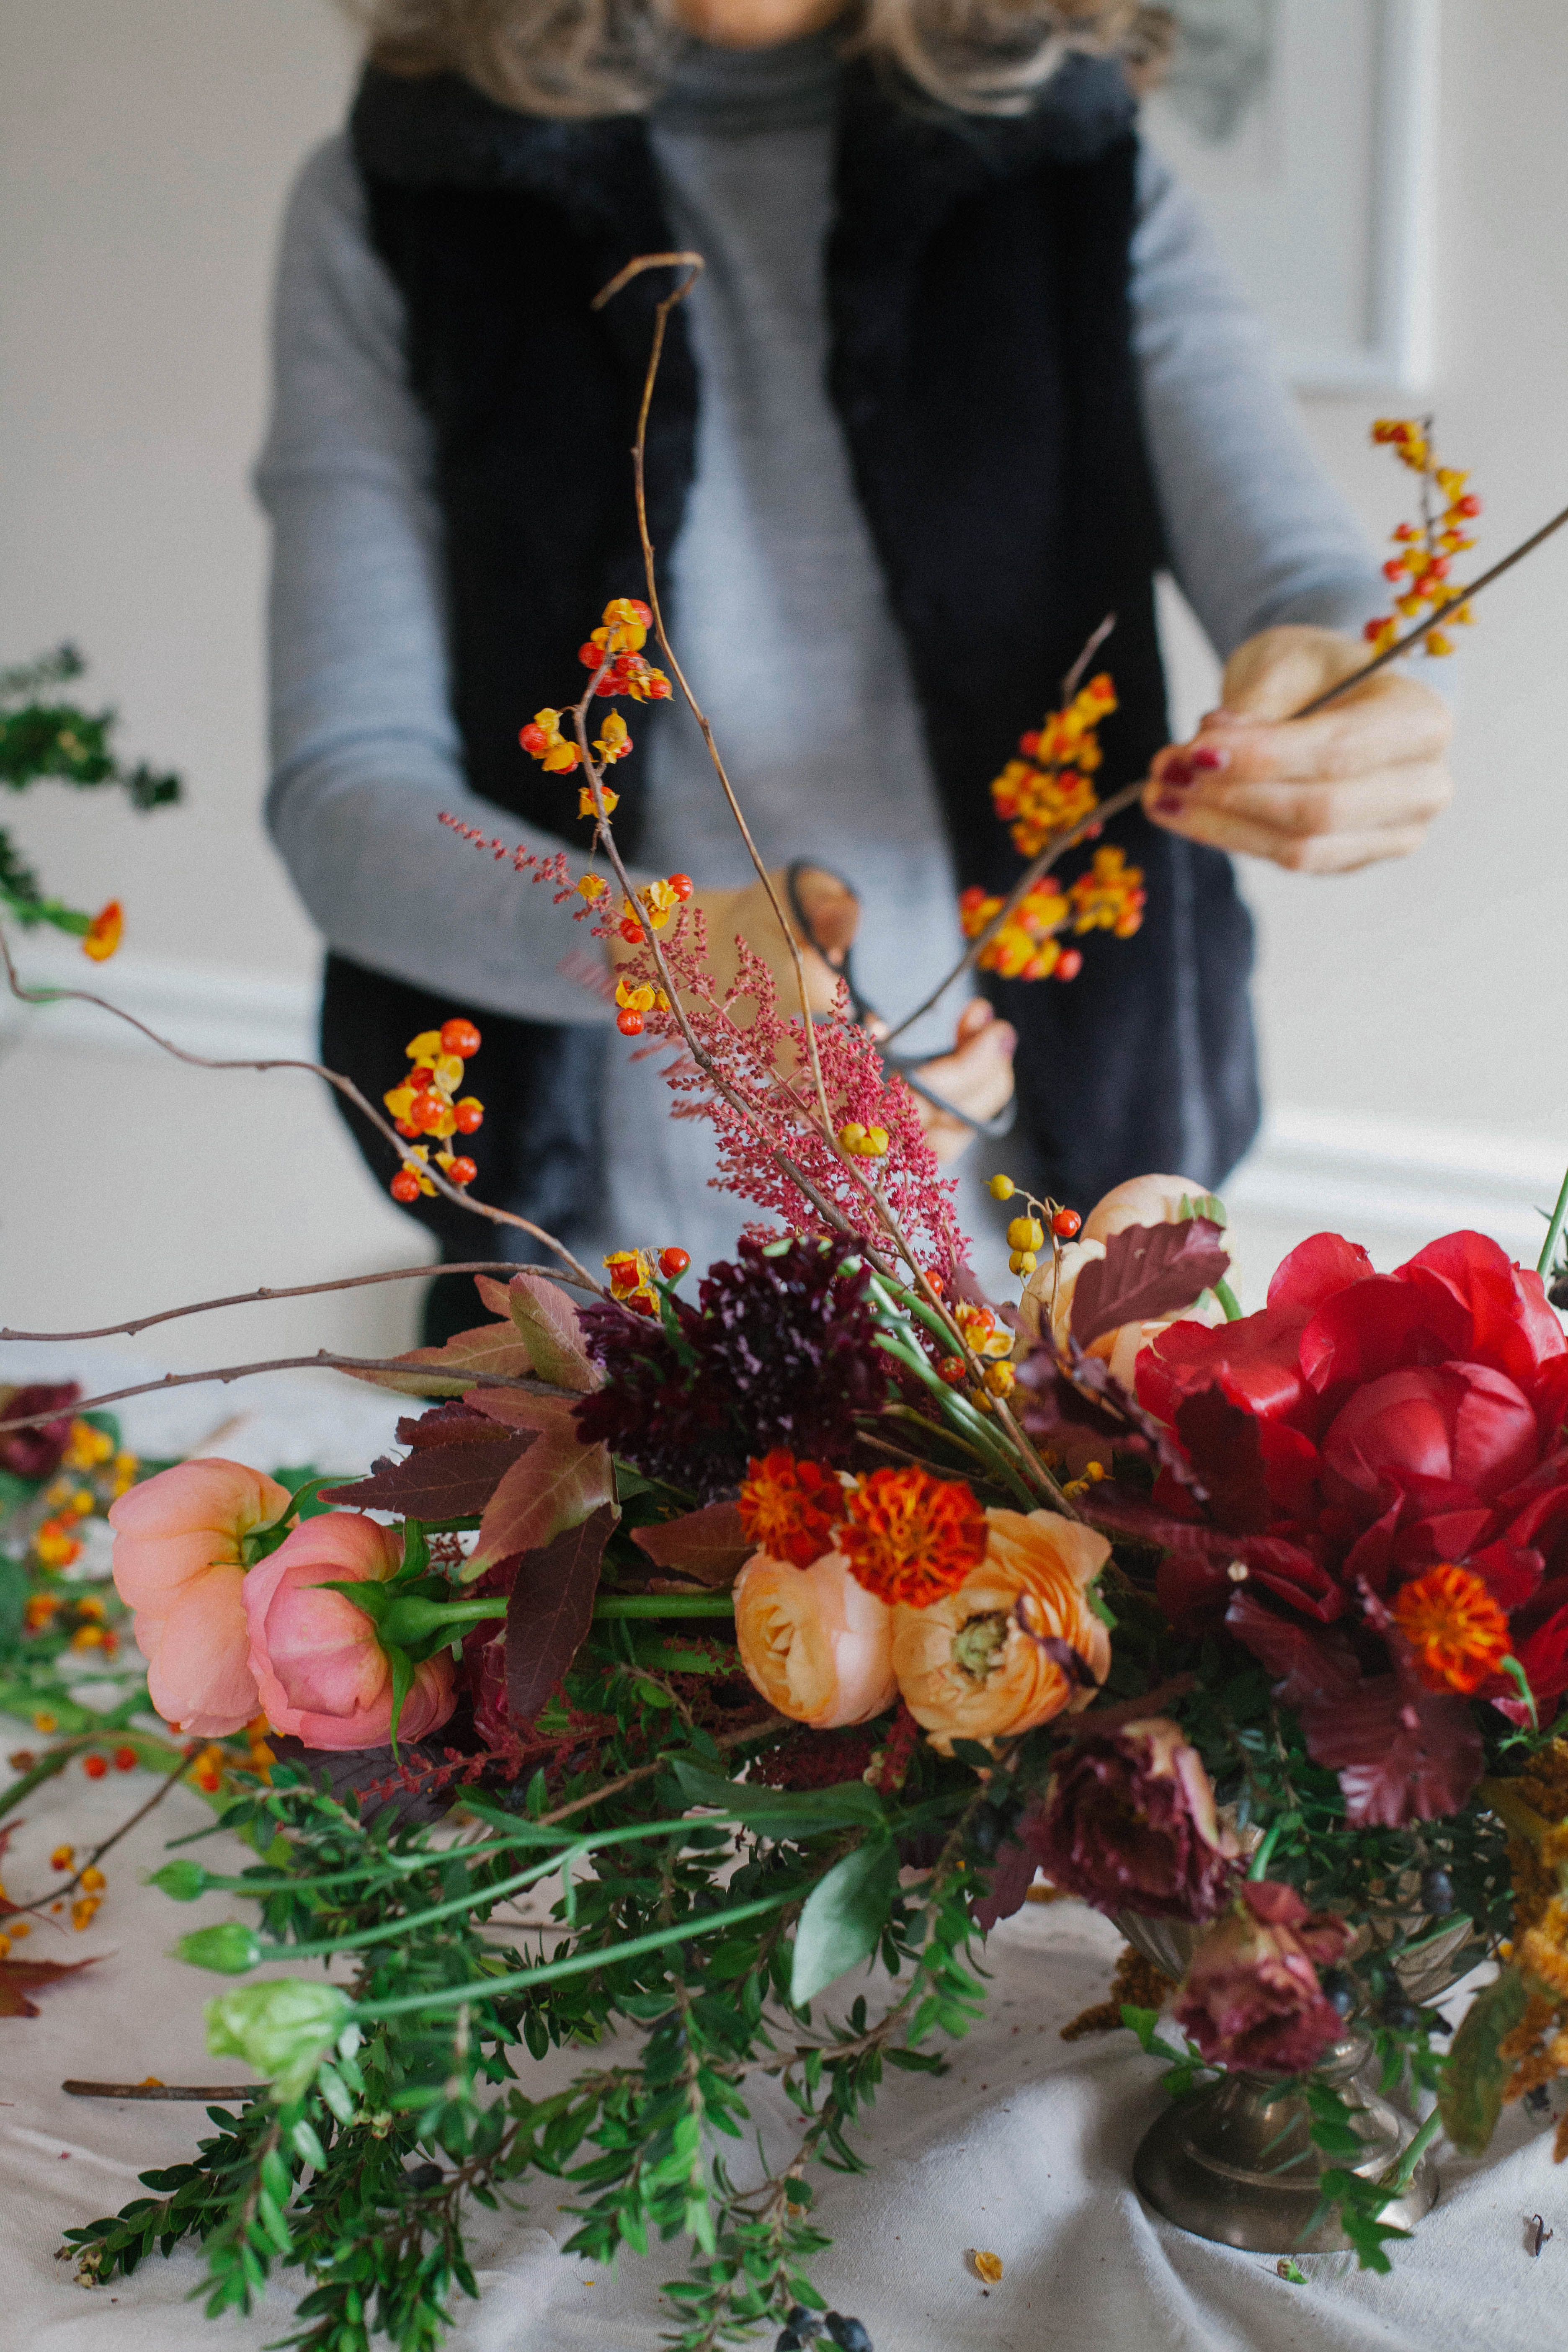
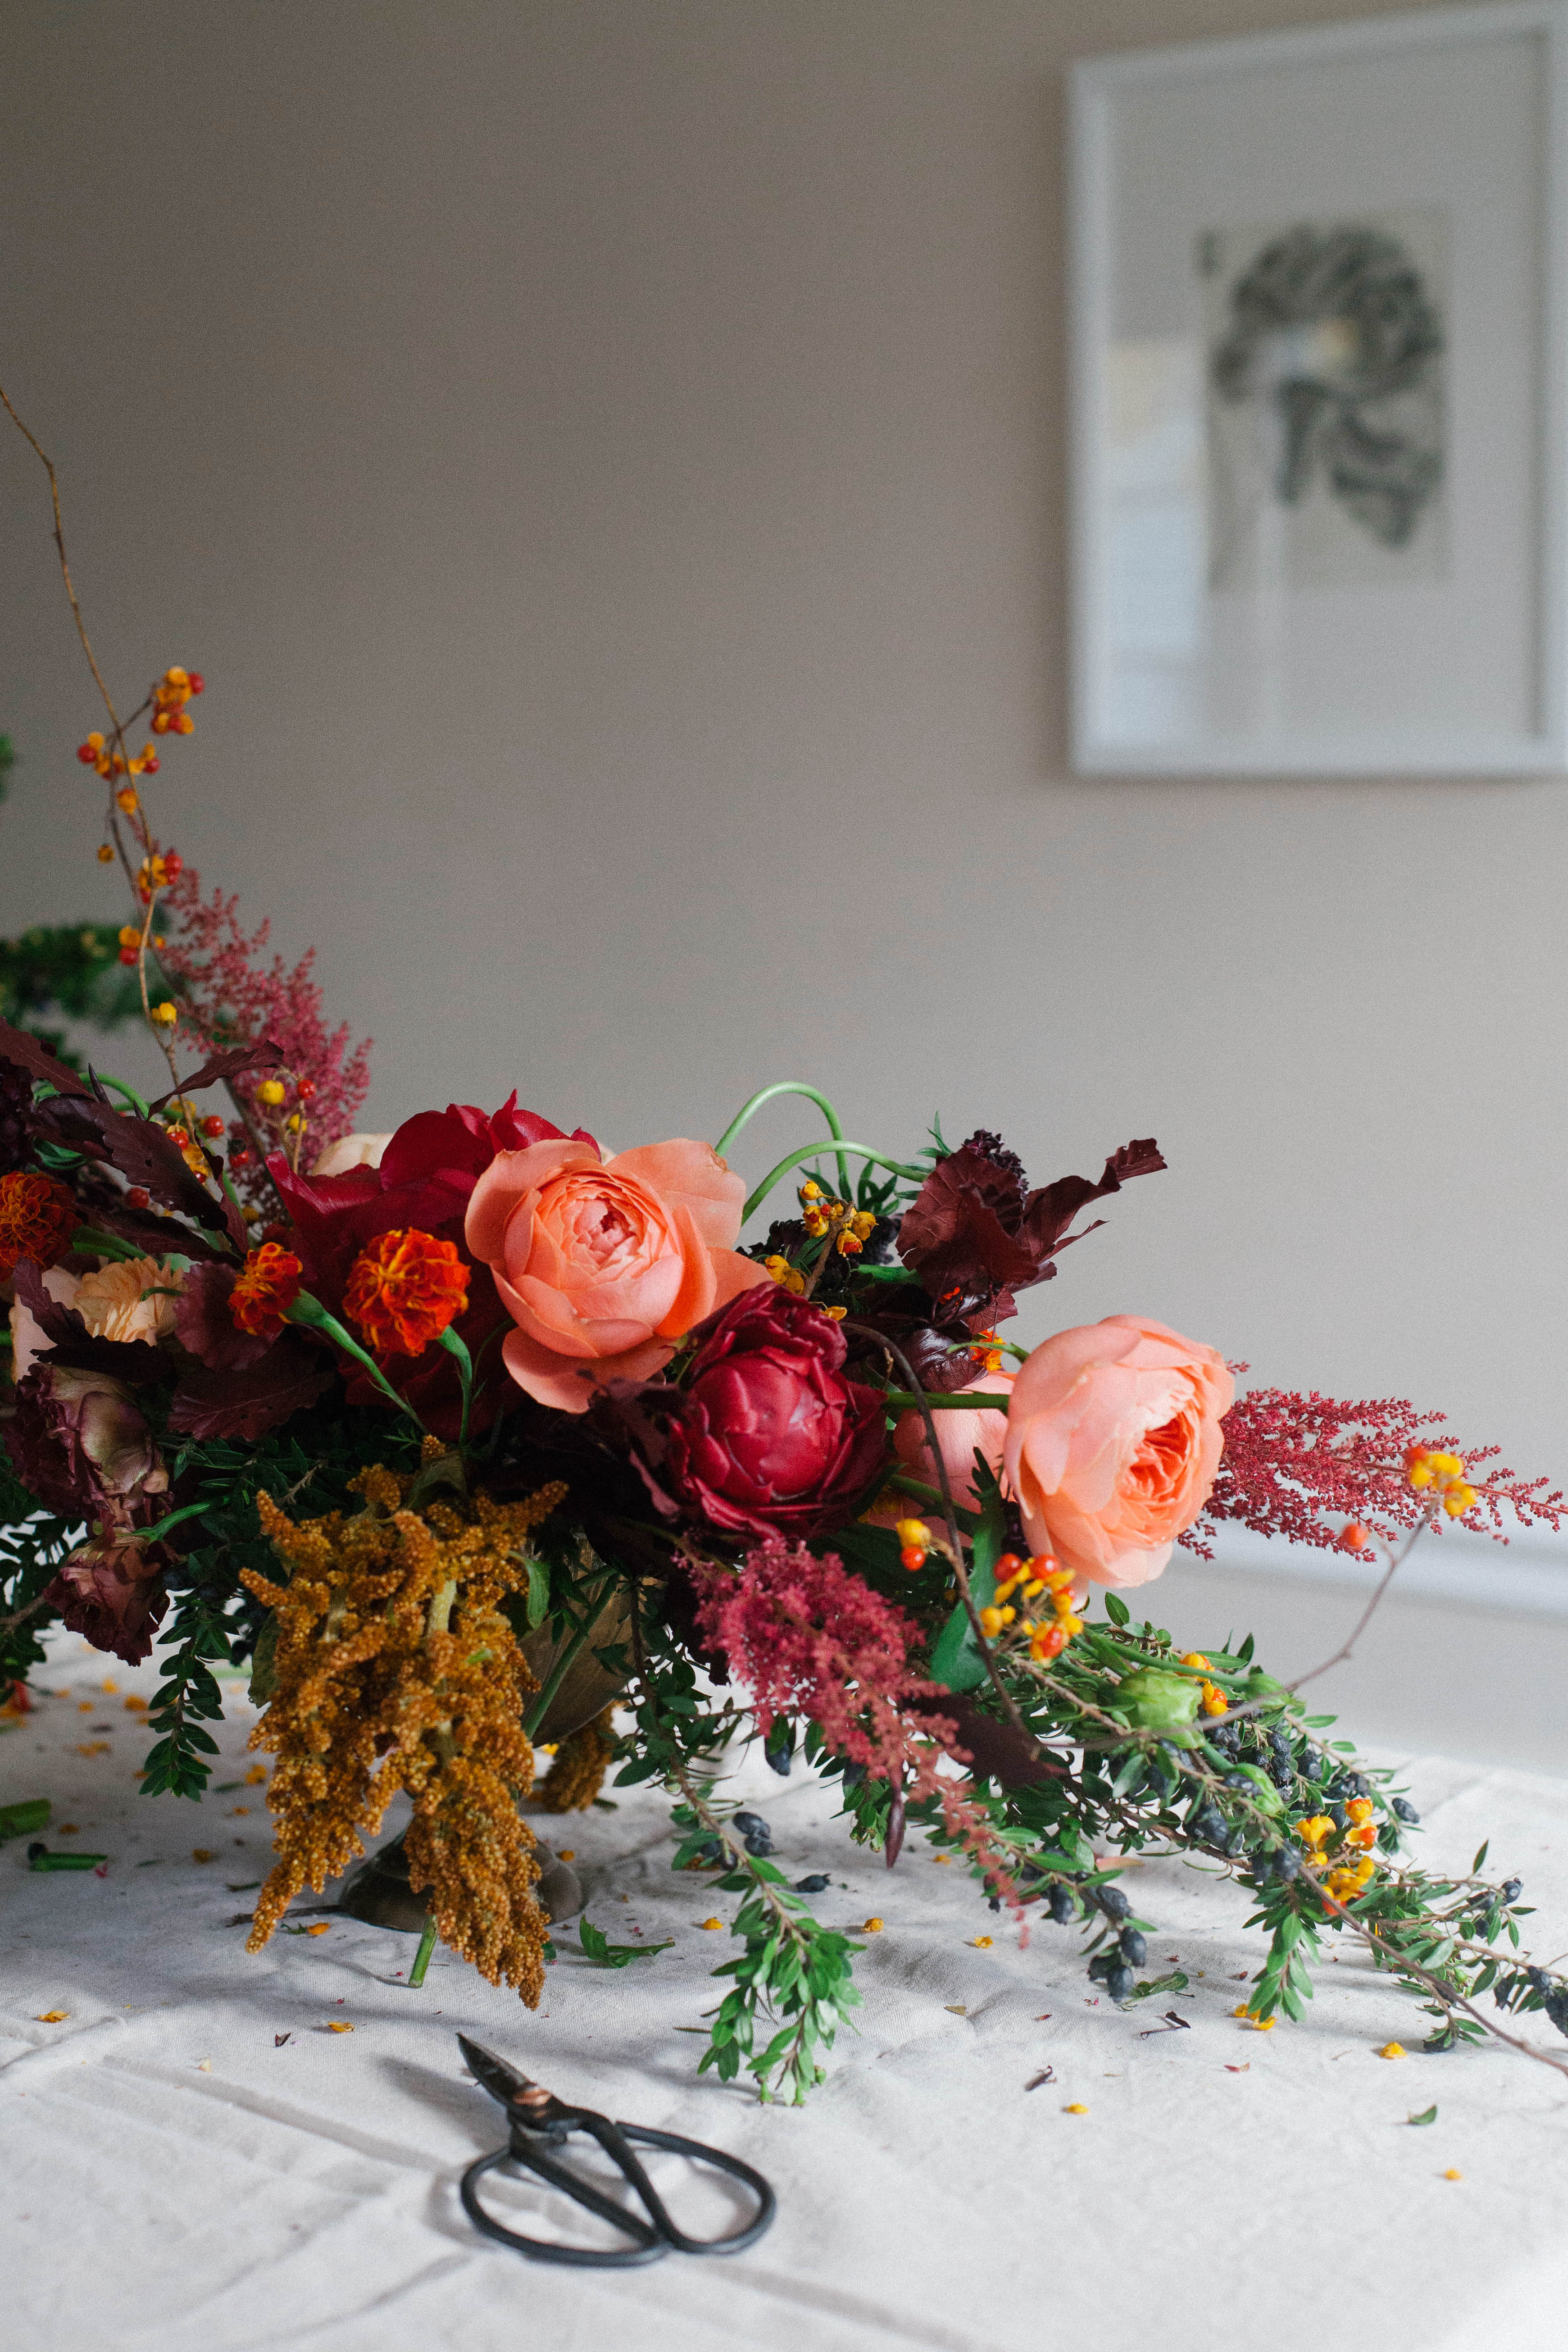
– flowers and foliage: hot pink ranunculus, peach ranunculus, romantic antique pink garden roses, burgundy peonies, french orange marigolds, chocolate lisianthus, yellow bittersweet, berried myrtle, liquid amber, dark red copper beach branches, blackberry scoop scabiosa, bronze amaranthus, and red astilbe
Directions
1. Process your flowers…as soon as you get them home, cut about 1-2″ off bottom, and remove all/most leaves from the stem (at least leaves that will be in water). Place in cool, fresh water immediately, and keep them in a cool location until you are ready to use. If some flowers aren’t completely open, you can keep them in a warmer area (maybe the kitchen) to help blooms open up.
2. Using floral tape, create a grid on the vessel. Once you complete the grid, place a strip of tape along the top edge of the vessel, securing the pieces of tape used to make the grid (see second photo).
3. Add cool water to vessel.
4. Using greens and/or foliage, create the basic shape or silhouette for the centerpiece. We started with the berried myrtle, liquid amber, bittersweet, and copper beach branches. We wanted a low design that allowed folks to see over the arrangement. And we wanted an asymmetrical design, so that one side was dense and blooms are angled upwards, while the opposite side was a bit lighter and pieces were kept lower.
5. Move on to larger blooms or those with the heartiest stems and begin to fill in; to create motion and movement, make sure to cut stems at varying lengths. Here, we used peonies, amaranthus, garden roses, and scabiosa.
6. After the basic shape is in place, begin to fill in with softer blooms and pieces: marigolds, ranunculus, lisianthus, and astilbe. At this point we also added extra stems of anything else we’d already used but that needed filling in.
7. Remember to continuously rotate arrangement, since guests will be seeing all sides of this arrangement.
8. When center of arrangement is filled in with blooms and extra foliage, examine, and fill in any gaps. Cascading bits (like amaranthus) work well to cover any gaps at the base.
Leave a Reply
PREVIOUS POST:
NEXT POST:
Disclosure.
Discovering how to infuse our lives—ourselves, our work, our relationships, our homes, and our entertaining spaces—with simple beauty, more intention, and slow living principles.
Interested in working together?
Click here to visit the Contact page and get in touch.
PORTFOLIO
© 2020 A Daily Something — All Rights Reserved.
Design by TONIC.
Learn more about A Daily Something styling services, content creation offerings and view curated work.
CONTACT + COLLABORATE
MANIFESTO
Join the list to receive our thoughtful monthly letters, and to be the first to know of upcoming workshops, dinners, gatherings, and more.
SUBSCRIBE
ALL PHOTOS AND IMAGES ON A DAILY SOMETHING ARE BY A DAILY SOMETHING UNLESS OTHERWISE NOTED. IF YOU SEE AN IMAGE THAT IS NOT PROPERLY SOURCED, PLEASE LET US KNOW AND WE'LL UPDATE THE INFORMATION! IF YOU WOULD LIKE TO SHARE A PHOTO OR TUTORIAL FROM A DAILY SOMETHING, PLEASE ONLY SHARE ONE PHOTO, WHICH MUST BE CREDITED AND LINKED BACK TO A DAILY SOMETHING.
SPONSORED POSTS WILL ALWAYS BE DISCLOSED AND ANY GIFTED ITEMS WILL BE MARKED C/O. WE ONLY WORK WITH COMPANIES THAT ARE A GOOD FIT FOR THE A DAILY SOMETHING AESTHETIC AND CONTENT. THANK YOU FOR SUPPORTING THE COMPANIES THAT ENABLE US TO CONTINUE PRODUCING QUALITY CONTENT.
