


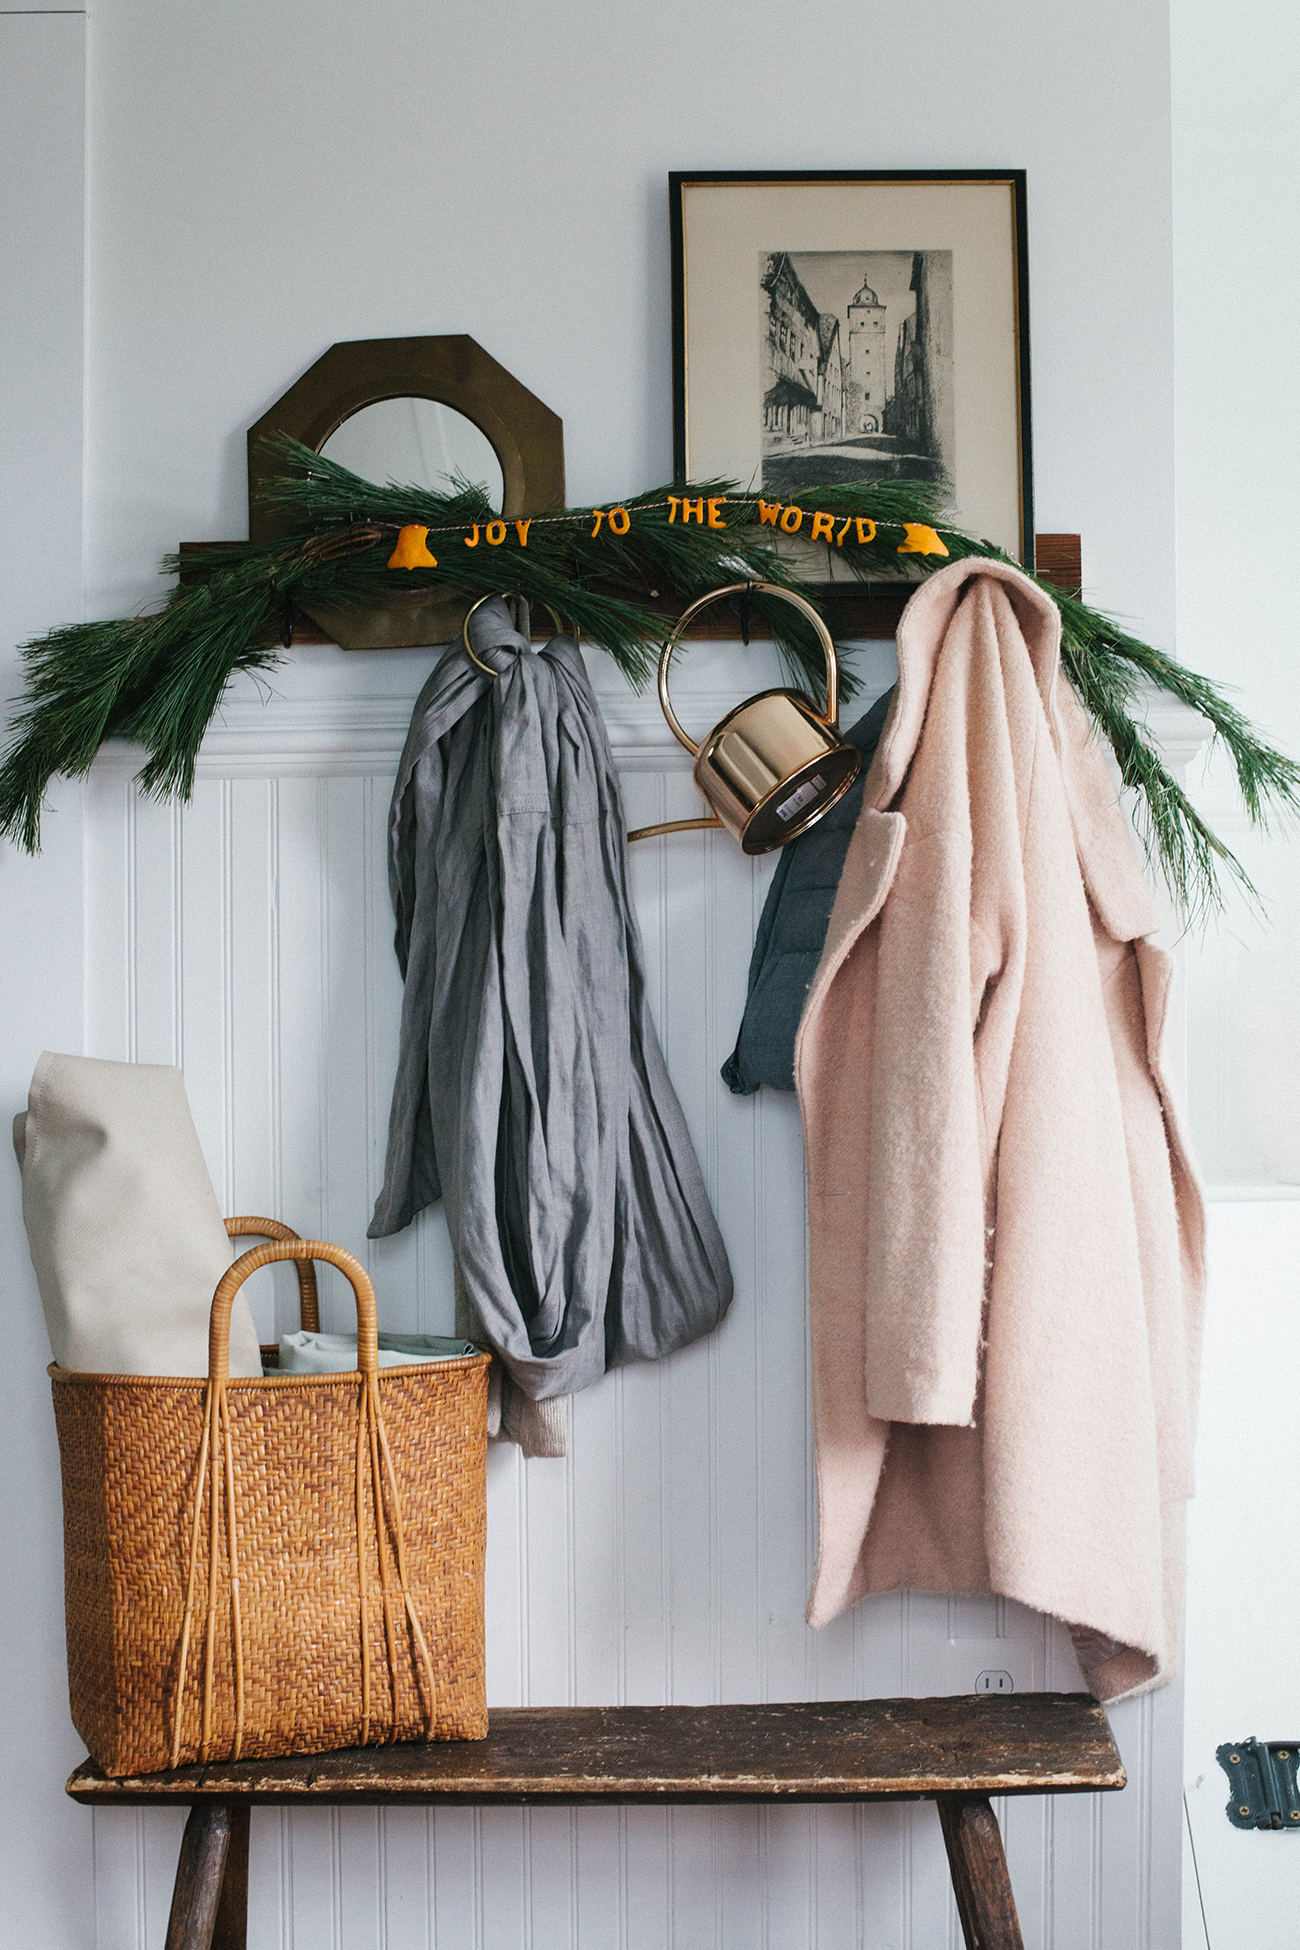
DIY | Wintry Garlands with Citrus Peels

I love filling the holidays – and really all year round – with traditions (who doesn’t?!). Since the girls are getting older, traditions are becoming more and more meaningful, and they actually have memories from years past, and it’s really special! When we pulled into the Christmas tree farm to cut down our tree a few weeks ago, Zoe squealed with delight and talked about last year’s adventure! The girls are at ages where they can actually help (and not just have fun) in lots of these traditions: cookie-making, tree decorating, offering their opinions on what tree to cut down, telling the story of the nativity, making ornaments, etc. Naomi is still struggling with the hands-on projects, since she doesn’t quite get scissors yet (and dang, scissors skills are pretty necessary when DIYing), but that will come with practice!
This week, we partnered with Cuties Citrus for their #100DaysofSunshine campaign, to share a fun wintry DIY project. To celebrate Advent, we’ve been doing a Christmasy/wintry project or activity every day. I planned out each of our activities for the month in November. I think I’ll continue this more intentional crafting into the new year; we’re actually making things that are beautiful & fun to display, and I can be prepared with supplies ahead of time!
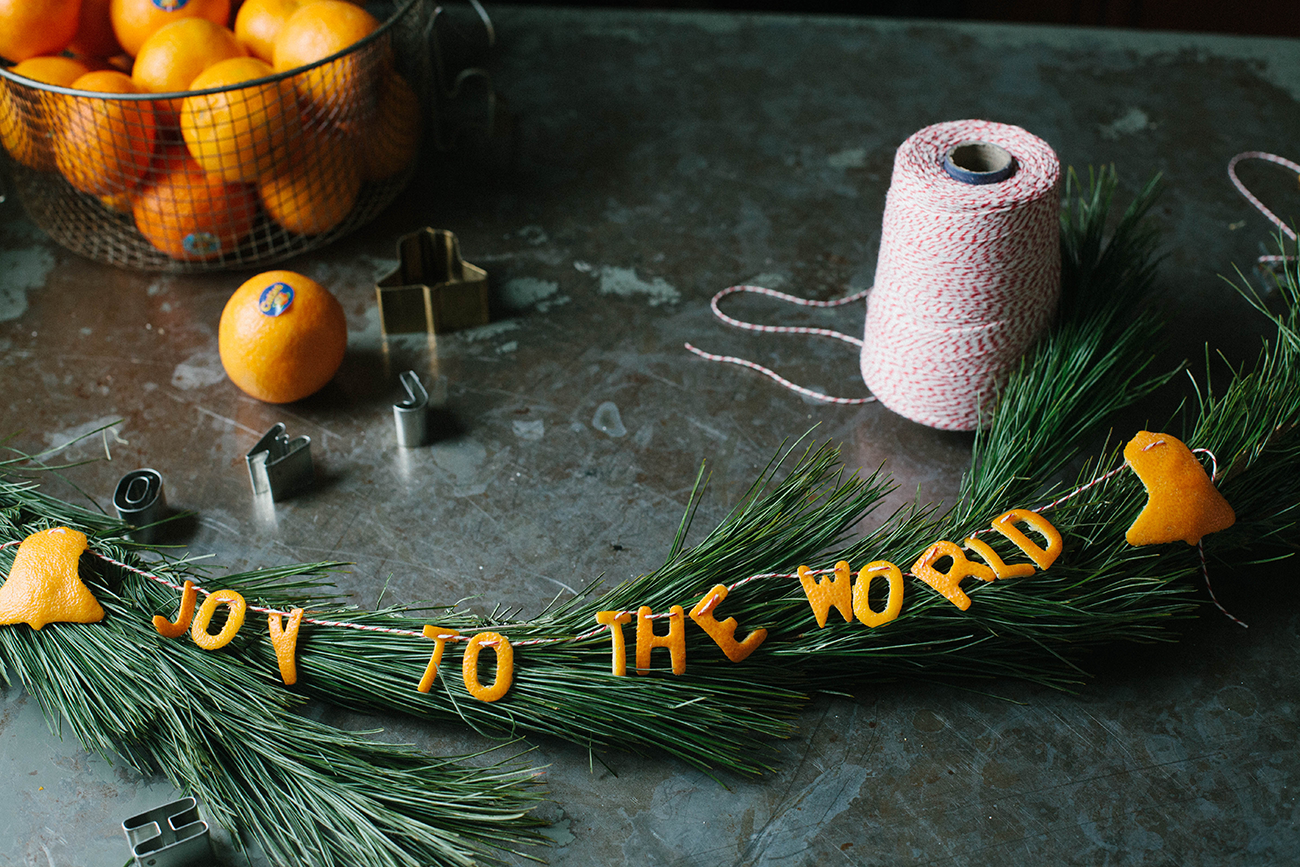
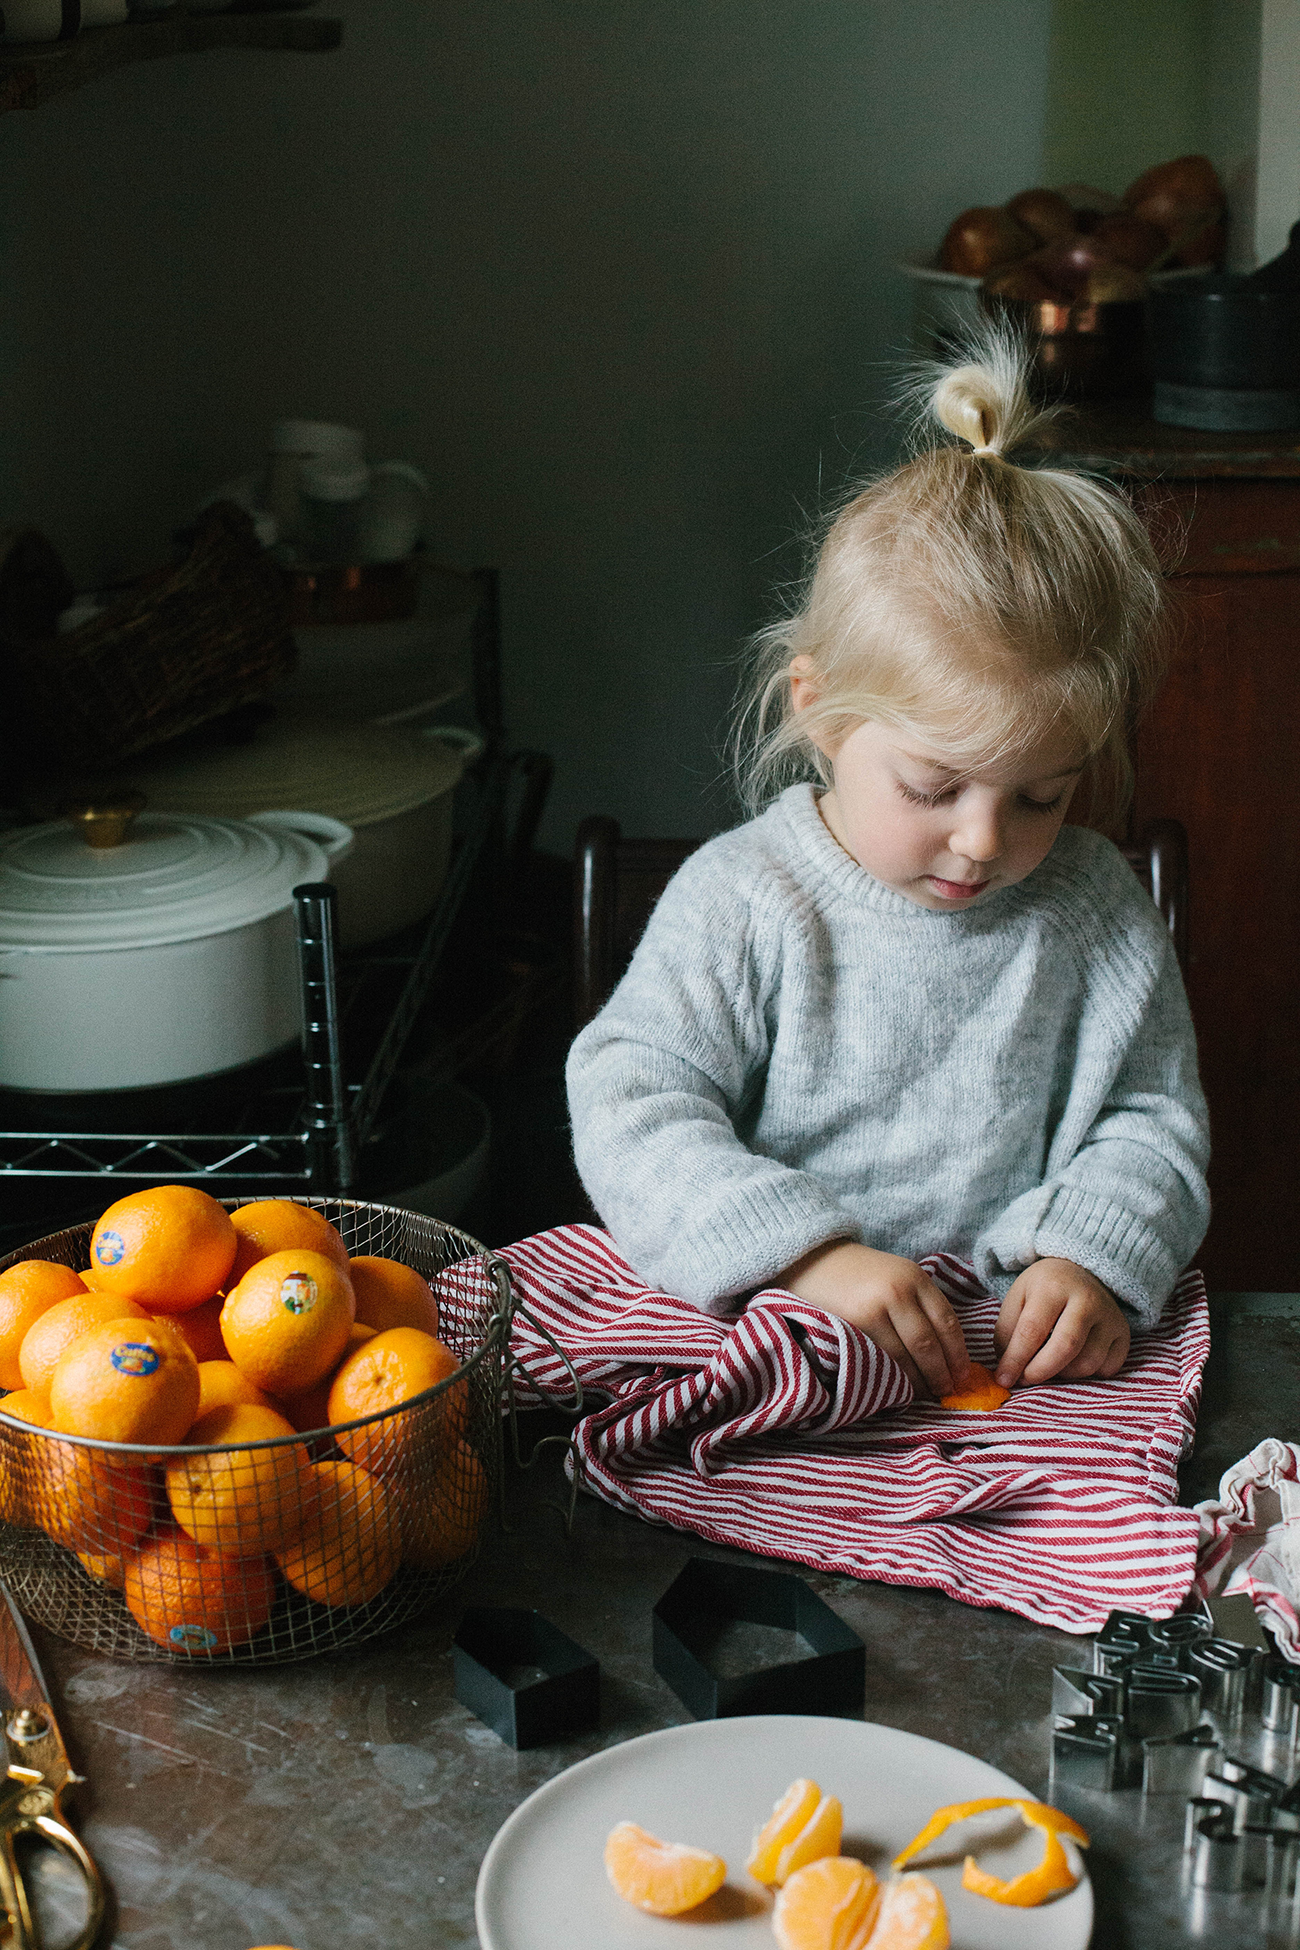
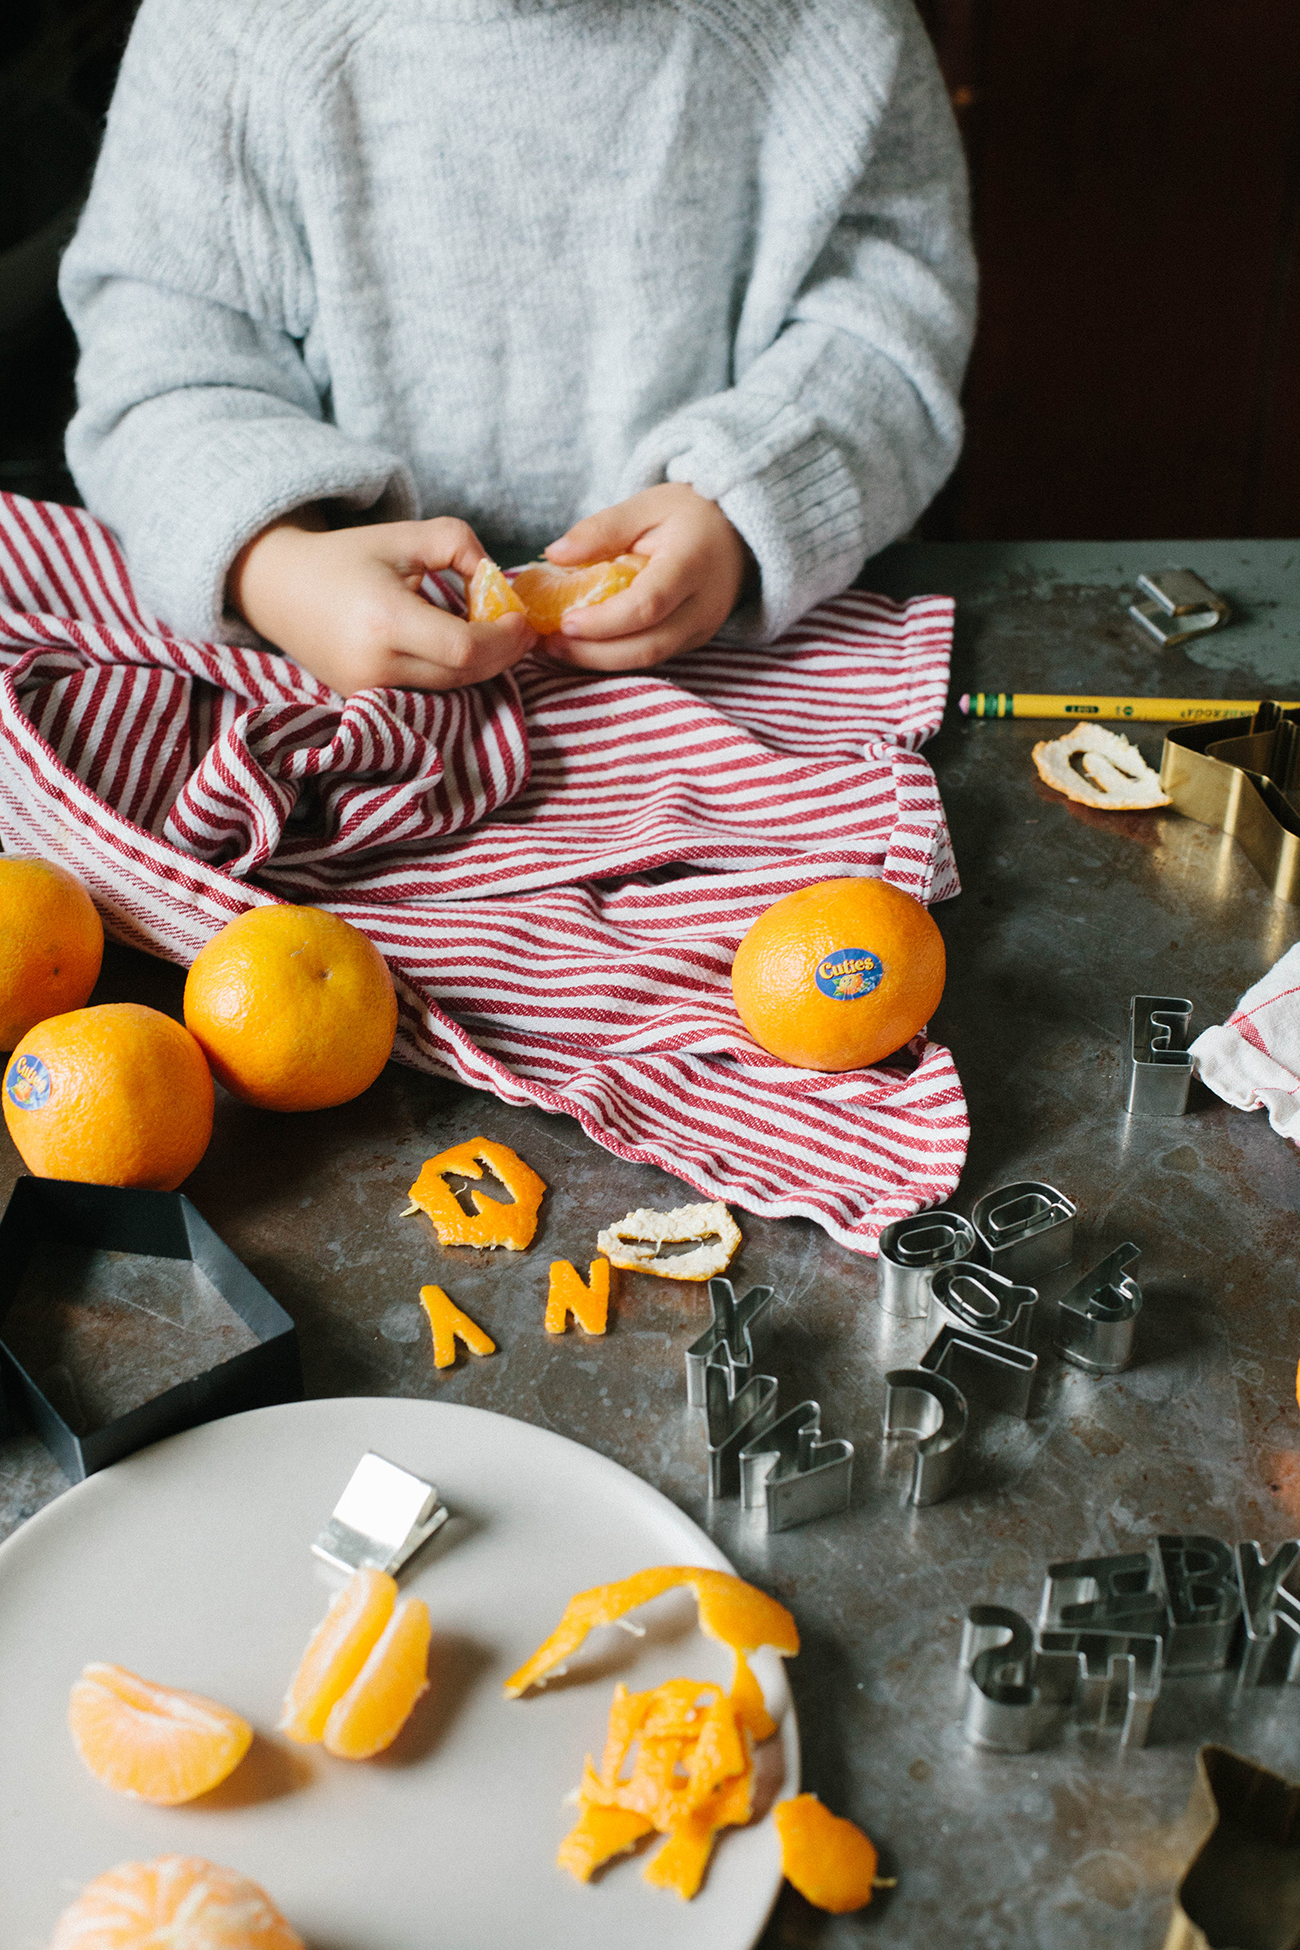
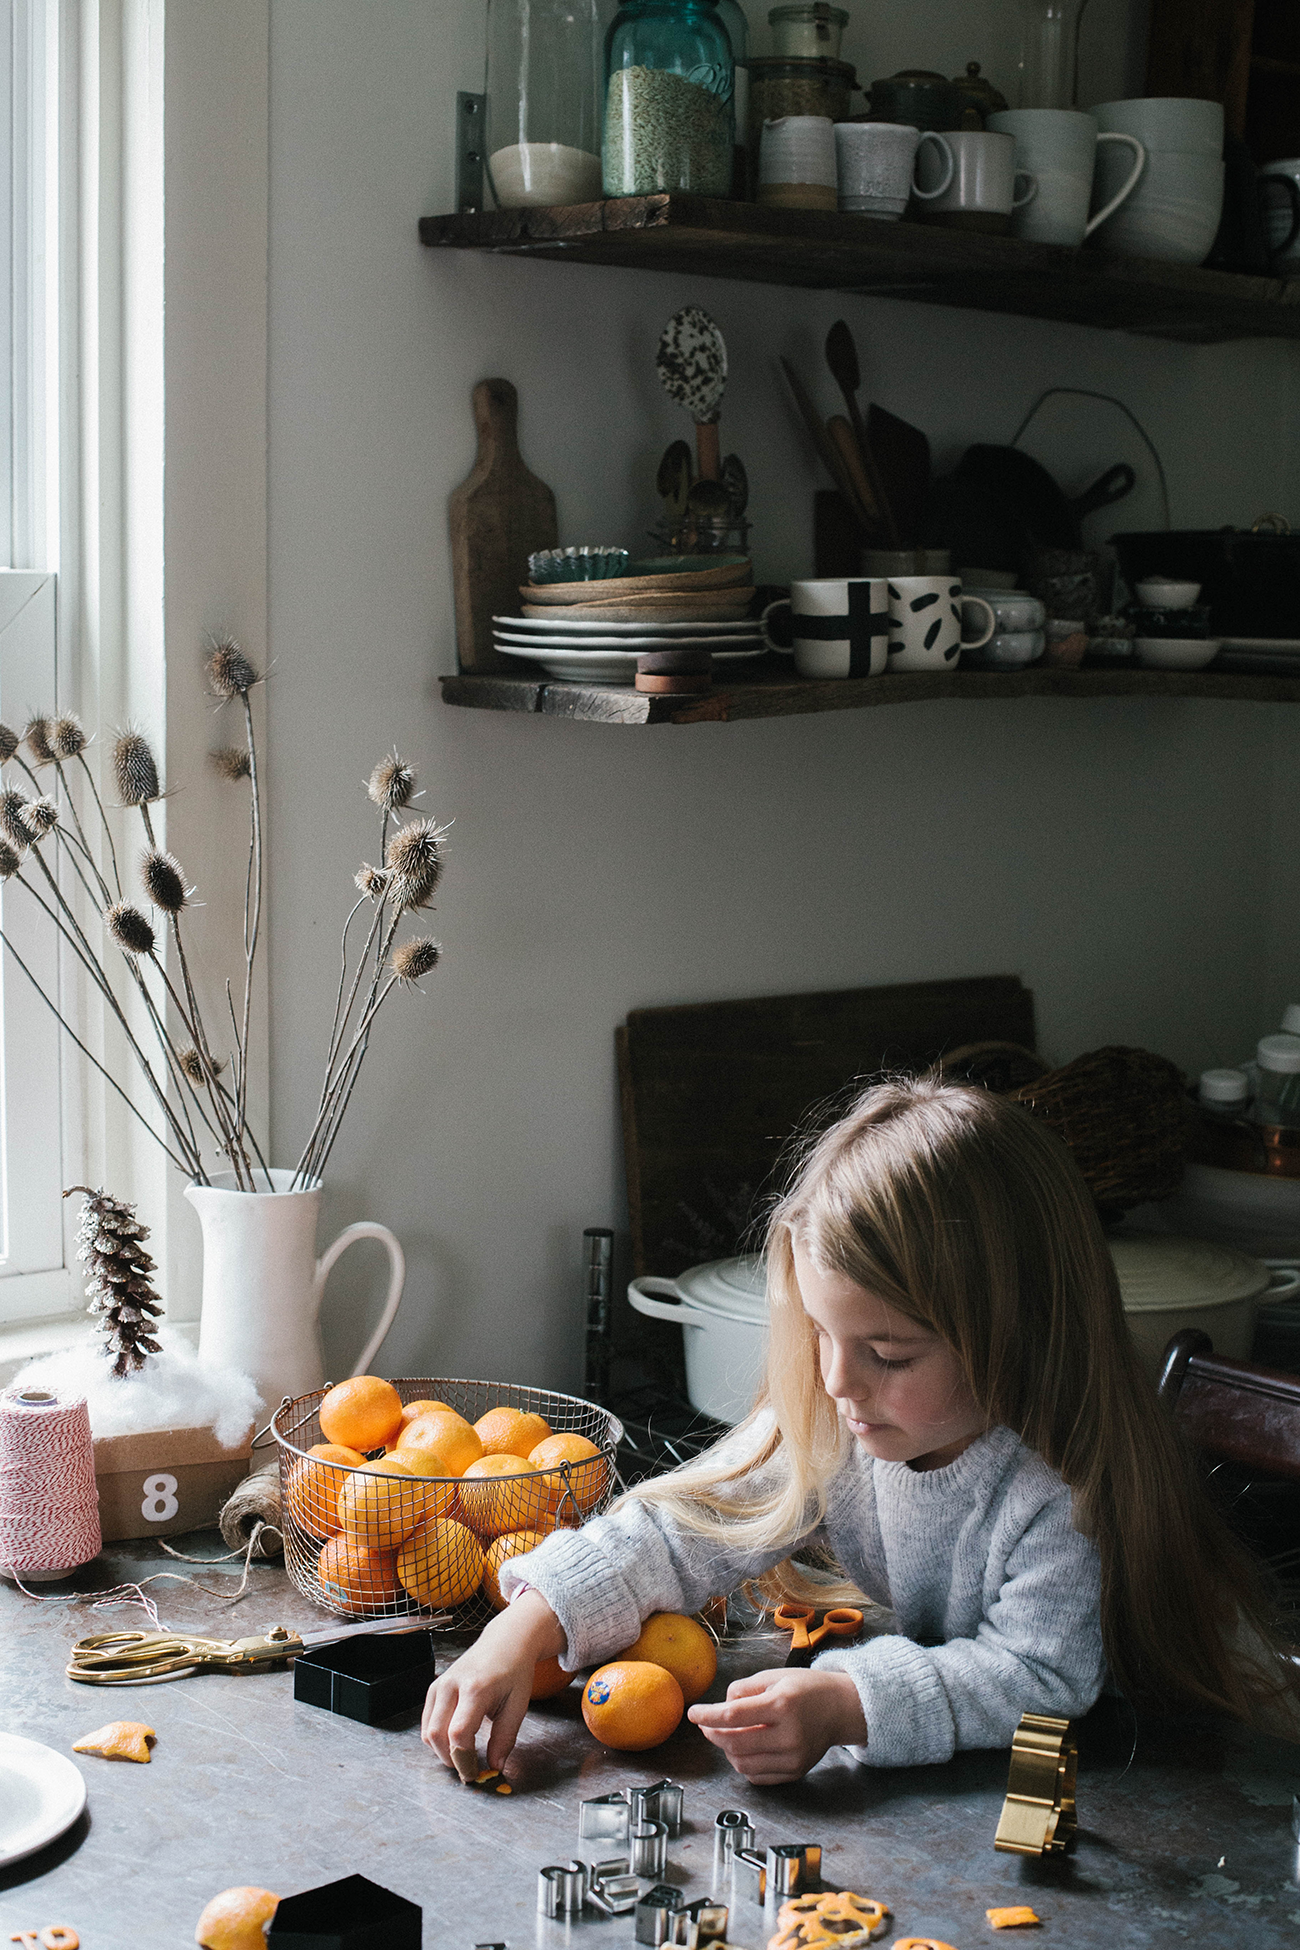
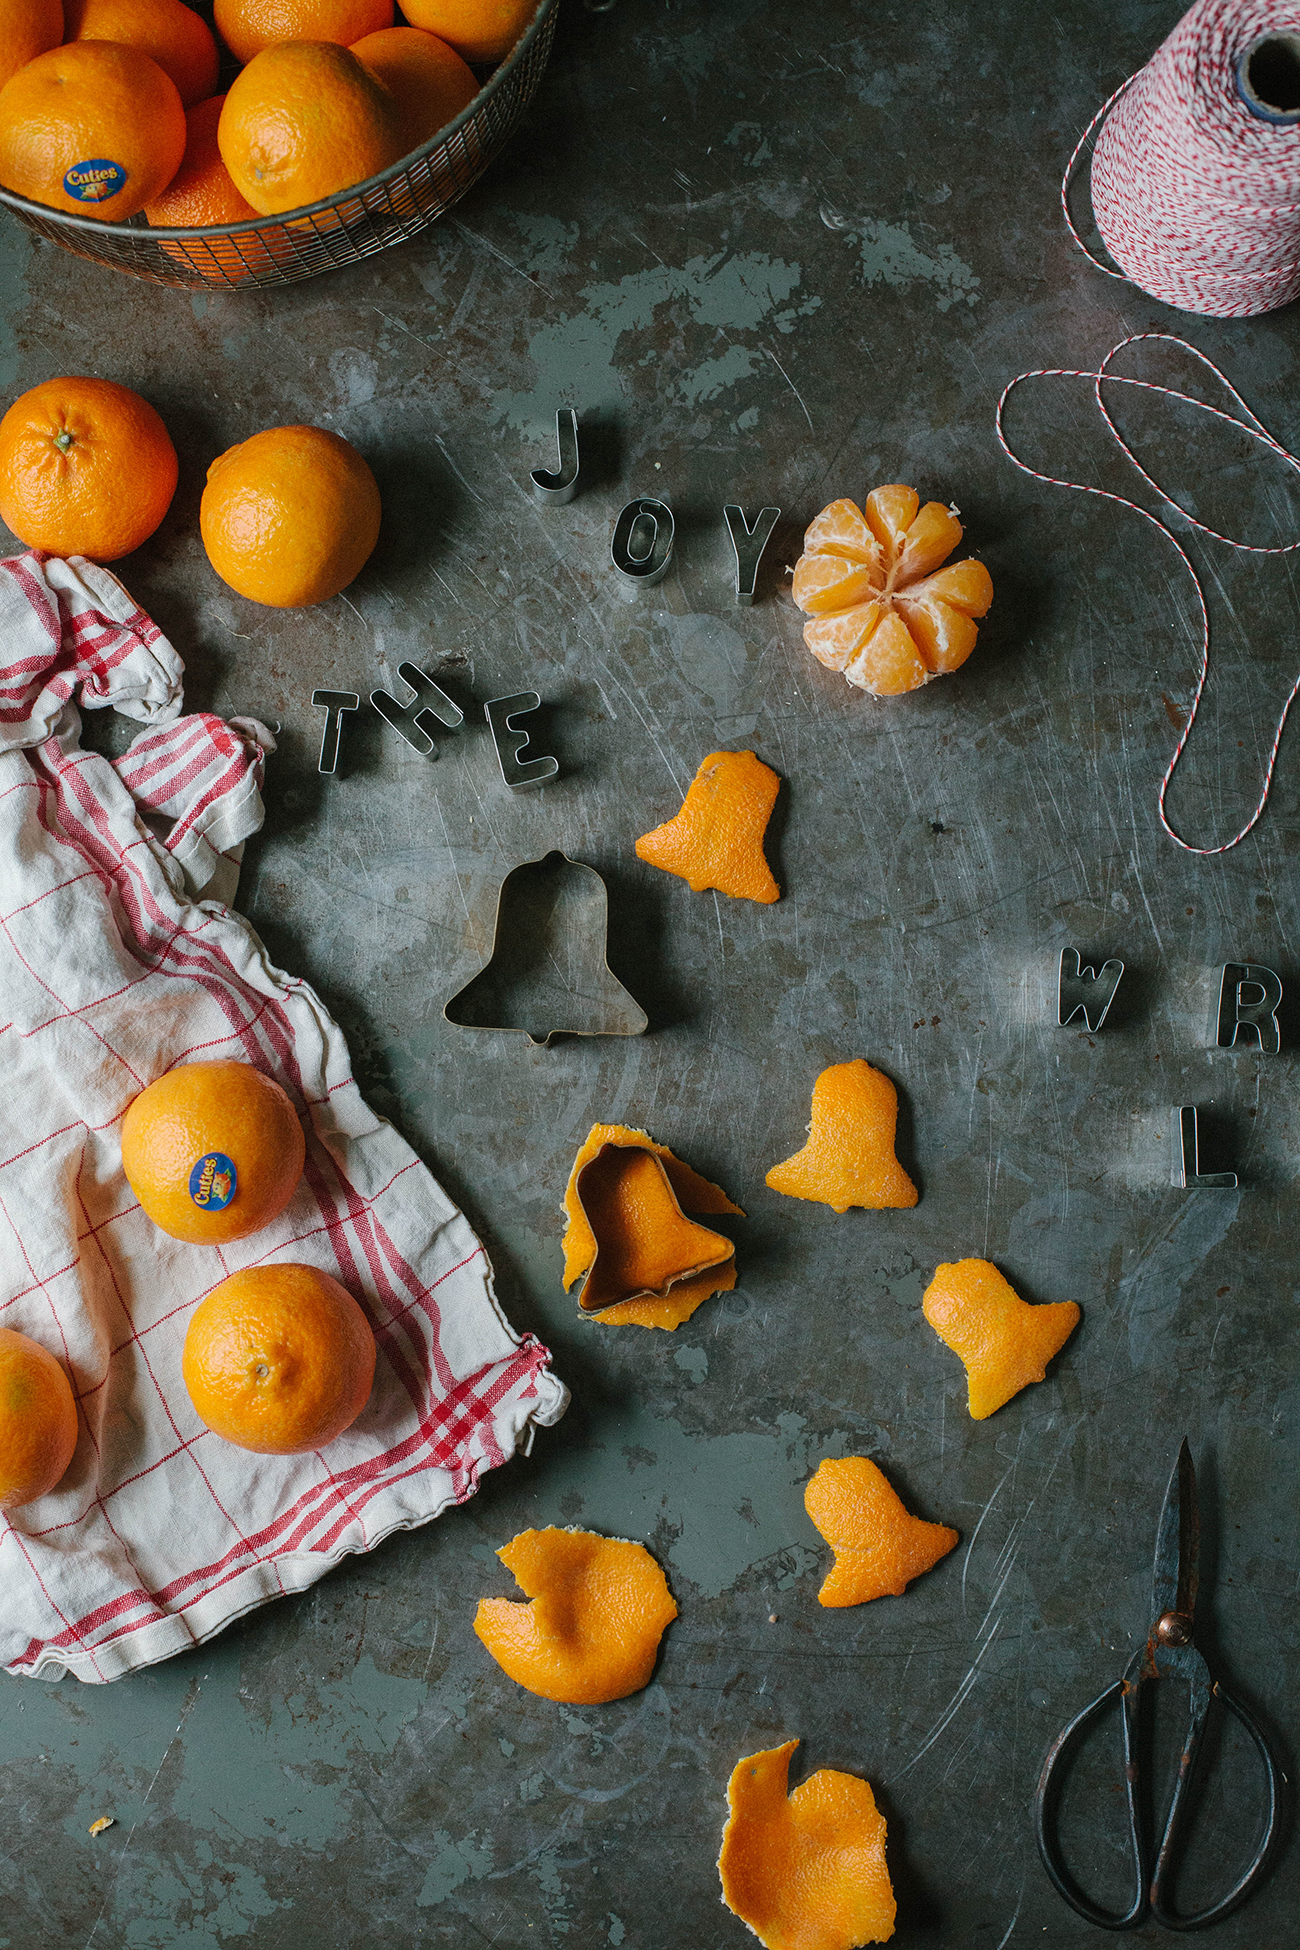
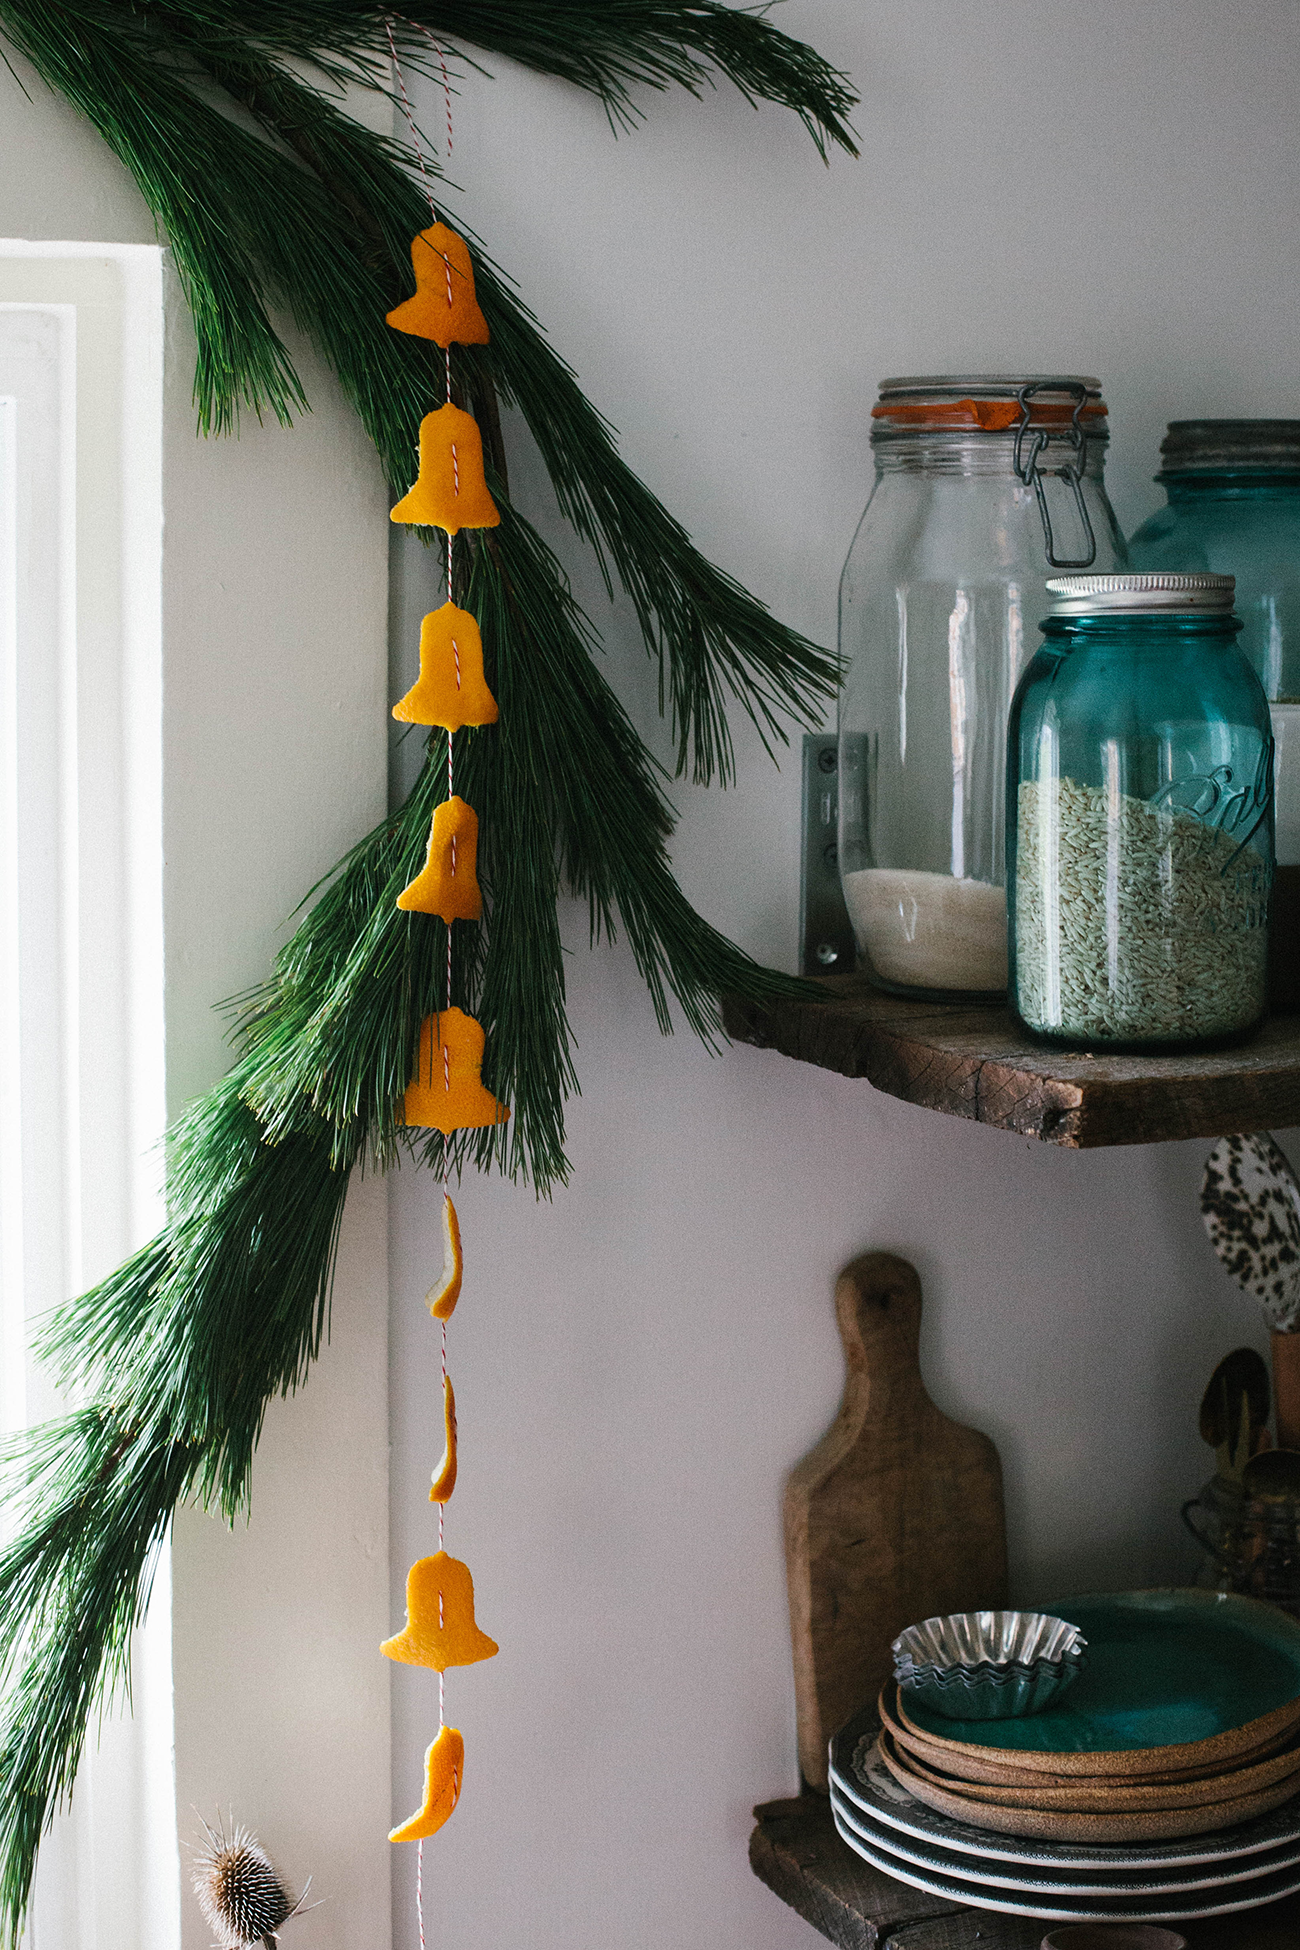
We sat down with a big basket of Cuties and a few of our favorite mini cookie cutters, and made some fun garlands (and we’re planning on using this same DIY for gift tags and gift wraps)! We LOVE Cuties, and all year long we pine for them to be back in-store, ripe, and ready to eat! As a mom, what I love most about Cuties is that they’re so kid-friendly. The girls are able to peel to them, and I don’t have to worry about seeds. My girls love peeling Cuties, actually; they feel like they’re helping out (and they really are).
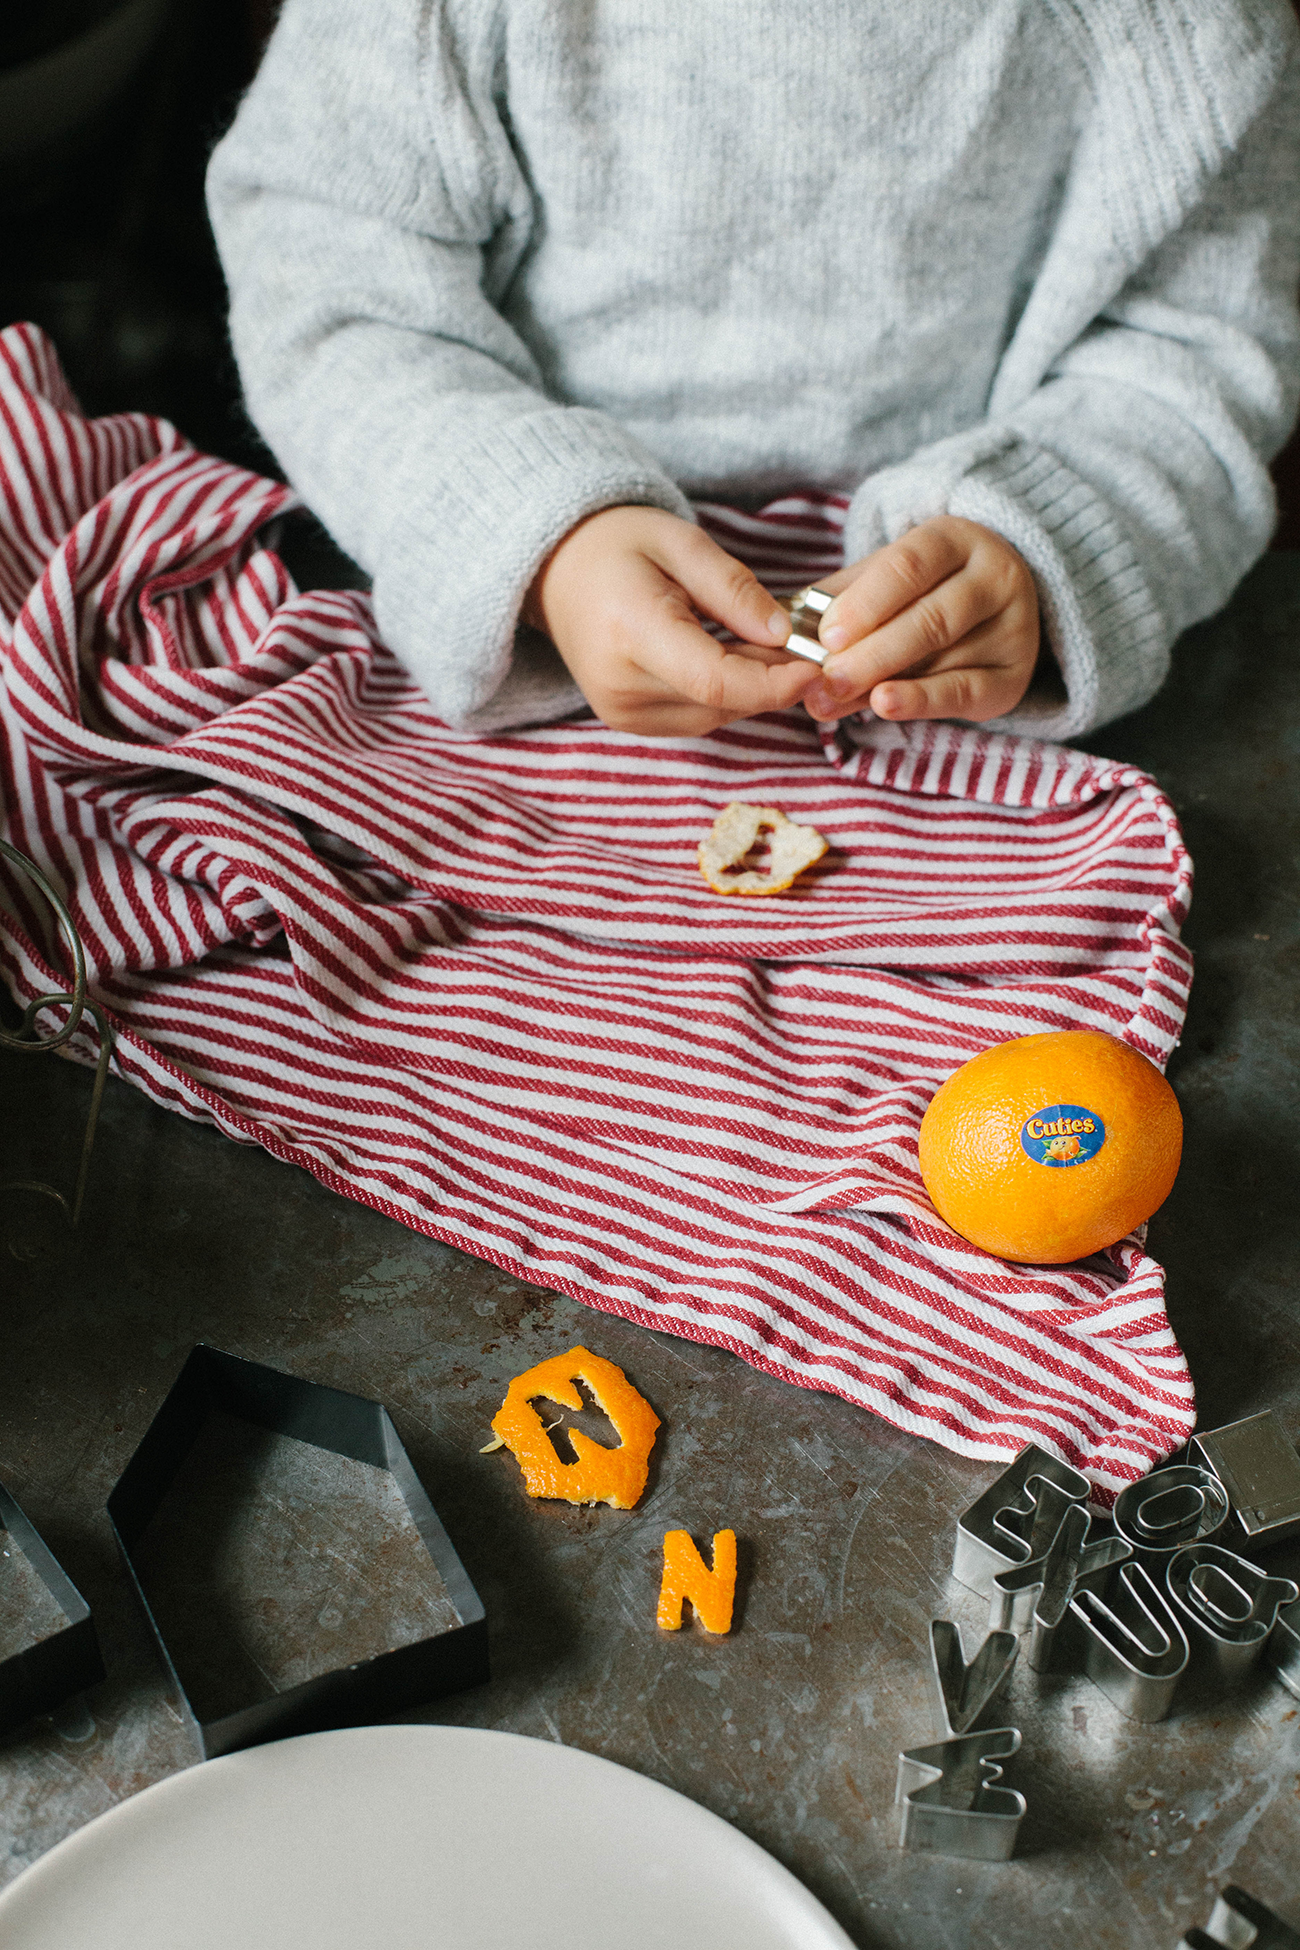
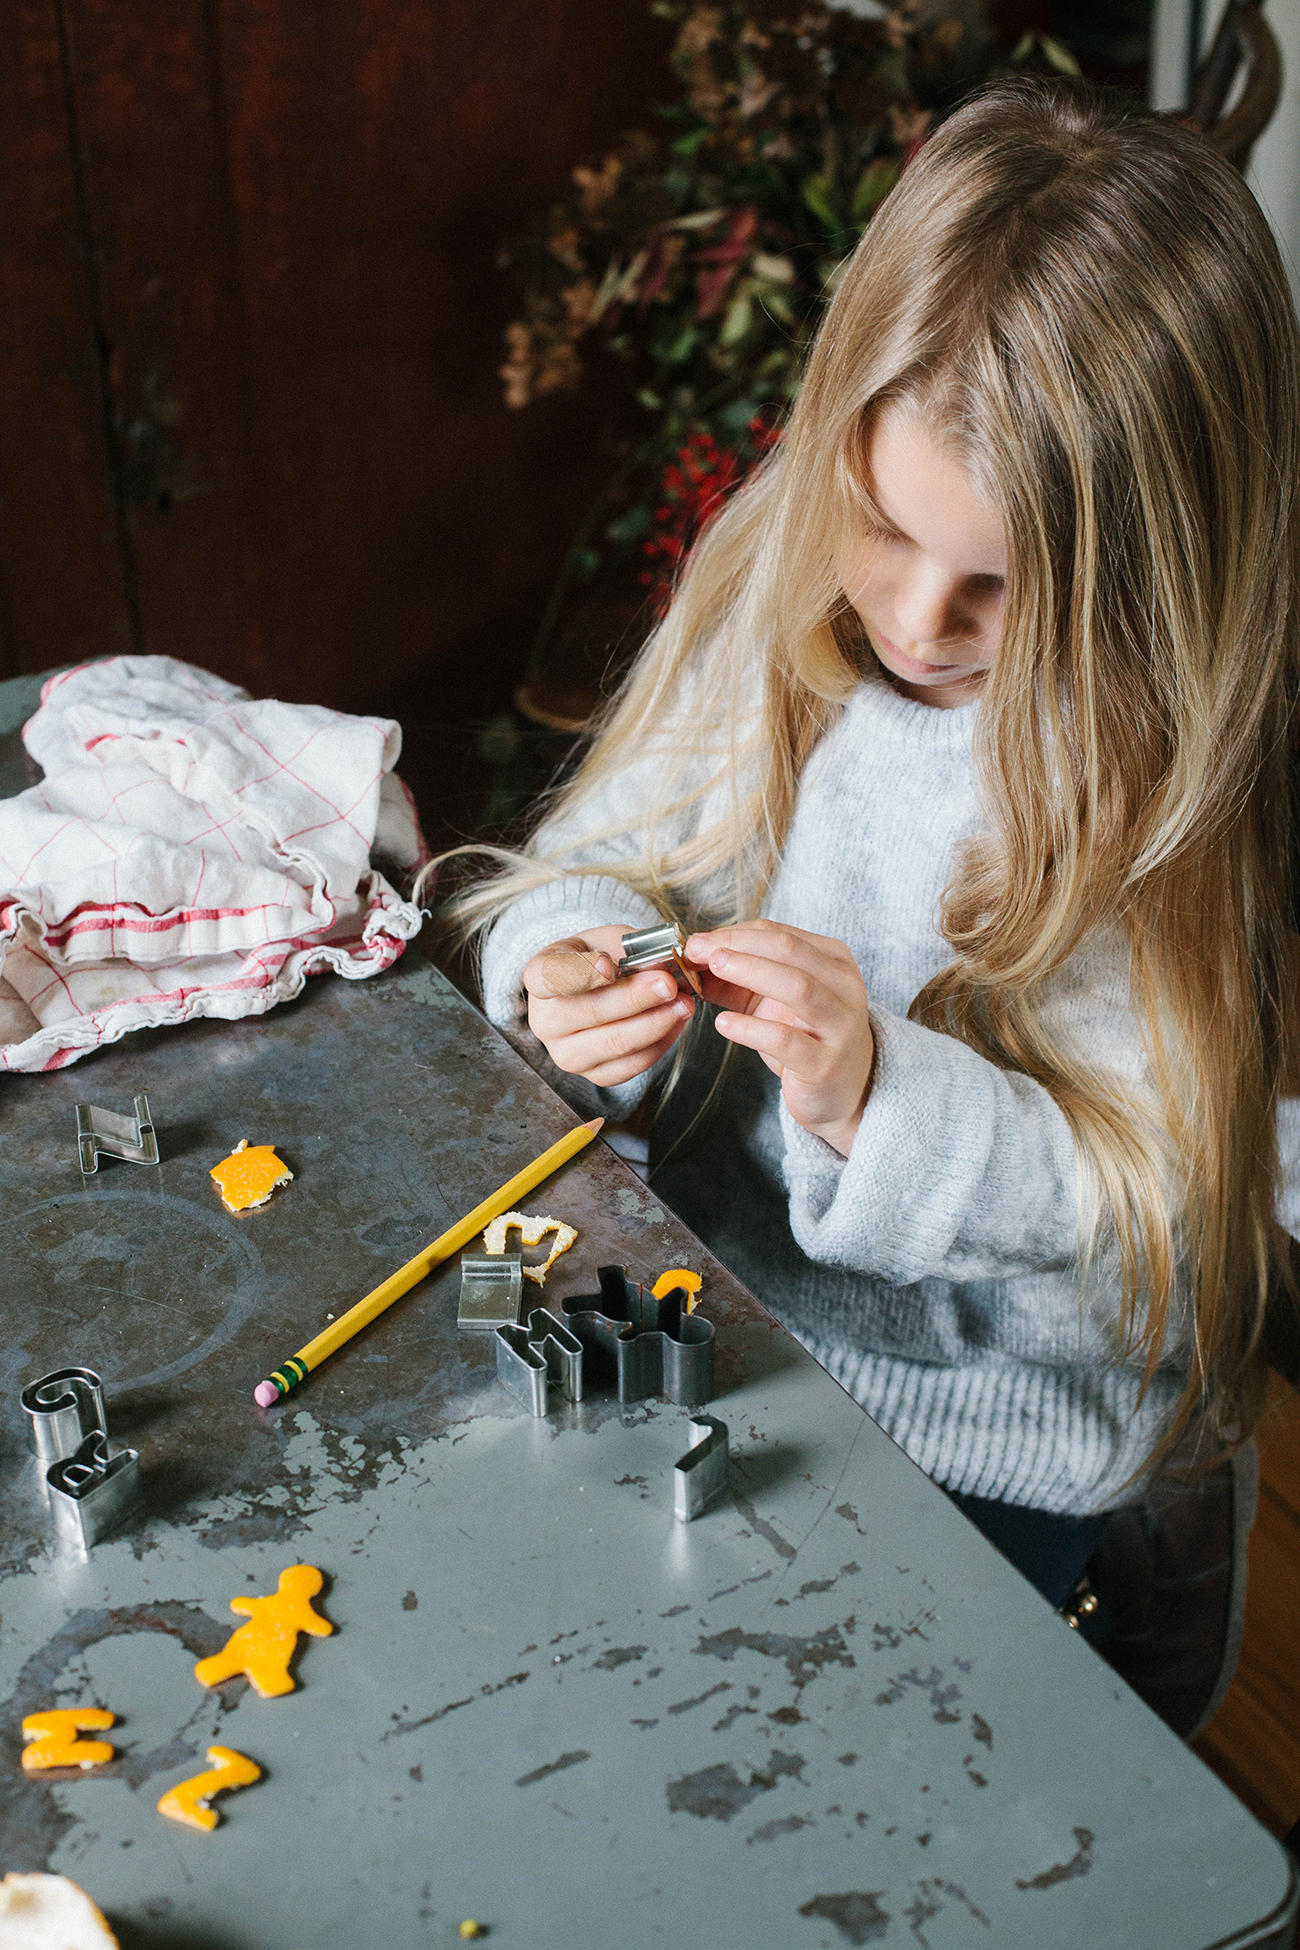
I frequently sit down at the table with the girls for a project, only to realize they aren’t able to actually do the project without my constant assistance. And then they get frustrated or lose interest and the project flops! But, they were able to many of the steps to make these garlands, which was super fun! They could help peel the Cuties, find letters that we needed, help use the cookie cutters (Zoe pressed them through the peel, and Naomi poked the peel out of the cookie cutters with a pencil), and Zoe was even able to help “sew” and assemble the garland. And of course, Naomi was also pretty satisfied to just sit and watch while munching on the Cuties. After 4, I lost count. I think she ate around 8. haha!
I so relish these times of sitting around our kitchen table, making things with our hands. Being present and together with my children, without distractions. Without looking at my phone (but yes, a few snaps with my real camera). It’s uninterrupted, intentional times like these where my kids ask me questions and we get to talk about life. We talked about who and what they’re thankful for (and what being thankful means). We talked about making peoples’ lives more beautiful and special through little details and giving handmade gifts. So thankful for this opportunity to BE with my daughters!
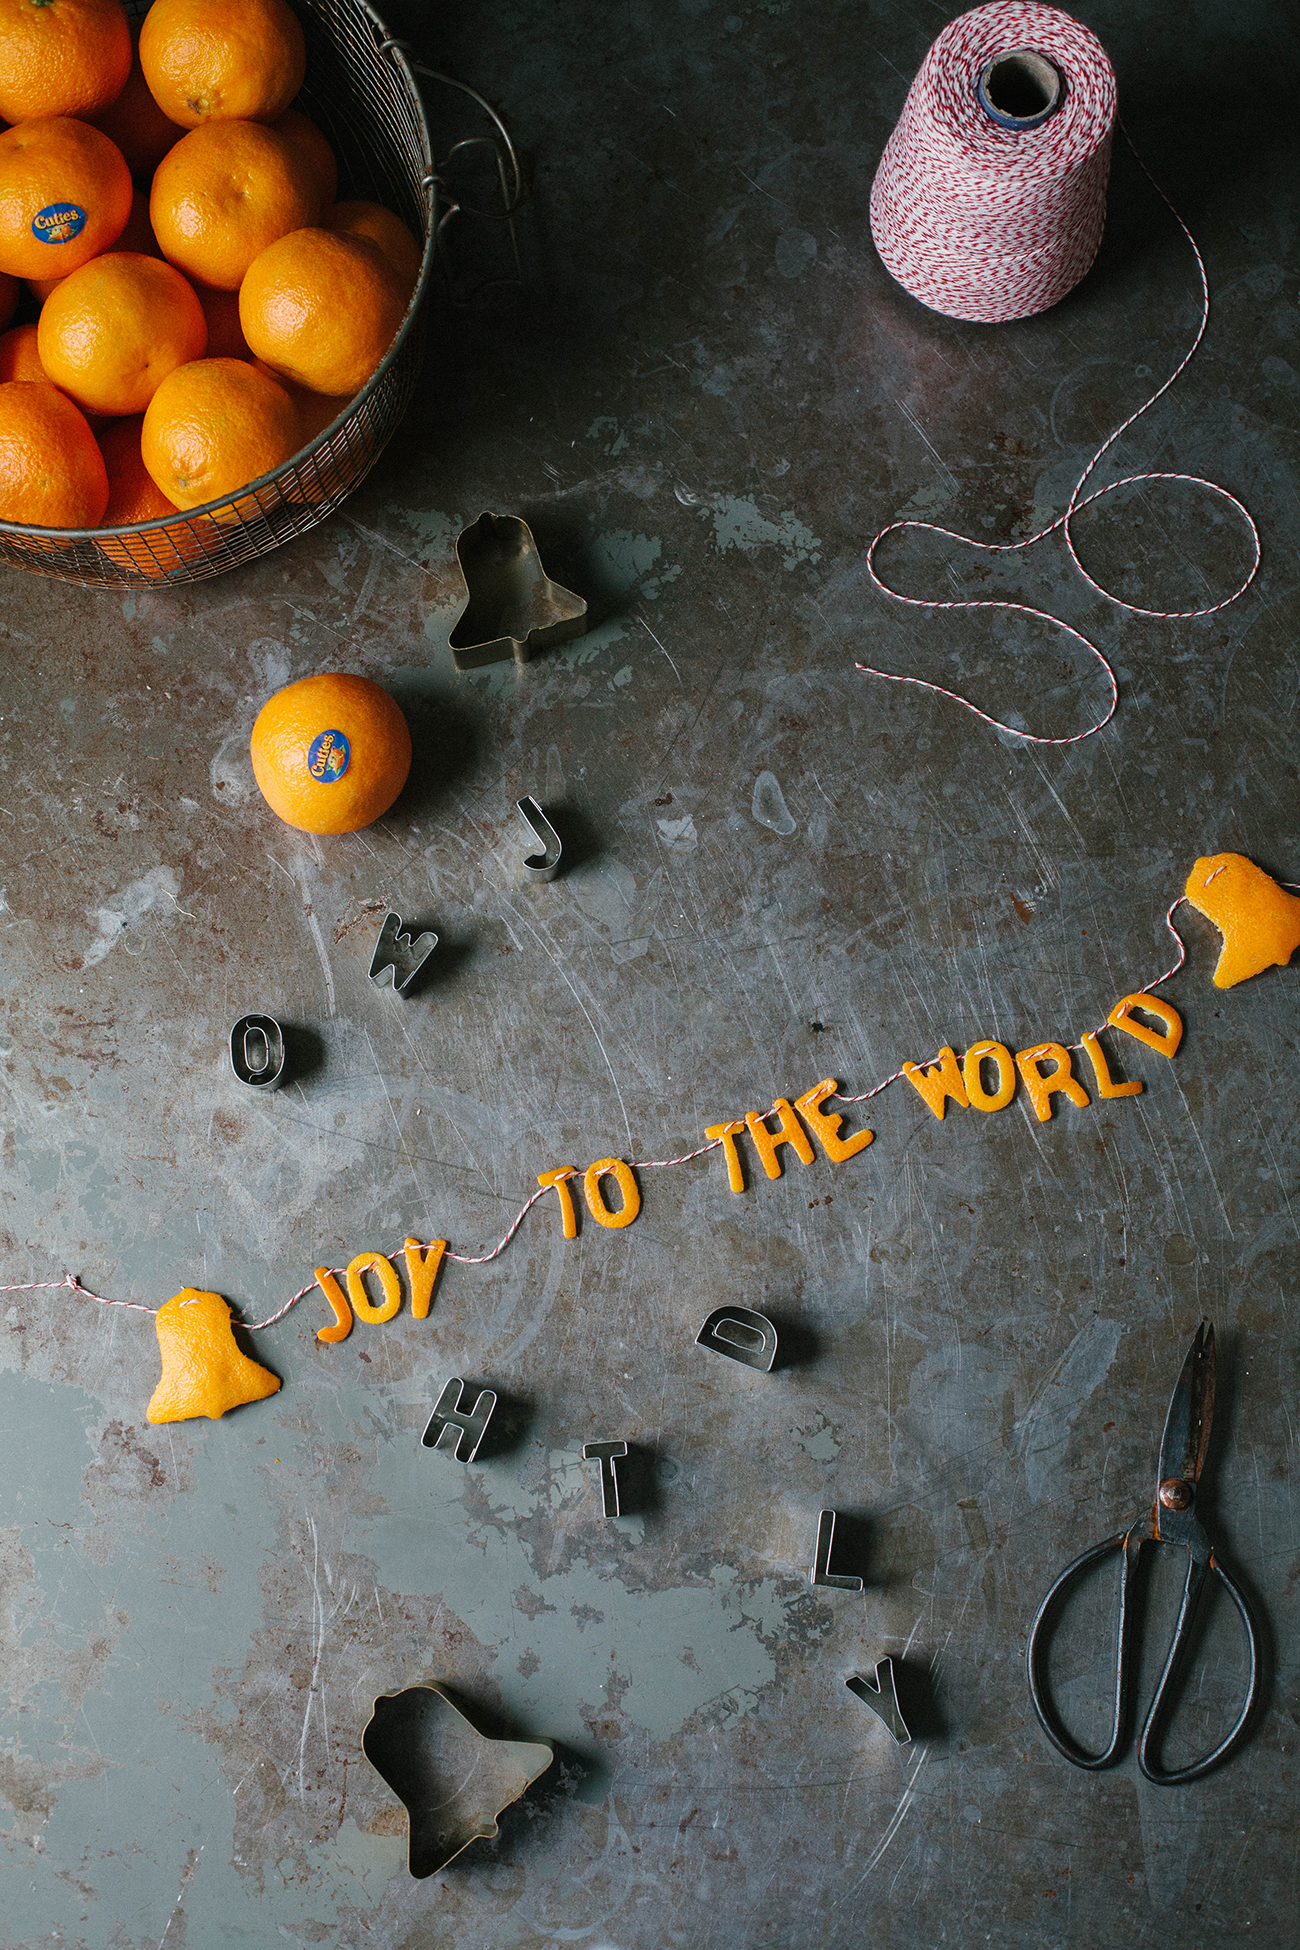
I love that this project takes something usually discarded – citrus peels – and turns it into a gorgeous decoration or gift! Check out the Cuties Instagram to get more fun ideas on how to creatively use (and eat) Cuties!
To make your own citrus garland, collect these supplies and follow the steps below:
Wintry Garlands with Citrus Peels
Supplies
1 bag of Cuties clementines
Mini cookie cutters (we used a gingerbread man, a bell, and the alphabet)
Kitchen towel
Fine string or thread
Needle
Wax or parchment paper (for drying)
Directions
1. Carefully peel the Cuties, keeping the skin as intact as possible. You want pieces to be as large as possible.
2. Lay the peels on a kitchen towel, and place cookie cutter on top of the peel. Grab a section of towel and place on top of the cookie cutter (to protect your hand). Using a little elbow grease (but not that much; Cuties have pretty tender peels), press the cookie cutter through the peel! You may not need to use the towel for this, but our cookie cutters were metal and felt a little sharp under our hands.
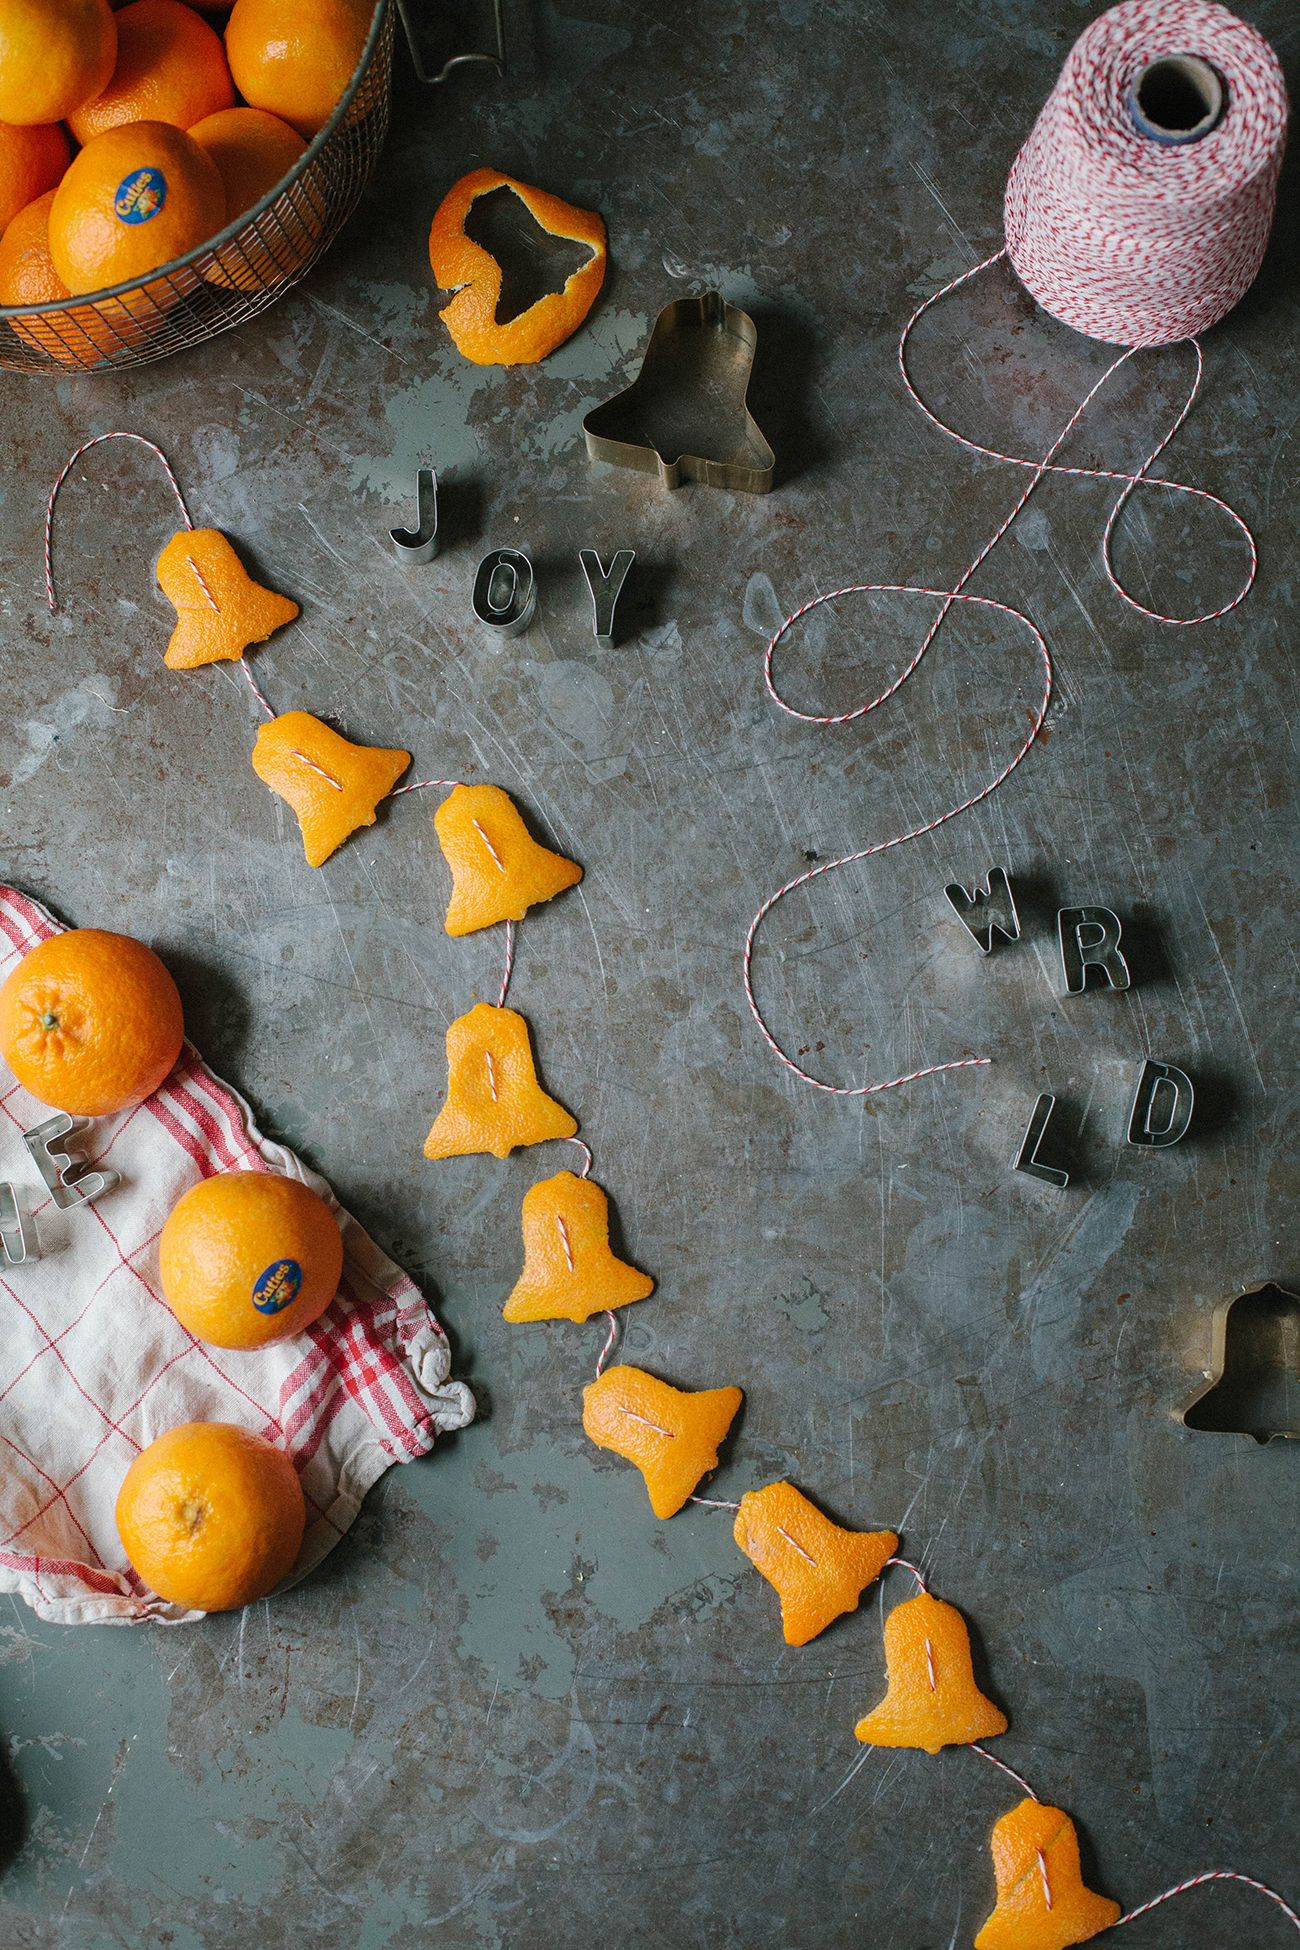
3. Thread a needle with the string, then “sew” the letters or shapes onto the string. If you’re using tiny shapes or letters, you want to be careful not to rip the peel while sewing.
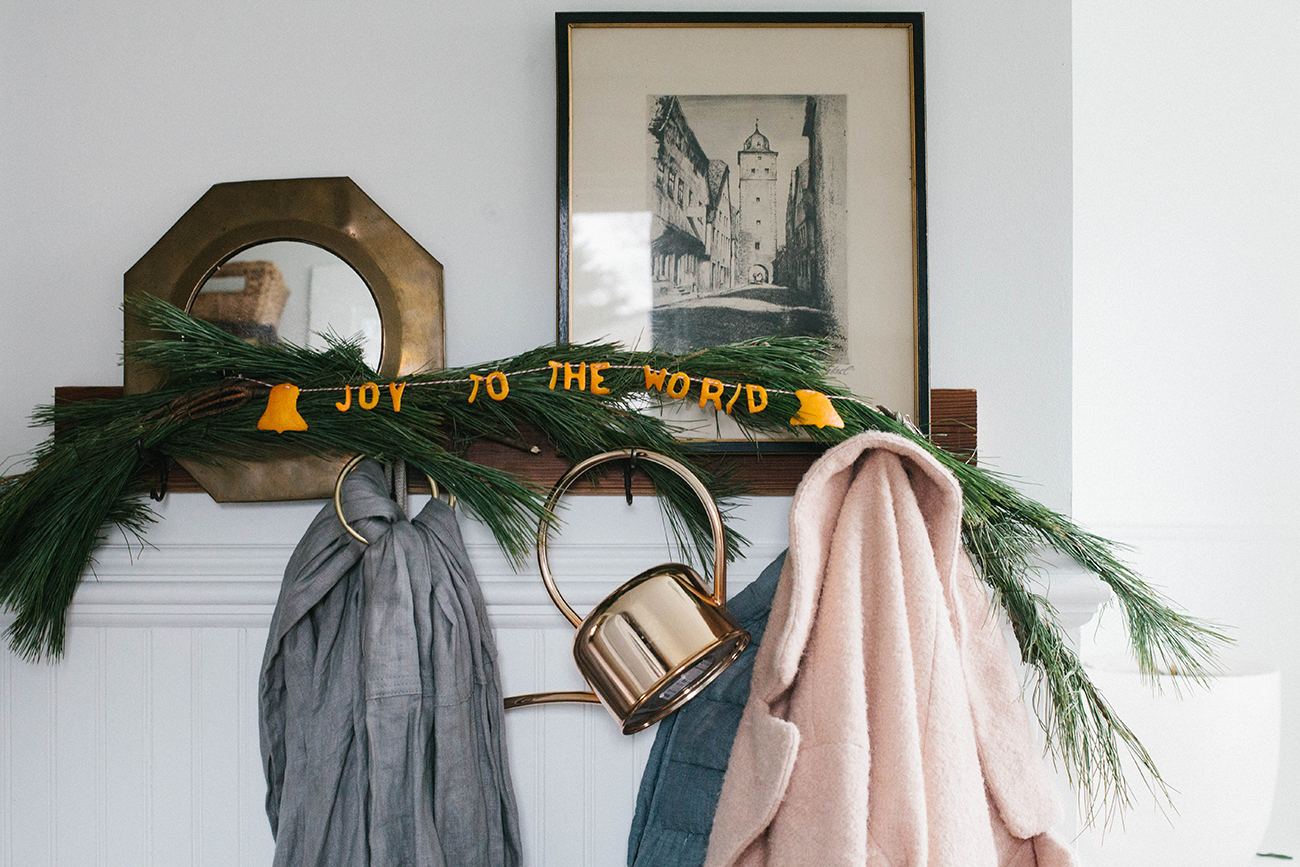
4. Place garland between sheets of wax or parchment paper, then place a stack of heavy books on top. You want your garland to dry flat!
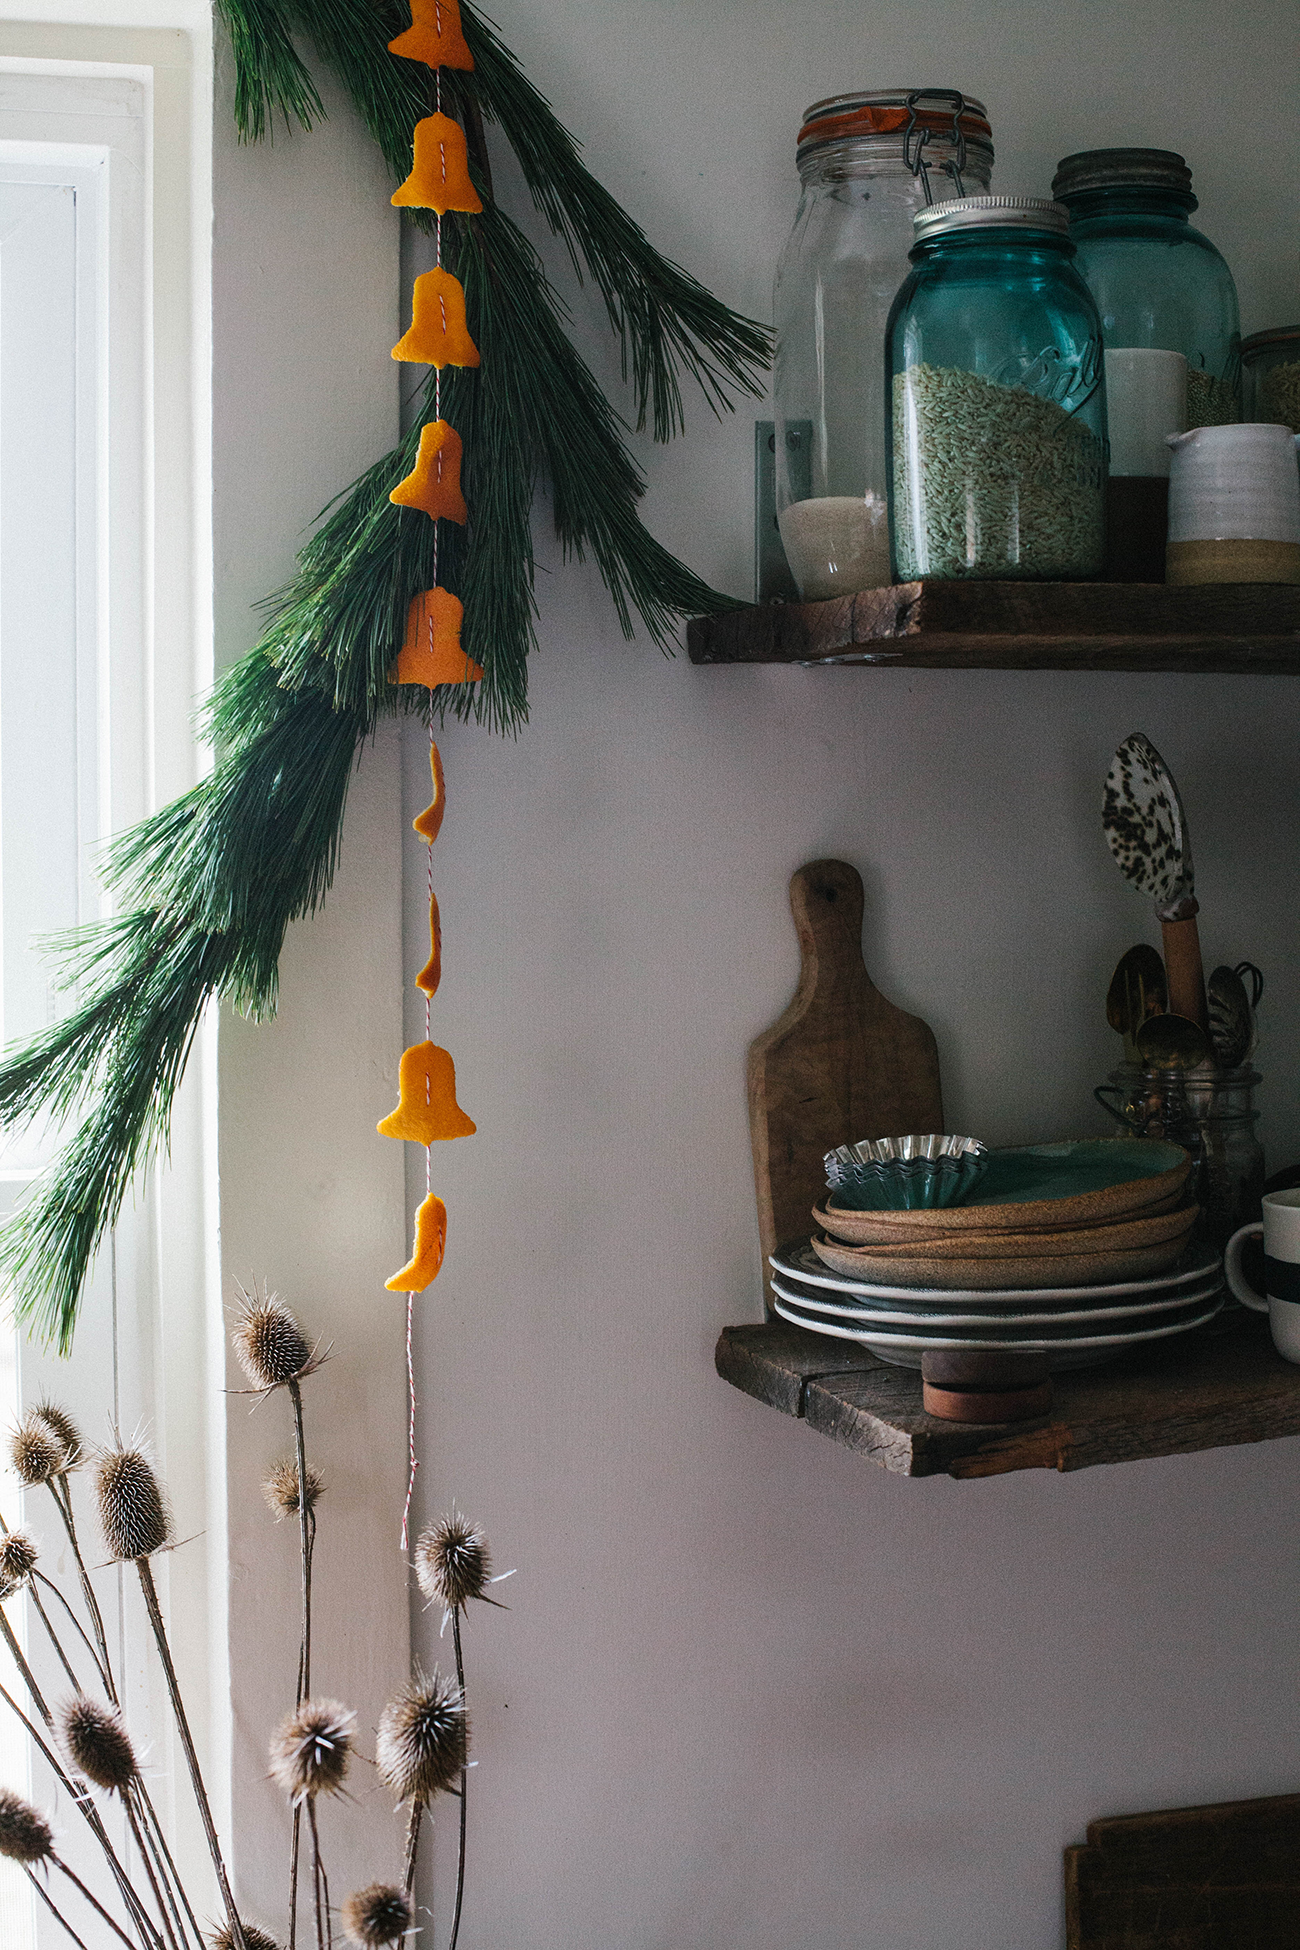
5. Once the peel is dry, hang in your house (or gift to a friend)!
In case you’re interested, you can download our Intentional Christmas List, with 20 of our favorite slow activities for Christmastime.
Sponsor Note: Although this post was sponsored by Cuties Citrus, all content, words, and ideas are my own. Thanks for supporting the partnerships that keep A Daily Something running!
SaeSave
Leave a Reply
PREVIOUS POST:
NEXT POST:
Disclosure.
Discovering how to infuse our lives—ourselves, our work, our relationships, our homes, and our entertaining spaces—with simple beauty, more intention, and slow living principles.
Interested in working together?
Click here to visit the Contact page and get in touch.
PORTFOLIO
© 2020 A Daily Something — All Rights Reserved.
Design by TONIC.
Learn more about A Daily Something styling services, content creation offerings and view curated work.
CONTACT + COLLABORATE
MANIFESTO
Join the list to receive our thoughtful monthly letters, and to be the first to know of upcoming workshops, dinners, gatherings, and more.
SUBSCRIBE
ALL PHOTOS AND IMAGES ON A DAILY SOMETHING ARE BY A DAILY SOMETHING UNLESS OTHERWISE NOTED. IF YOU SEE AN IMAGE THAT IS NOT PROPERLY SOURCED, PLEASE LET US KNOW AND WE'LL UPDATE THE INFORMATION! IF YOU WOULD LIKE TO SHARE A PHOTO OR TUTORIAL FROM A DAILY SOMETHING, PLEASE ONLY SHARE ONE PHOTO, WHICH MUST BE CREDITED AND LINKED BACK TO A DAILY SOMETHING.
SPONSORED POSTS WILL ALWAYS BE DISCLOSED AND ANY GIFTED ITEMS WILL BE MARKED C/O. WE ONLY WORK WITH COMPANIES THAT ARE A GOOD FIT FOR THE A DAILY SOMETHING AESTHETIC AND CONTENT. THANK YOU FOR SUPPORTING THE COMPANIES THAT ENABLE US TO CONTINUE PRODUCING QUALITY CONTENT.

Now that is really a great idea!
Thanks so much, Trina!
Amazing! I just bought a big bag of cuties today!
Awesome! Definitely give this a try 🙂
[…] DIY Wintery Garlands with Citrus Peels 2/ DIY Braided Rope & Ribbon Wreath 3/ DIY Colorful Christmas Village 4/ DIY Colorful Wood […]
What does the garland look like when it has dried more? The photos you have look pretty fresh.
Great question! I didn’t get photos of the dried garland but they’re still hanging in my kitchen and mudroom! I actually like the look AFTER it dries out more than fresh, because the color changes to a richer orange. If you hang to dry, the edges curl up a tad. I pressed one garland under a book to dry, before hanging, and it dried flat but the color wasn’t as vibrant.
[…] the festive season, why not make good use of the peel? Check out this fun wintry garland DIY by A Daily Something and get […]
[…] the festive season, why not make good use of the peel? Check out this fun wintry garland DIY by A Daily Something and get […]
Lovely!