


Budget Weekend Kitchen Makeover

About 1 1/2 years ago, I decided to [have Joe] repaint our kitchen over the weekend. It hadn’t been painted since we moved into our home 5 years earlier, and it desperately needed a fresh coat. I was done with the light green the contractor had painted it prior to us buying. Needless to say, that repainting turned into an unplanned budget weekend kitchen makeover. I never shared any details about this little kitchen refresh, but I get questions all the time, especially about the paint color and the open shelving. So today I’m sharing allll the details, links, resources, and some recent photos. Keep scrolling for the deets.
In case you’re interested, you can see what our kitchen used to look like. Green walls, lots of upper cabinets, an under-cabinet range hood. It looked very small and cramped.

Saga of the Upper Cabinets
When we set out to paint the kitchen, we knew we’d be removing our upper cabinets. It had been our plan all along, for whenever we got around to painting the kitchen. I wanted to pare down on what I had in my kitchen, and knew that getting rid of some of our cabinets would force me to do just that. I also knew that getting rid of the upper cabinets would help to open up our very small kitchen and make it feel larger. So, down came the upper cabinets on our west wall. And the range hood, since it was an under-cabinet unit. (Our little secret: we still haven’t installed a new range hood….still can’t decide on something that doesn’t dwarf our kitchen.)
Then Out Came the Countertops
Of course, one thing led to another, and this meant Joe had to repair the walls and ceiling a bit. And then we decided to get rid of our granite countertops and replace them with something else. We needed our new countertops to be affordable and something we could readily purchase, since our kitchen was already pulled apart and it was Saturday evening.
Figuring Out the Details
We weren’t planning on necessarily tackling all of this, but suddenly our kitchen was torn apart and we needed to finalize our plans. Which meant I had to decide what on earth to do for open shelving. So, I started scouring all my favorite kitchen photos for inspiration. I’ve pinned over 3000 Kitchen Images, but when it came down to actually figuring out what was going to work best for us, in our tiny 100-year-old farmhouse, I had to do some soul searching. I loved images with one simple shelf, and maybe a half tile backsplash, but I knew that wouldn’t work in our tiny space, where I need to maximize our storage areas.
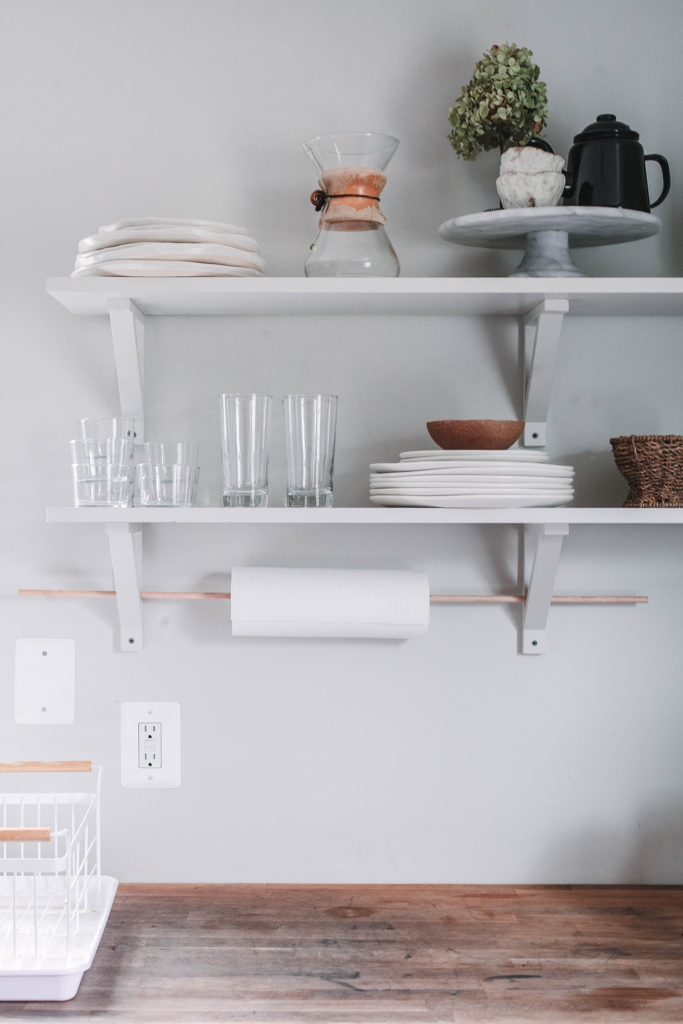
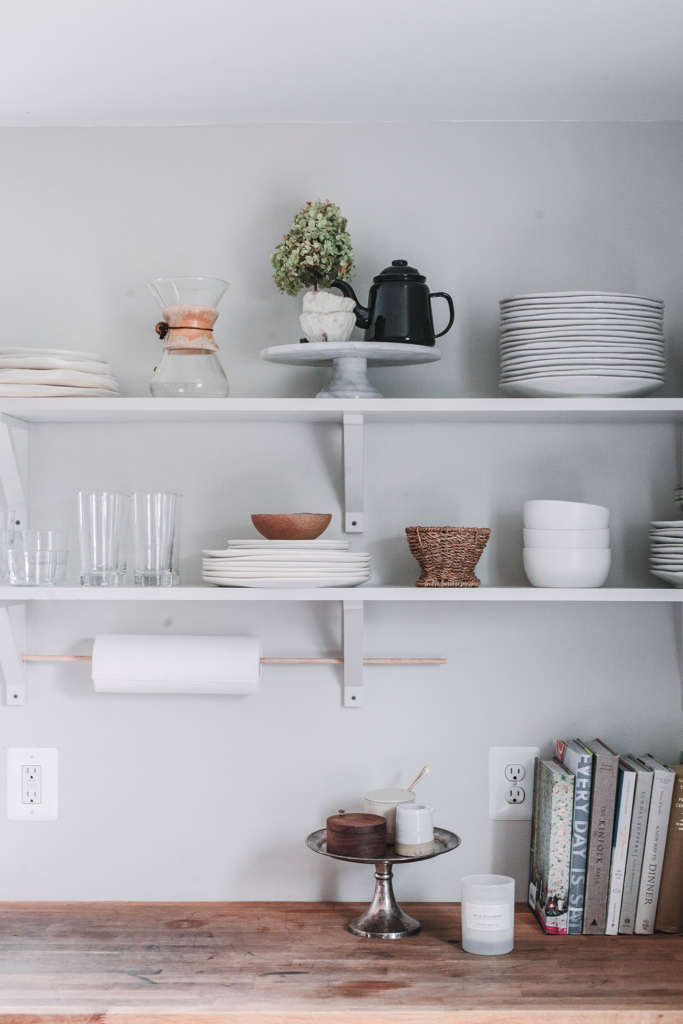
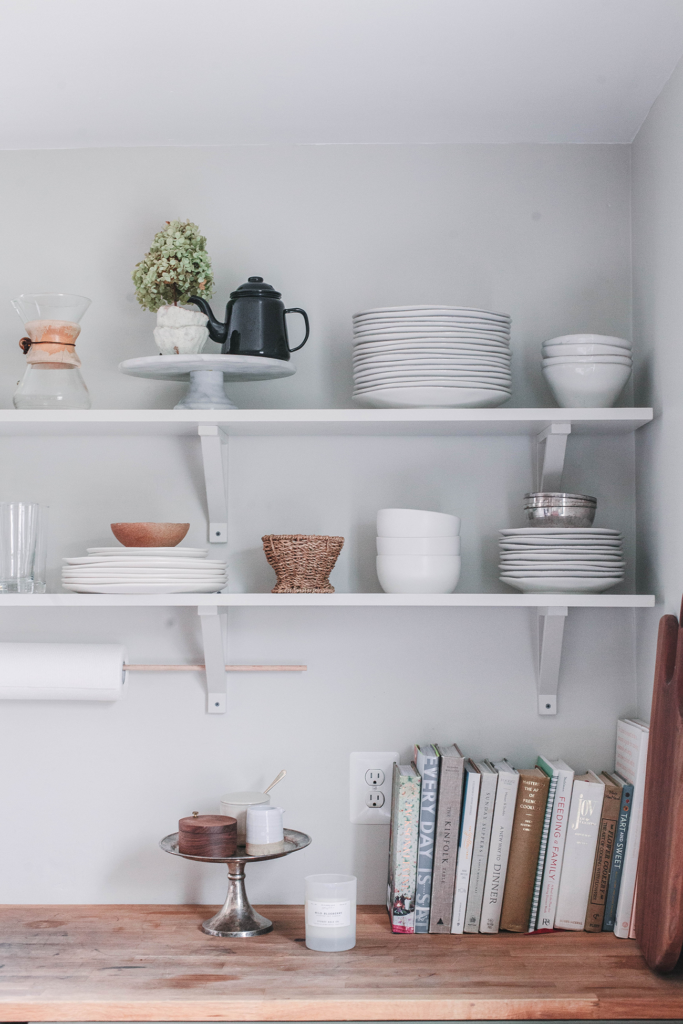
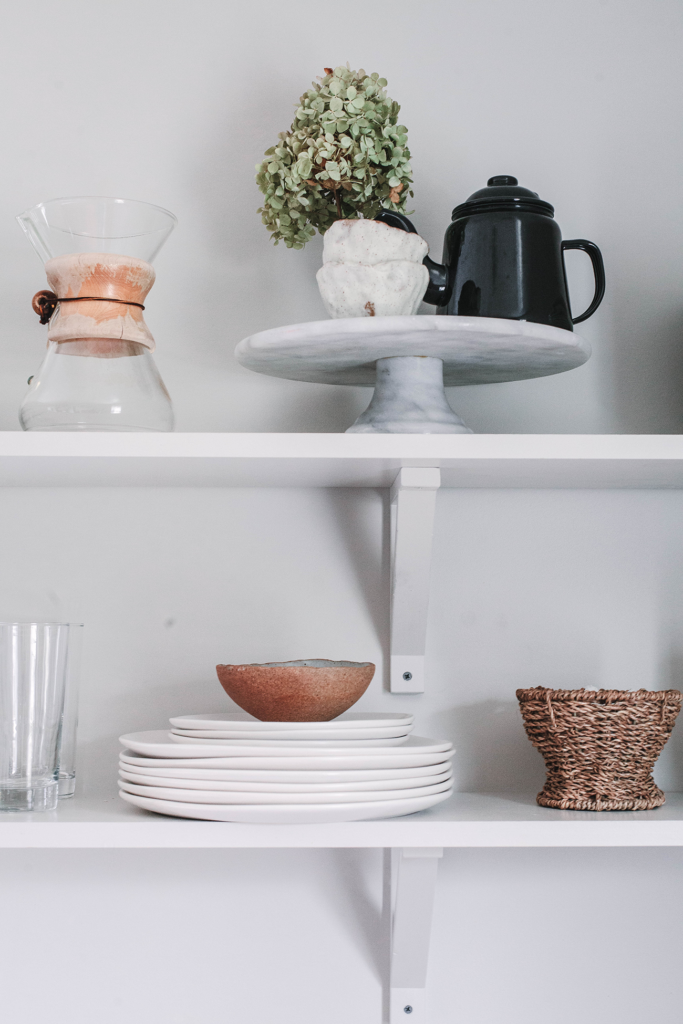
I kept going back to these two images (one, two) that I shot in 2017 at the Food52 office in NYC. They were bright and fresh, and I liked the simple painted shelves. And the countertops were perfect…I grew up with butcher block and really love it.
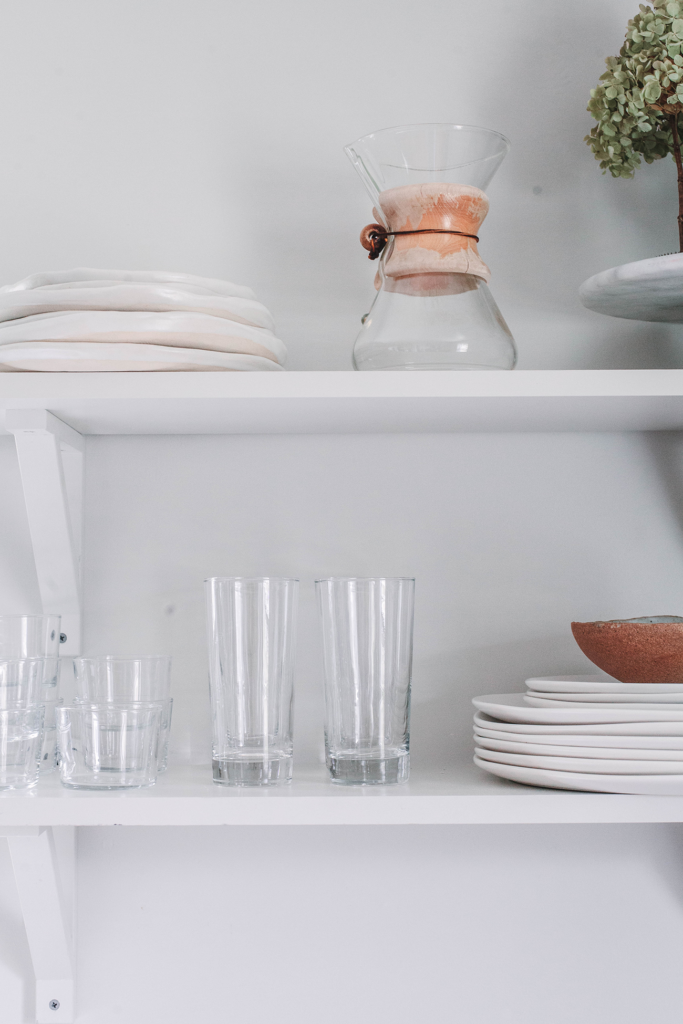
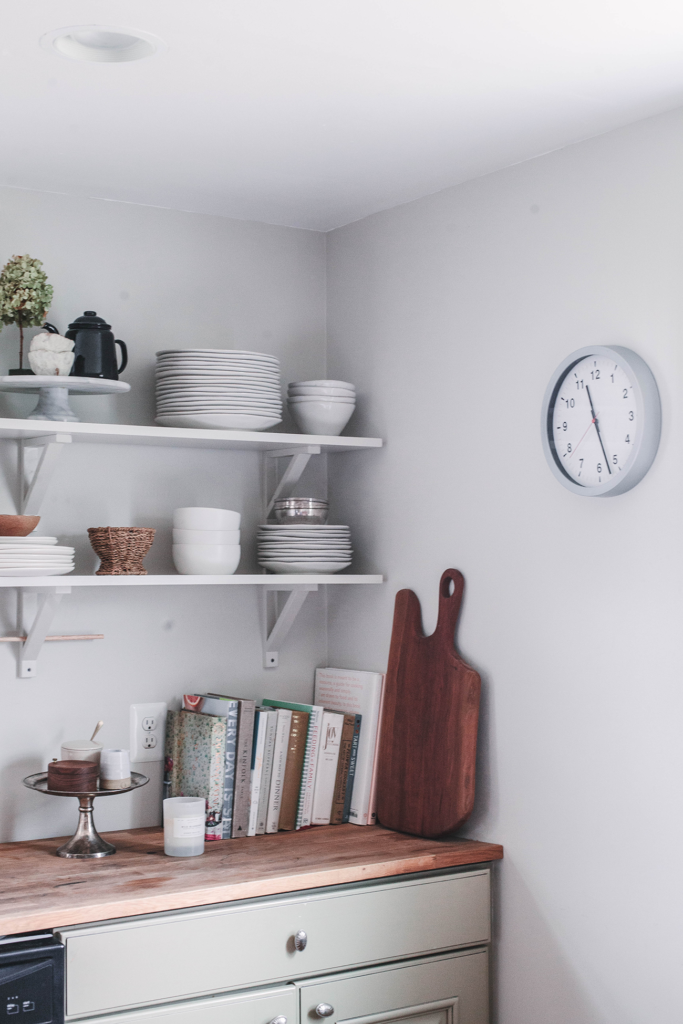
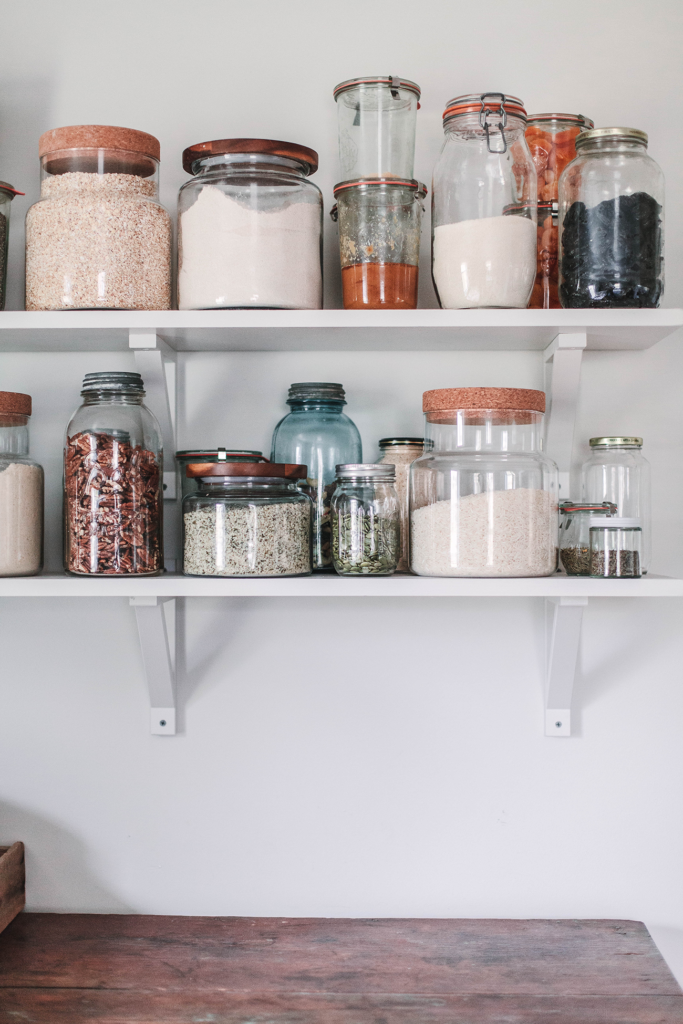
For our open shelves, I eventually decided on 10″ pine boards with wooden brackets, both painted in our wall color. After almost 2 years, I’m still 100% pleased with this decision. Someone coined them “Modern Quaker” and I am loving that description. For our countertops, I decided on IKEA butcher block. We were able to take a Sunday morning trip to pick up the final pieces to our kitchen!
Here are the steps we took for our weekend budget kitchen makeover:
- Prep work. This is such an important step! Before starting, you want to make sure you have all your supplies and prep your space. Nothing kills progress on a weekend kitchen makeover like multiple trips to the hardware store. Before you start (maybe the week before), figure out what you’re doing, and what supplies you’ll need. Joe ran to the store Saturday morning for the first round of supplies while I emptied the kitchen. Our house is tiny and there isn’t much space to empty our kitchen into, but we managed. I took everything out of the upper and lower cabinets, and into the dining room it went. Same with all the contents of our countertops. We spread drop cloths, taped, washed walls, and voila, the kitchen was prepped!
- Empty kitchen (or just the area you’re working in). I put nearly everything in our dining room, which displaced yet another room, which was extra incentive to get this project done ASAP.
- Tear down upper cabinets. This was easy enough, and always part of our plan when we got around to repainting our kitchen, but we didn’t really plan for the subsequent repairs that were needed. See below.
- Paint shelving components (pine boards and brackets). We primed the boards with <> and then used the hybrid (oil+water based) paint for the shelves and brackets. The shelves were simply 10″ pine boards from Home Depot, and I used the IKEA Ekby Valter brackets (they are currently discontinued, but available on Amazon). We painted them the same color as the walls (details below).
- Remove countertops and sink. Joe needed help from a friend here; the granite countertops weighed a million pounds. I listed the countertop pieces on Facebook Marketplace and they were gone in a day.
- Repair ceiling and walls from cabinet teardown. Joe had started the painting company & was still working with his dad and brother at the time, so he was expertly fast at this. He just used spackling paste like this.
- Paint kitchen. We did this together and it was fun. We used the custom color that’s throughout our entire home. We call it “Tom Ford White” because my sister had it made from a Tom Ford ad she saw in a magazine nearly 10 years ago! It looks like cement, and it’s dreamy. Here is the codes in case you’d like to use this color: 101-10.6, 107-12.1, 109-1.2.
- Prep and install new countertop. Prepping the countertop (cutting a hole for the sink) took quite some time. But, after a few youtube tutorials, Joe managed to git er done.
- Reinstall stink. Joe needed help putting the sink back, so my cousin stopped by to help with that.
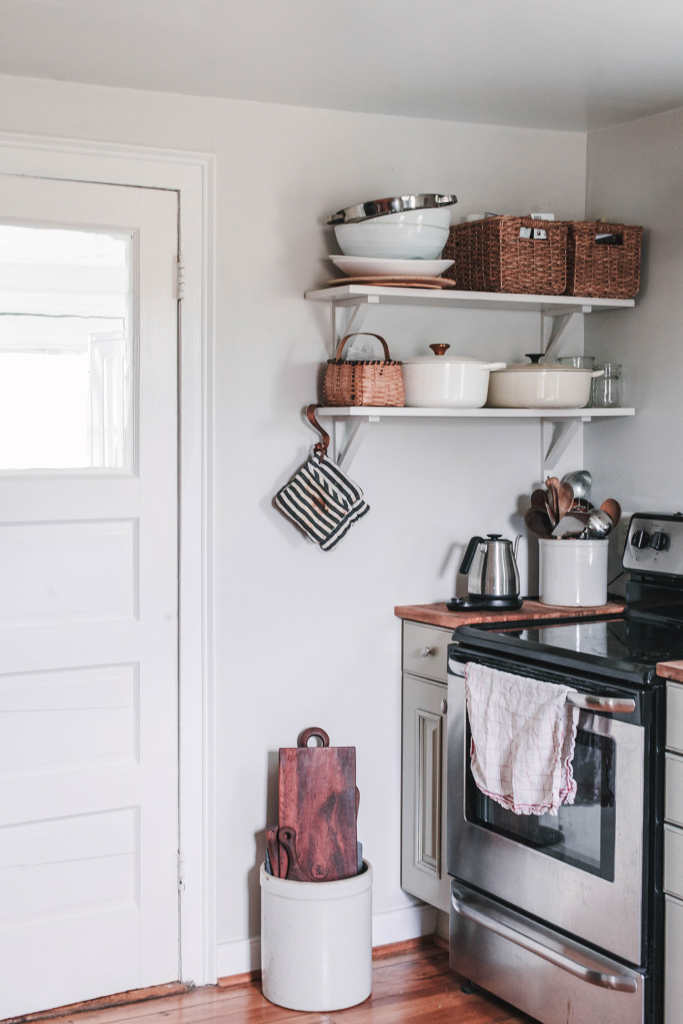
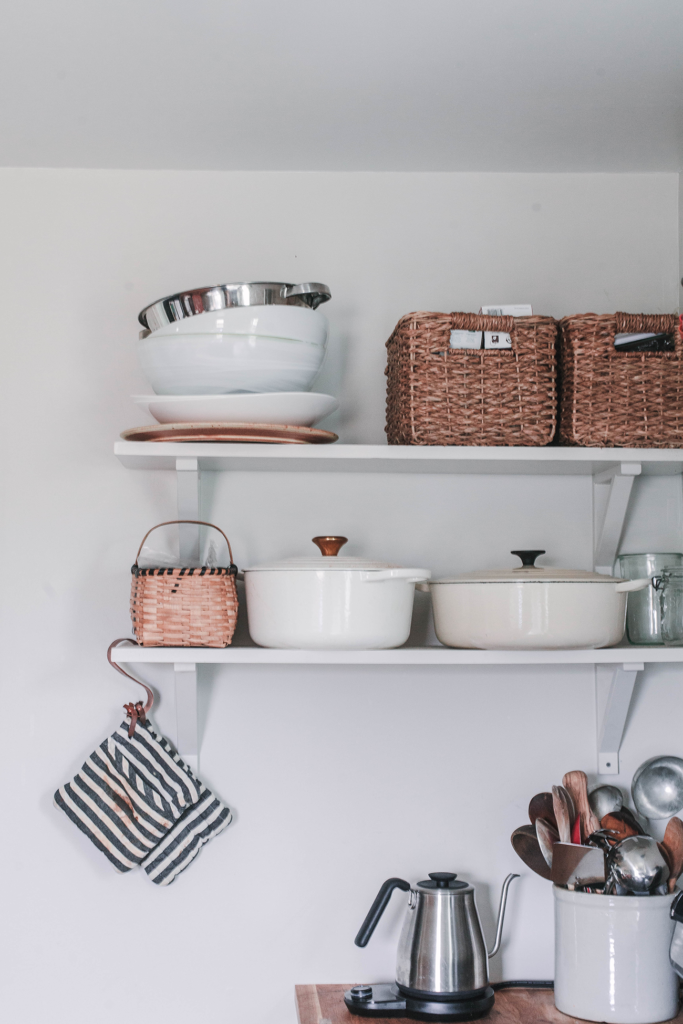
- Hang open shelves. Joe is really meticulous when it comes to the work he does, and he always makes sure he does it the right way. This drives me crazy IN the moment, but I’m always grateful for his care and precision in the end. Usually. He always insists on anchoring things into the walls, which takes more time, but in the end, I can pile more stuff on the shelves, so really, I should never doubt his construction know-how.
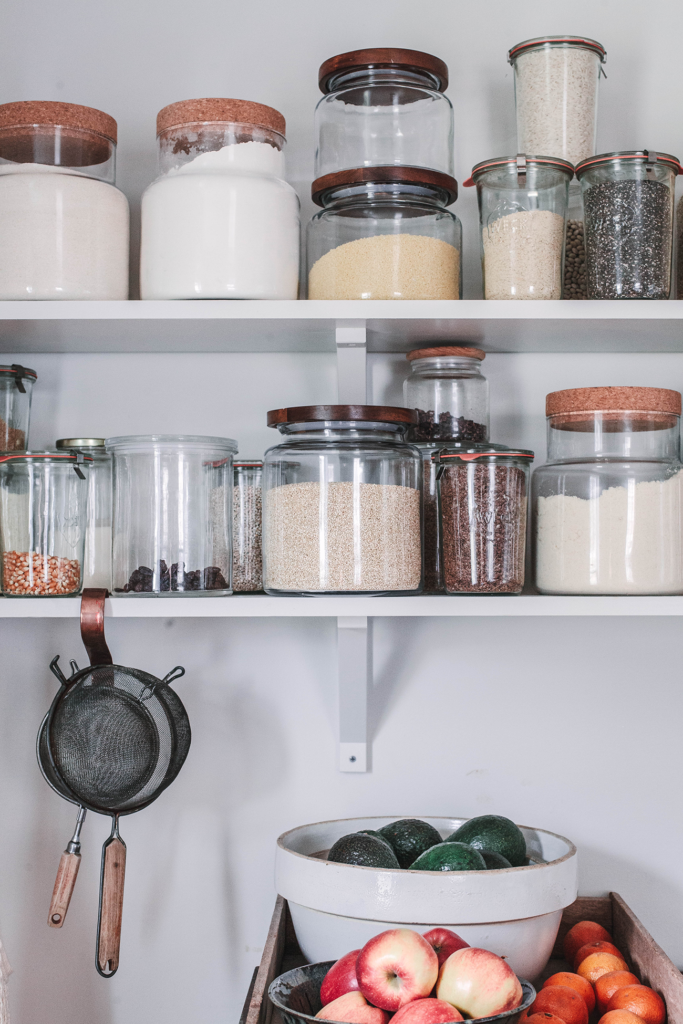
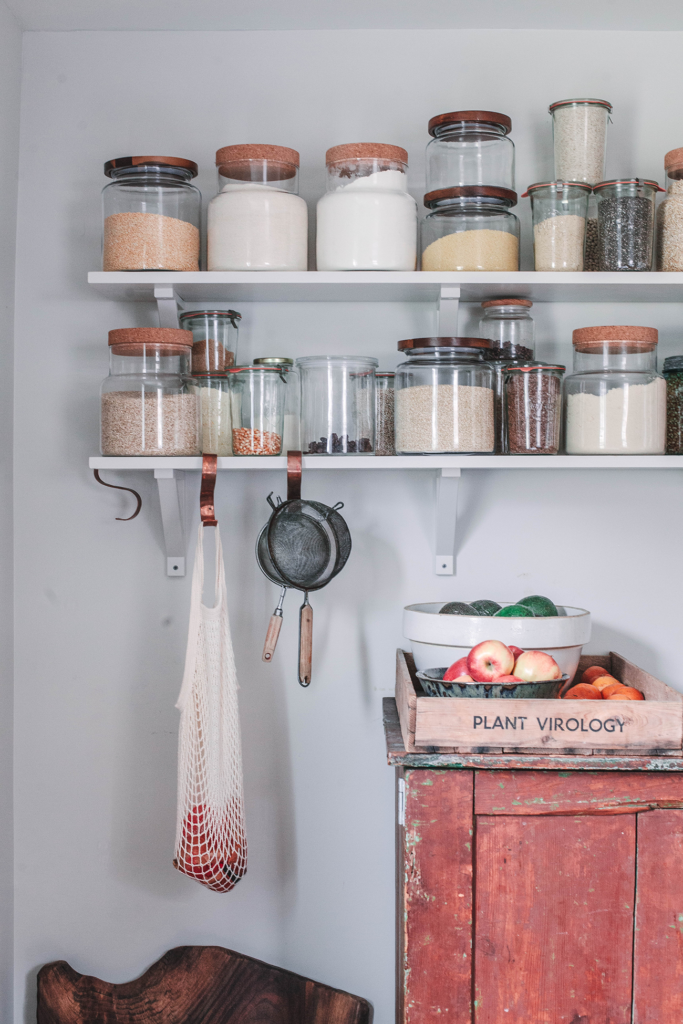
- Organize kitchen items. The best part! After having the kitchen completed, I went through allllll our stuff before allowing it back in the kitchen. I got rid of boxes. It was so wonderful and empowering!
- Put everything back in kitchen. The other best part! I had been DYING for open shelves in the kitchen, and here they were. Only my favorite, most-used items deserved a spot on our open shelves, and I was so thrilled to be able to style them! Three cheers for open shelves!
Cost Breakdown
Obviously, we did all the work ourselves. It was easy enough after a few YouTube tutorials, and we didn’t want to spend any money on things we could do ourselves. Here’s what we spent on our budget weekend kitchen makeover:
- Wall Paint: 1 gallon Sherwin-Williams Duration Home (matte), $60
- Shelf Paint: 1 gallon Sherwin-Williams ProClassic Acrylic-Alkyd paint (semi-gloss), $70
- Shelf Primer: 1 quart Kilz Original, an oil based primer, $9
- Butcher Block Countertops: 74″ block, $129, 98″ block, $198, total: $298
- Shelves: Premium Pine $15/board, total for 5 boards: $75
- Shelf Brackets: IKEA Ekby Valter (no longer available at IKEA), $5 each, total for 14: $70
PROJECT TOTAL: $507
This weekend project has brought our family and home life so much joy and order. It’s amazing how a few improvements can make such a difference on the mood and overall feel of a home. It’s airy and open and so much more beautiful to experience.
I’ll be sharing another post soon with some of my favorite, go-to kitchen tools and props, so keep an eye open for that!
Leave a Reply
Disclosure.
Discovering how to infuse our lives—ourselves, our work, our relationships, our homes, and our entertaining spaces—with simple beauty, more intention, and slow living principles.
Interested in working together?
Click here to visit the Contact page and get in touch.
PORTFOLIO
© 2020 A Daily Something — All Rights Reserved.
Design by TONIC.
Learn more about A Daily Something styling services, content creation offerings and view curated work.
CONTACT + COLLABORATE
MANIFESTO
Join the list to receive our thoughtful monthly letters, and to be the first to know of upcoming workshops, dinners, gatherings, and more.
SUBSCRIBE
ALL PHOTOS AND IMAGES ON A DAILY SOMETHING ARE BY A DAILY SOMETHING UNLESS OTHERWISE NOTED. IF YOU SEE AN IMAGE THAT IS NOT PROPERLY SOURCED, PLEASE LET US KNOW AND WE'LL UPDATE THE INFORMATION! IF YOU WOULD LIKE TO SHARE A PHOTO OR TUTORIAL FROM A DAILY SOMETHING, PLEASE ONLY SHARE ONE PHOTO, WHICH MUST BE CREDITED AND LINKED BACK TO A DAILY SOMETHING.
SPONSORED POSTS WILL ALWAYS BE DISCLOSED AND ANY GIFTED ITEMS WILL BE MARKED C/O. WE ONLY WORK WITH COMPANIES THAT ARE A GOOD FIT FOR THE A DAILY SOMETHING AESTHETIC AND CONTENT. THANK YOU FOR SUPPORTING THE COMPANIES THAT ENABLE US TO CONTINUE PRODUCING QUALITY CONTENT.

Beautiful
[…] KITCHEN MAKEOVER: Okay, friends, stay with me. This just looks like SO much fun. If I owned my own place, I would one thousand percent jump on this […]
Your kitchen is so beautiful and appealing. Very laid back and has a welcoming vibe.
Thanks so much, Valerie! It’s definitely very LIVED IN 😉