I am so very excited to be sharing this DIY candleholder today. I am simply thrilled with how it turned out!!
I was infatuated with
this image on a new blog read of mine –
Pages from my Moleskine. The original image came from
here and is digitally rendered. Crazy, huh? Then, when I saw two cylinder hurricane globes at the thrift store, I knew I had to try this project!
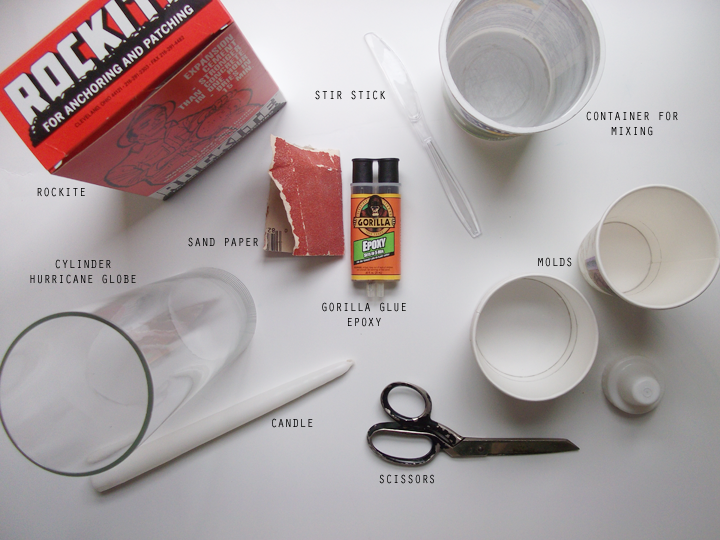
To make your own concrete candleholder, all you need are the above supplies.
Rockite is a special expansion cement, available at most ACE Hardware stores. It’s much finer than concrete…it’s almost like mortar. And it dries in only 15 minutes! I also made my
coasters out of Rockite.
You probably already have most of the supplies on hand… For my mixing container and stir stick, I used a plastic yogurt container and a disposable knife (I’ve used these same tools for several concrete projects – they just need to be washed when finished with each project). For the molds, I used three disposable cups – 2 soup cups (shorter and a larger diameter – for the top piece) and a coffee cup (taller and smaller in diameter – for the bottom piece). And for the negative shape for the candle, I used a baby bottle cap (anything that shape would work)!
After gathering the above supplies, follow these simple steps. This is really very simple to make! All you’re doing is casting two round concrete shapes, and gluing them together.
Make sure you work on a level surface (or your castings will be uneven and you’ll have to sand more at the end if you don’t).
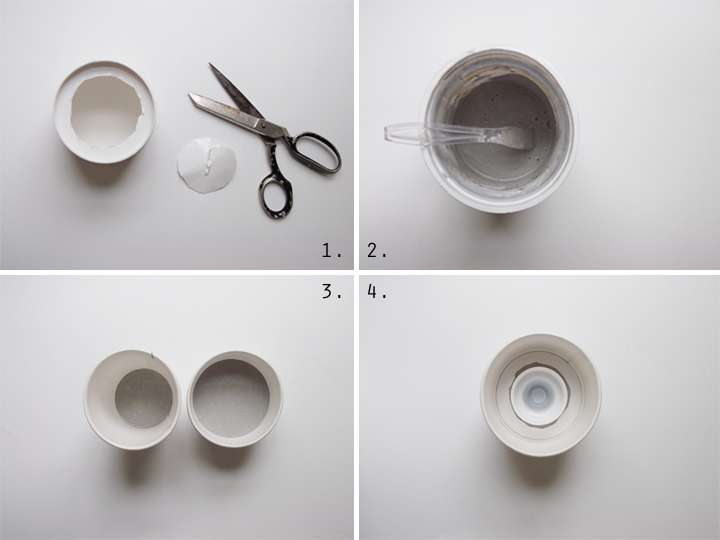
1 // Cut a hole in the bottom of one of the soup cups. Ultimately, this cup will create the ledge for the hurricane globe to rest on.
2 // Mix Rockite and water together in plastic container. I use a water-Rockite ratio of 2-5 (for every 2 tablespoons of water, add 5 tablespoons of water). It should have the consistency of slightly thick pancake batter!
3 // Pour mixture into molds (one soup cup and one coffee cup). The coffee cup makes the bottom piece, and the soup cup makes the top, which actually holds the candle.
4 // Allow to dry for about 10 minutes, and then gently place the cup with hole in bottom into the concrete in the soup cup (to create the ledge for the hurricane globe**). Then place the bottle cap (to create the negative for the candle) into the concrete (make sure it’s centered). See picture if you’re confused at this point (or email me!)
**Make sure that the object you use to make the ledge for the hurricane globe has the same diameter as the hurricane globe.
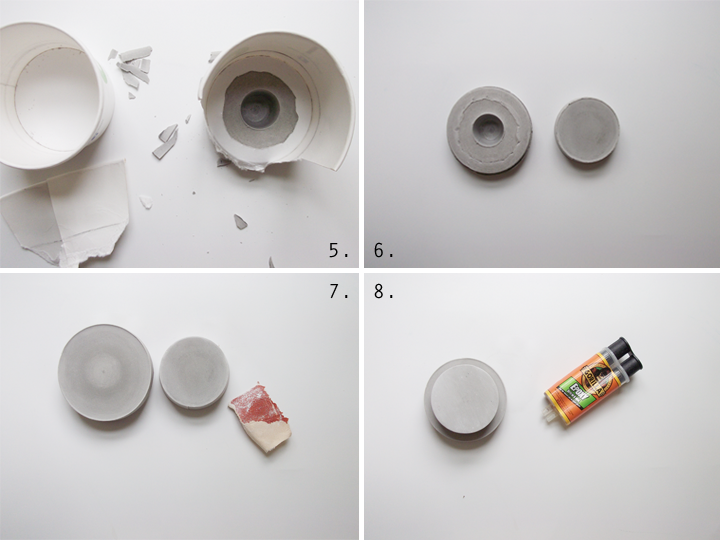
5 // After at least 15 minutes (concrete should be hardened), begin to work out of molds. Gently squeeze sides of molds and tap bottom of cups. Concrete should slide right out! The concrete will be quite warm, so be careful!
6 // At this point, you will have two round castings. One for the base and one to actually hold the candle.
7 // Gently sand any rough edges or uneven surfaces. Then brush excess dust away.
8 // Using the
Gorilla Glue Epoxy, glue the two pieces together. Make sure the base is centered under the top!
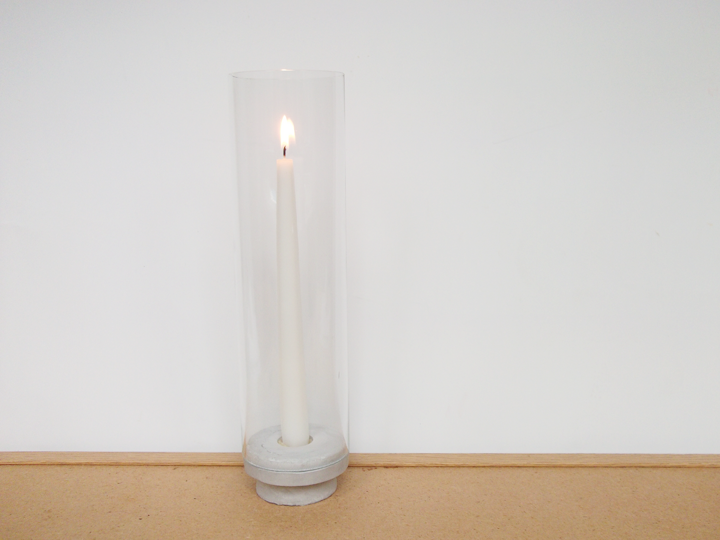
Place your candle and glass globe, and voila, you have a concrete candleholder! So industrial and elegant, right?
If you try this out, I’d love to see pics! Also, let me know if you have any questions about the process…I’m not sure how clear my instructions are…
Happy Wednesday!
Rebecca


Thanks for the mention! This looks great! The minimal, simple shape of this suits the concrete so much.
Did you catch my concrete bowl project last week? It was actually inspired by your coasters so looks like we've been feeding off each other!
Genius idea, these candleholders look so simple, but really nice.
http://www.tamarasblend.com/
That's amazing! You make the most simple things lovely, I love it!
Um, wow. That's amazing! My favorite part might be the fact that you custom made something using maybe one of the most common thrift store finds! I've also got to check out this Rockite business.
This is fantastic. You are giving me some great easy ideas to improve the home. Cheers friend!
Jealous of your DIY talents. So awesome!
Great post 🙂 I love finding more diy projects to do.
♥ Naomi {Starry Eyes + Coffee Cups}
It's stunning!
So cool!! I love this. And I love your pictures of the tutorial as well. 🙂
Hey Rebecca! I ran out and got the concrete and made myself a tea light candle holder from an empty Nyquil bottle and used a milk bottle blue cap to make the indent for the tea light candle. The cement DID get really warm and was surprised on how fast it dried, so you have to work really quick when working with this cement. Sanding the edges of your cement piece was really easy too! Now I want to make more! Thanks for the great idea!
I love the idea behind this Rebecca. Well done!
Ronnie xo
Thank you for sharing, so lucky to read your post, i will read your post time to time,thank you!If you like Tods Shoes you can come here have a look.include Tods Men Shoes,Tods Women Shoes.
Can you sell these on ebay?!